How to Create Seattle Decorated Cookies
Okay, so I have a confession to make with these Seattle decorated cookies. I made these buttercream cookies for my brother as a “Welcome to Seattle” housewarming (apartment-warming?) gift. I fully intended to bring them to him as well. But, as anyone has ever been to Seattle knows, traffic can be horrendous.
I knew he was moving 30 miles away from my place, but, I thought, if I can go see him outside of rush hour, it should be no problem. Well, he didn’t end up making it into Seattle until the afternoon. It was a Friday by the way. I looked up the traffic prediction on Waze and it said an hour and a half there. That’s decent. I then typed in what the commute would be coming home, giving myself an hour to visit him. Well, that was predicted at two and a half hours, using toll roads and HOV lanes!
I knew the prediction would only get worse the longer I stayed to visit. Given that I have a baby that hates car rides (that’s a whole ‘nother story!) I texted my brother saying I couldn’t make it and that I’d have to eat his cookies for him! We couldn’t let them go stale, of course. I think he forgave me.
These Seattle decorated cookies would be great for a housewarming party, bachelorette or bachelor weekend, or really any reason to throw a destination party in Seattle. I have also seen some cute “around the world” theme parties in which you could use the Space Needle design to represent Seattle.
Follow along for the step-by-step photo series tutorial.
*This post may contain affiliate links, which means I may receive a commission, at no extra cost to you, if you make a purchase through a link. Please see my full disclosure for further information.*
Skip to
Part 1: Gathering your Supplies for your Seattle Decorated Cookies
To create these Seattle decorated cookies yourself, you will need:
- 3 Icing bags
- 3 Wilton #5 tips
- circle cookie cutter
- rectangle cookie cutter
- cloud/rain cookie cutter (I made this one with parchment paper – check out the “Getting Started” page for instructions on how to do this if you can’t find a rain cookie cutter)
- Wilton gel coloring to obtain gray, aqua, and white buttercream frosting, here’s my crusting buttercream recipe
- gray sanding sugar
- butter knife
- Your favorite sugar cookie dough recipe – if you don’t have a favorite, here’s mine
Part 2: Baking the Cookies and Setting up Your Icing Bags
- Roll out, cut, and bake your cookies and allow them to cool.
- While they are cooling, whip up your frosting. Divide the frosting into three bowls. To create gray frosting, add a bit of black gel dye. To create aqua frosting, add Wilton Teal to the icing. If you want a pure white buttercream frosting, check out my tips here, otherwise use the undyed frosting for the white.
- To set up your icing bags, put the white, gray, and aqua frostings into their own bags, each with a tip #5 in them. If you are unsure how to do this, no worries, I have you covered in my post here: Getting Started.
Part 3: The Fun Part! Frosting Your Seattle Decorated Cookies
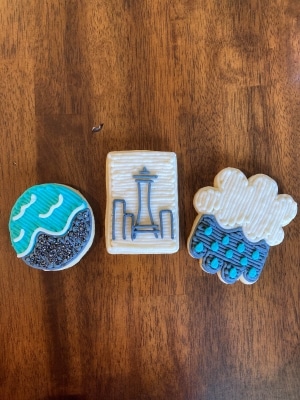
To create the beach cookies, take your aqua frosting and outline and fill in half of the cookie. You will want to create a wavy edge to represent the waves hitting the beach. I filled in the lines at a diagonal to show the direction of the waves.


Do the same for your gray frosting to represent the beach. Everyone that’s been to a beach along the Washington coast knows we don’t have sand, we have rocks! I filled these lines in vertically for some contrast.

Take your gray sanding sugar, to represent the rocks, and place them over the gray frosting. Then, take your white frosting and outline the edge of the wave with it. Create some mini waves in the ocean as well.

To create the Seattle Space Needle cookies, outline the edges and fill in the rectangle with your white frosting.

Take your gray frosting and create three horizontal lines toward the top of the rectangle, with one vertical line coming out of the first horizontal one. Reference the photo for more instruction.

Draw two bent lines vertically. Again, reference the photo.

Create two horizontal lines toward the bottom of the Space Needle.

Lastly, draw in some other buildings next to the Space Needle to represent the rest of the skyline.

For the rain cookies, outline and fill in your cloud with the white frosting. When filling in more complex shapes, find an area where you can create a good sized block of straight lines. Then, go back and fill in the smaller spaces that are left behind. Take a look at the photos for reference.


Do the same for the gray frosting. I used horizontal lines to create a contrast between the cloud and the sky background.


To create your rain drops, draw small ovals with the aqua frosting.

Then, take your butter knife and shape the ovals into tear-drop shapes.

Repeat this for the remaining rain drops.

And that’s it! I truly hope that if you need to transport these cookies in Seattle you have better luck than me!
Speaking of transporting buttercream sugar cookies, check out my post here for tips on doing that successfully! It’s definitely possible so don’t believe the naysayers.
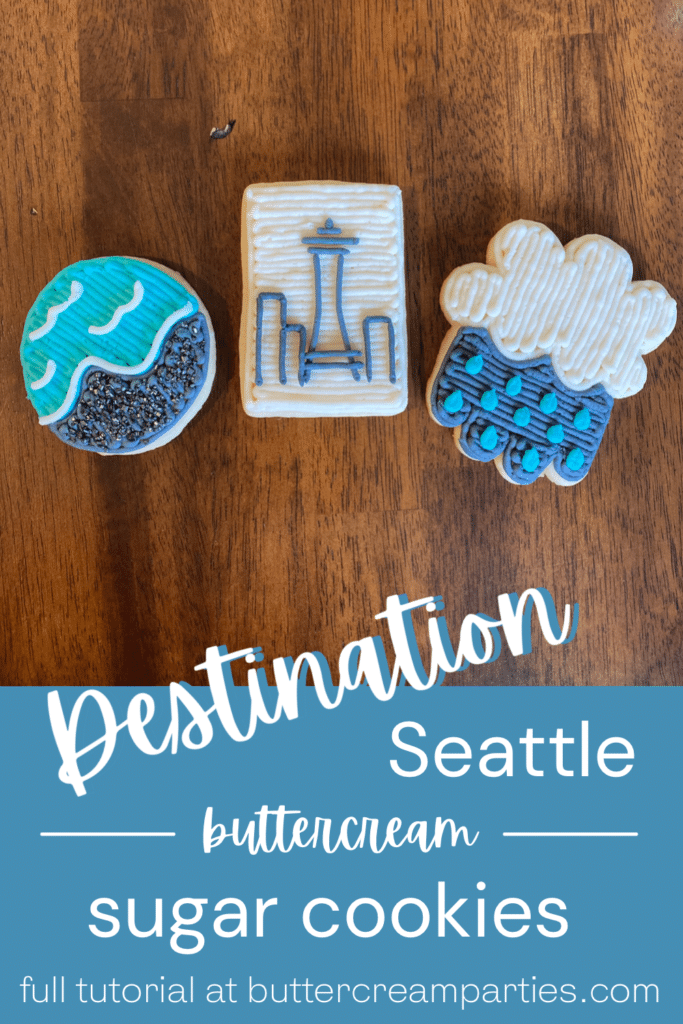
Save the Tutorial for These Seattle Sugar Cookies for Later
To save these fun buttercream iced cookies for later, use any of the social share icons at the top or side of this page. Alternatively, hover over the image below and pin it to your Pinterest account. Make sure you’re following me on Pinterest, too! buttercream parties | decorated sugar cookie tutorials
If you created these cookies, tag me on Instagram at buttercreamparties! I’d love to see your decorated cookies!