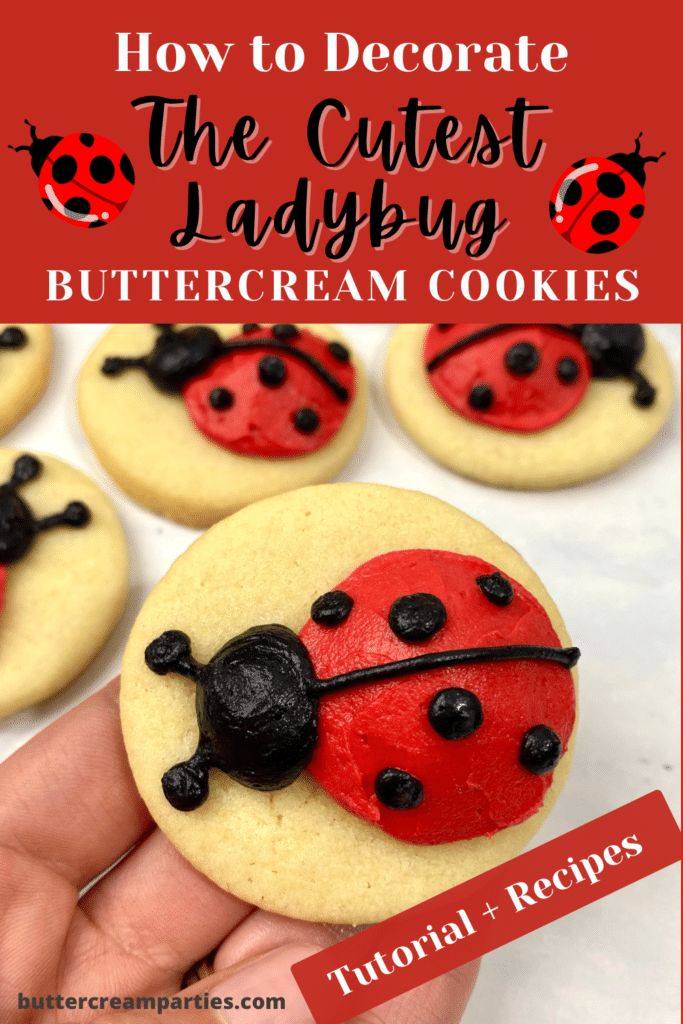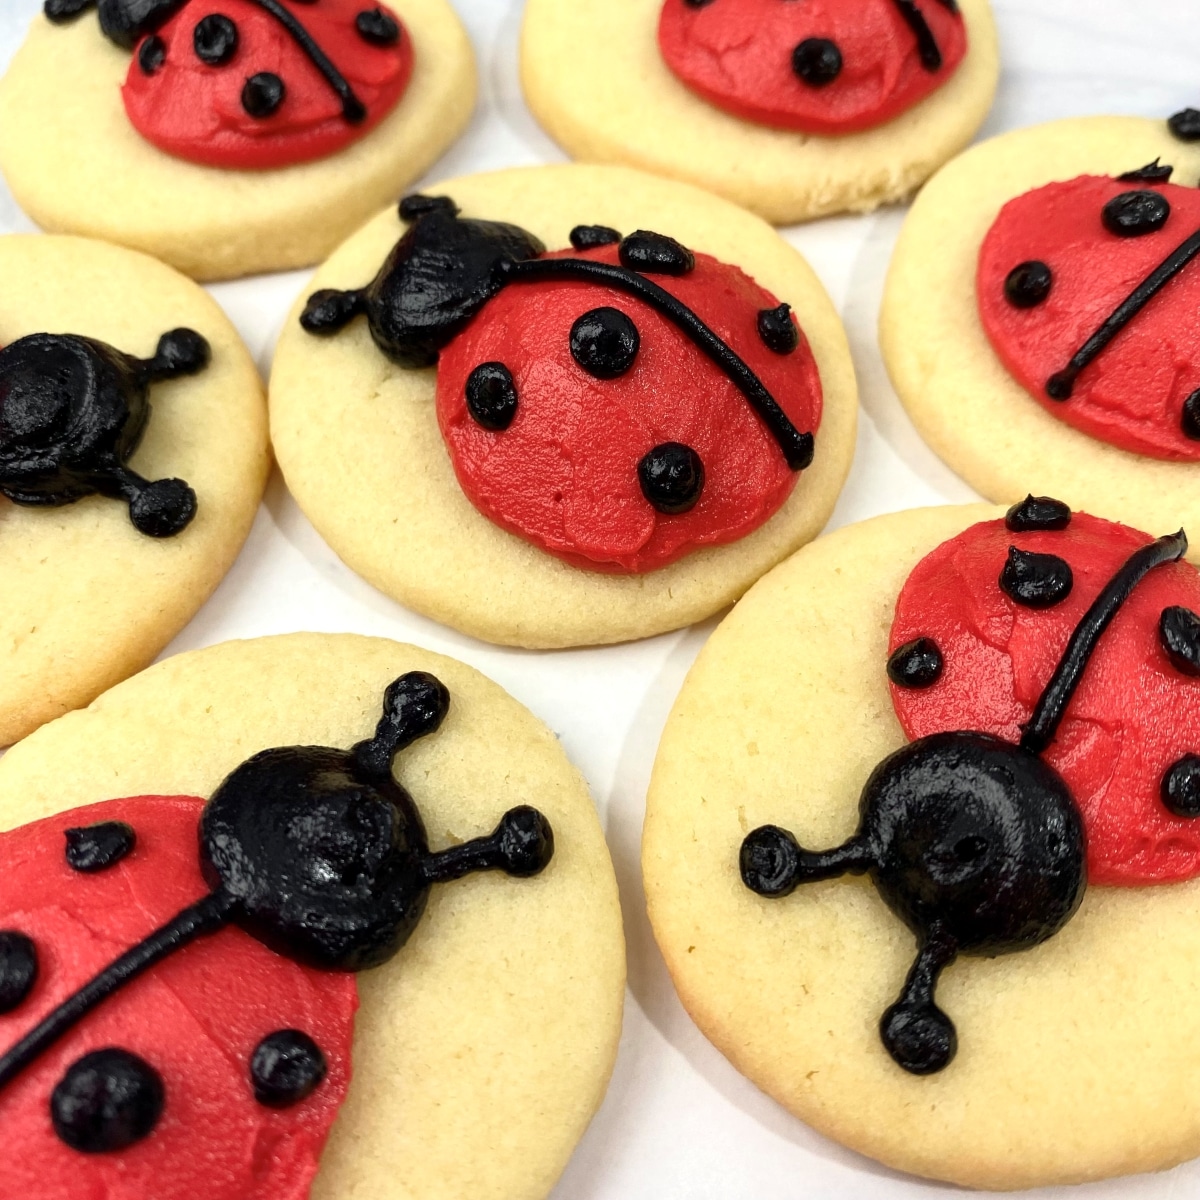
How to Decorate Cute Ladybug Cookies with Buttercream
Spring is almost here and I cannot wait. It is such a beautiful time of the year with all the pretty flowers, and most important, the sun makes an appearance. I wanted to celebrate spring with these too-cute ladybug cookies.
These ladybug cookies would be perfect for a ladybug birthday party. I’ve seen some really cute ones on Pinterest.
Another plus: the cookies are mini cookies, measuring about 2″ in diameter. Sometimes we just want a small treat, ya know?
*This post may contain affiliate links, which means I may receive a commission, at no extra cost to you, if you make a purchase through a link. Please see my full disclosure for further information.*
Skip to
Part 1: Gathering the Supplies for Decorating Ladybug Cookies
To decorate the cutest ladybug sugar cookies, you will want to gather:
- 2 Icing bags
- 2 Couplers
- One Wilton #2 tip and #12 tip – buy these at a bake supply store or purchase this kit I use for almost every tutorial
- Small circle cookie cutter – I used the smallest circle in this set
- Gel food dye for buttercream frosting in red and black
- Palette knife or butter knife
- Ingredients for a crusting buttercream, find my crusting buttercream icing recipe here
- Ingredients for sugar cookie dough, find my no spread sugar cookies recipe here
Part 2: Baking the Cookies and Setting up Your Icing Bags
- Roll, cut out, and bake your sugar cookies according to the recipe. You will be able to make about 40 sugar cookies with the recipe and cookie cutter linked above. Remember, these are mini cookies.
- Make your buttercream icing and separate it into two bowls:
- One bowl will only contain about a third a cup of frosting, color that black.
- The rest of the frosting will be dyed red.
- ***Remember, your colors will develop over time so just get to a medium-dark shade of each color.
- Set up your icing bags as follows:
- Place couplers into each of the icing bags and fill them with the buttercream, one color per bag of course. You don’t need to attach the tips yet.
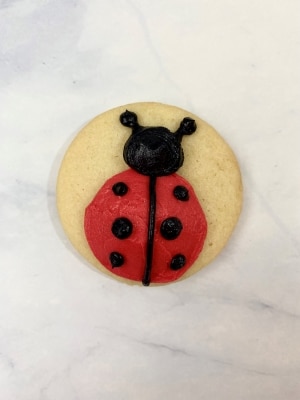
Part 3: Decorating Ladybug Cookies
Check out the video above, especially to see how to smooth the ladybug body, and then check out the photo tutorial below.
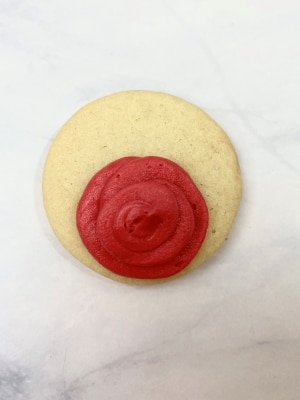
- Use the tip #12 attached to the red icing bag and pipe out a swirl of frosting for the ladybug body. The swirl will start on the outside and move its way in. Then, add another slightly smaller layer of swirl in the same motion to create a dome shape.

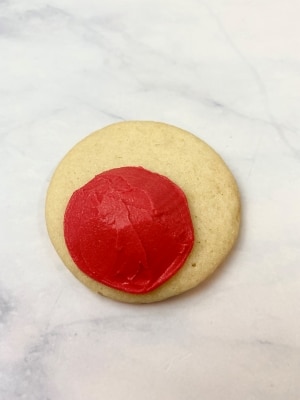
- Smooth the ladybug body with the palette knife.
- Repeat steps 1-2 for all of the ladybug cookies before moving to step four. This saves on rinsing/drying time.
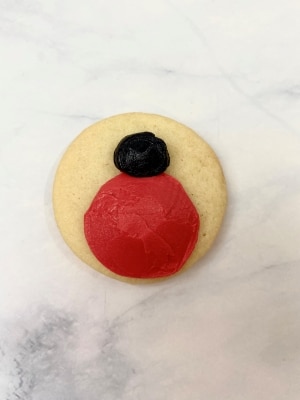
- Remove/rinse/dry the tip #12 from the red icing and attach it to the black icing. Pipe out blobs of black frosting for the ladybug’s head. You don’t need to do the swirl motion here, just keep the icing bag still and squeeze out enough frosting until it is the size you want.
- Repeat step 4 on all of the cookies before moving to step six
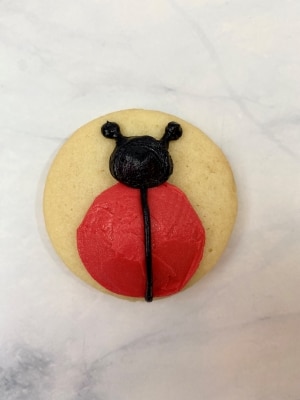
- Remove the tip #12 from the black icing and replace it with the tip #2. Pipe out the antennae by drawing two curved lines and placing a dot of frosting on the end of the line. Then, draw a line down the middle of the ladybug’s body.
- Squeeze out various sized dots onto the ladybug using the tip #2.
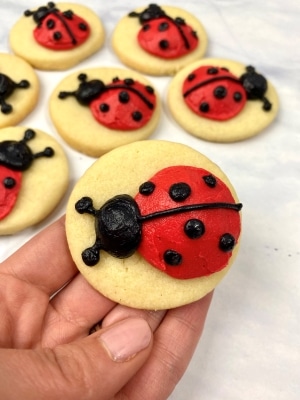
I just love how easy these ladybug cookies are to make, perfect for beginners! If you want to go the extra mile, whip up some green frosting and use a tip #233 to pipe grass onto the cookie before creating the ladybugs.
Save the Tutorial for These Ladybug Sugar Cookies
Make sure to save this cute ladybug cookie tutorial! Use the image below to pin it to your party board on Pinterest. Alternatively, use any of the social share icons on the top of the page to share it to your favorite social media site.