How to Decorate Hamburger Cookies with Buttercream Frosting
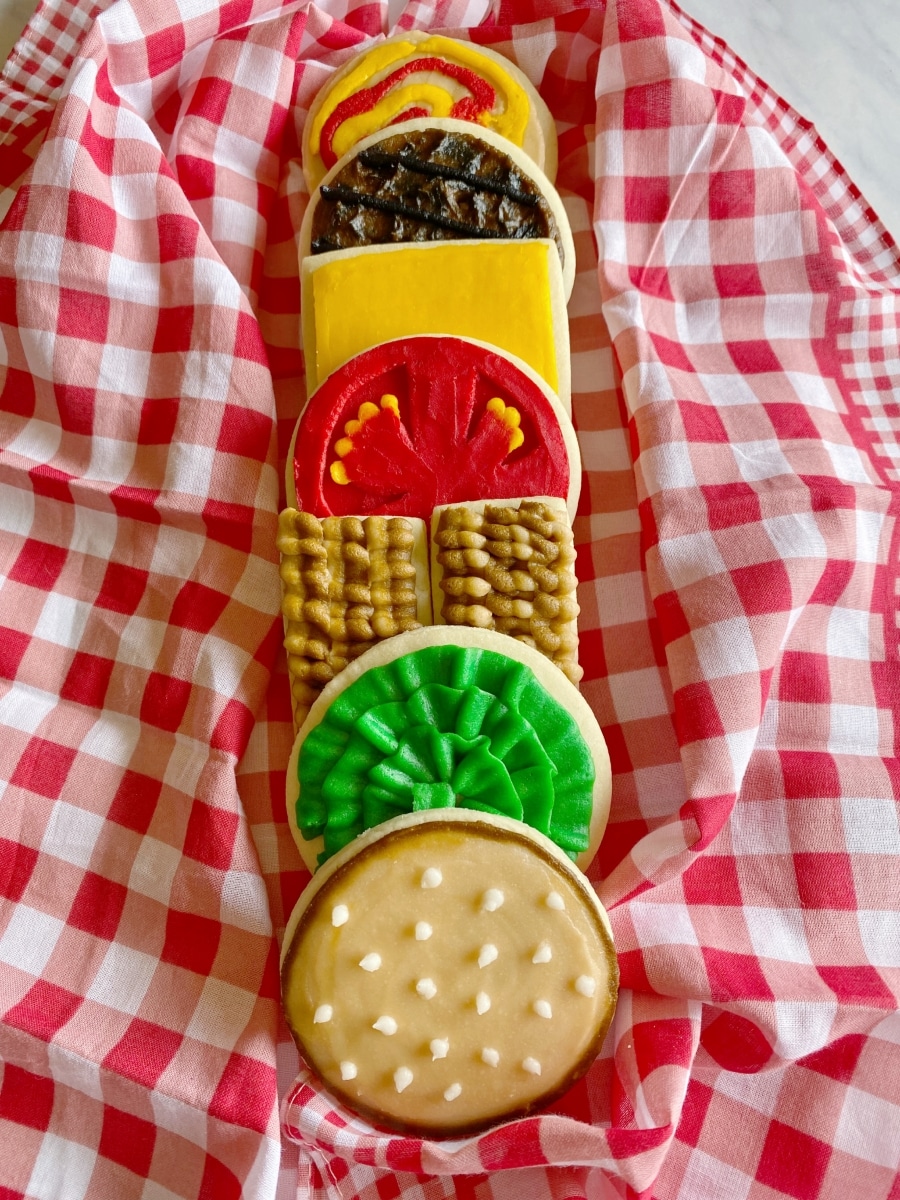
It’s finally the summer! I just love the summer time – it’s my birthday, the sun is out, the BBQ is on, lots of time with family, the list goes on. I decided to create this tutorial for hamburger cookies with buttercream frosting for all the wonderful summertime celebrations. These decorated cookies would be perfect for Father’s Day or even a Baby Q baby shower.
Follow along for the step-by-step photo series tutorial.
*This post may contain affiliate links, which means I may receive a commission, at no extra cost to you, if you make a purchase through a link. Please see my full disclosure for further information.*
Skip to
Part 1: Gathering your Supplies for the Hamburger Cookies
To create these decorated hamburger sugar cookies, you will want to gather:
- 8 Icing bags
- 6 Couplers
- 9″ flat spatula
- One Wilton tip #5, #10, #100, and #105 – buy these individually at a craft store or purchase the kit I use that includes all of this tips
- Circle and square cookie cutters
- A non-serrated knife
- Buttercream frosting in black, white, light brown, dark brown, yellow, red, and green – find my crusting buttercream icing recipe here
- No spread sugar cookie dough – find my no spread sugar cookies recipe here
You may be asking, “What are couplers?” Couplers allow you to change your tips on your icing bags. Check out my page, Getting Started: Learn How to Decorate Buttercream Cookies, to learn how to do this. Essentially, you will attach a coupler to each icing bag. When you need to attach a tip, just make sure to rinse out the previous color from the tip with hot water. Purchasing a set of couplers is pretty affordable on Amazon: 4 Count Wilton Coupler Set.
Part 2: Baking the Cookies and Setting up Your Icing Bags
- Roll, cut out, and bake your sugar cookies according to the recipe. To make one hamburger cookie, you will need:
- 5 circles
- 2 squares – In order to make the bacon strips, cut half of the square cookies in half. The other half will be the cheese cookies.
- Make your buttercream icing and distribute it into seven bowls. Remember that the color will deepen as it sets.
- One bowl needs only a little bit of frosting for the hamburger bun seeds. Keep this bowl undyed.
- Two bowls of frosting should be about twice the amount as your other colored frosting bowls – these will become the dark brown and light brown colors.
- The remaining 4 bowls are for the black, yellow, red, and green frosting colors.
- Set up your icing bags as follows:
- Pull out half of the dark brown frosting and half of the light brown frosting and place it into an icing bag with the tip #100 in it. Each color should be on one half of the bag vertically. It’s okay to not be perfect.

- Place the green frosting into an icing bag with the tip #150 in it.
- Place the white, black, red, yellow, and remaining dark brown and light brown frosting colors into their own icing bags (so 6 bags total), each set up with a coupler. If you don’t know how to do this, just hop over to my Getting Started: Learn How to Decorate Buttercream Cookies page. You don’t need to attach any tips to the bags yet.
- Pull out half of the dark brown frosting and half of the light brown frosting and place it into an icing bag with the tip #100 in it. Each color should be on one half of the bag vertically. It’s okay to not be perfect.
Part 3: How to Decorate Hamburger Cookies with Buttercream Frosting
Check out the video tutorial here!
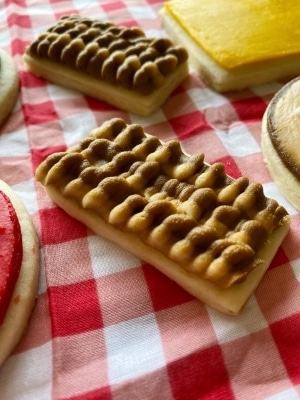
How to Decorate the Bacon Decorated Cookies
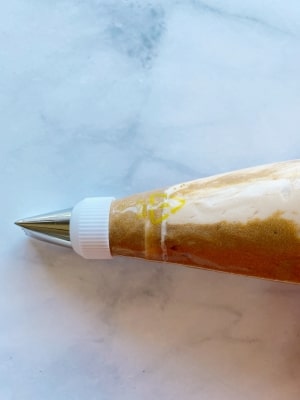
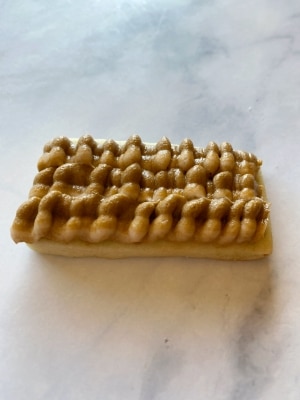
- Use the bag of frosting that has both the light & dark brown colors to pipe out the bacon strips. As you pipe along the length of the cookie, move the frosting up and down so that the bacon is wavy. In the photo below, you’ll see that the proper way to hold the tip is so that it resembles a bird flying. There is a point at the bottom which goes on the top of the cookie as you pipe.
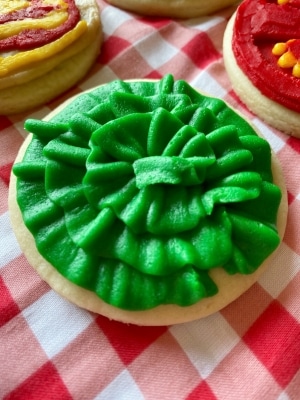
How to Decorate the Lettuce Cookies
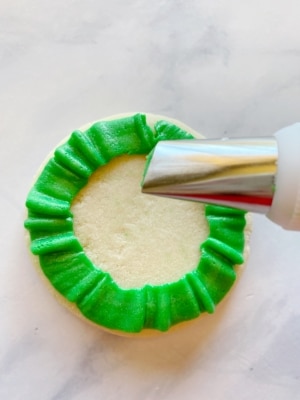
- Use the bag of frosting that has the green icing and pipe along the outer edge of the cookie, holding the tip parallel to the cookie.
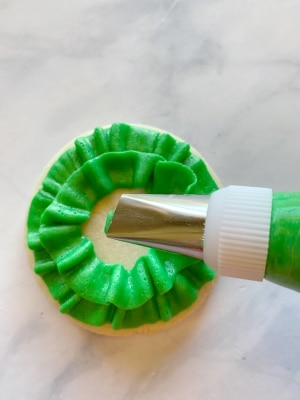
- Repeat the same step, adding layers of lettuce as you move inward.
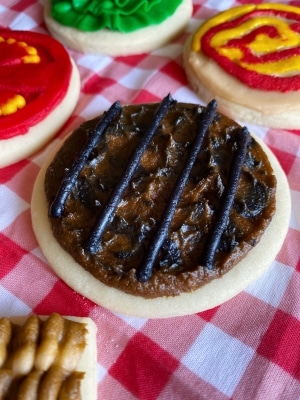
How to Decorate the Hamburger Cookies
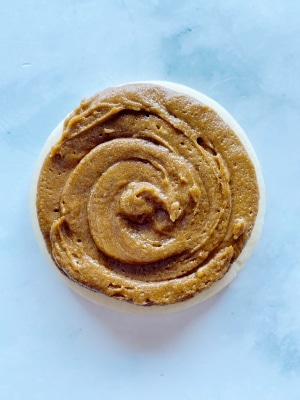
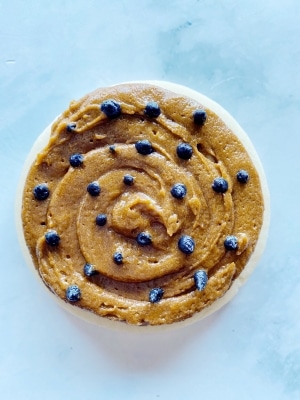
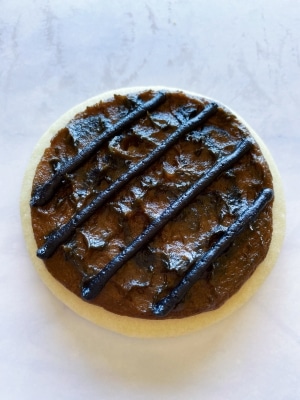
- Attach the tip #10 to the bag of dark brown frosting. Fill in the whole cookie. It is best to hold the tip close to the cookie so that the frosting comes out more flat, as opposed to round logs.
- Attach the tip #5 to the black frosting and squeeze out small dots of frosting throughout the hamburger patty.
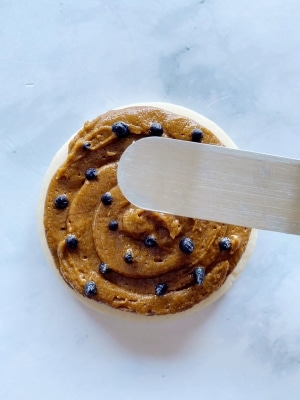
- Use the angled flat spatula to smear the frosting around, mixing the black and brown colors together a bit.
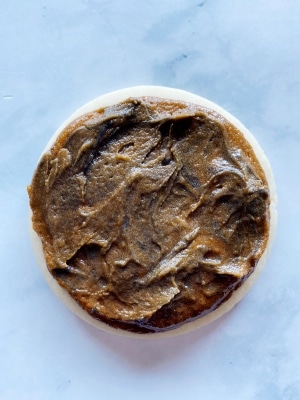
- Now, use the flat spatula to create a spiky texture to the top of the frosting. Simply place the spatula flat onto the frosting and pull up. Repeat as many times as you need to create a texture you like.
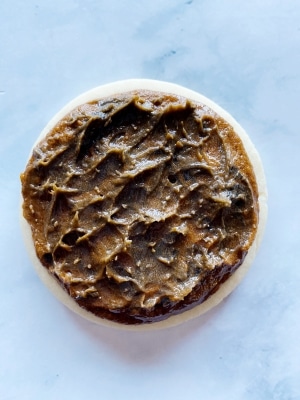
- Lastly, draw the grill lines using the black frosting with the tip #5 still attached.
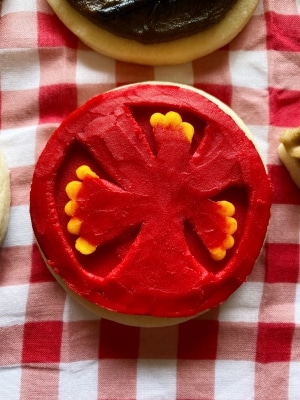
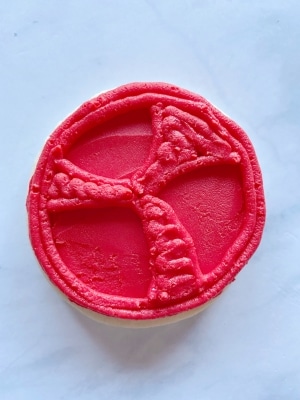
How to Decorate the Tomato Cookies
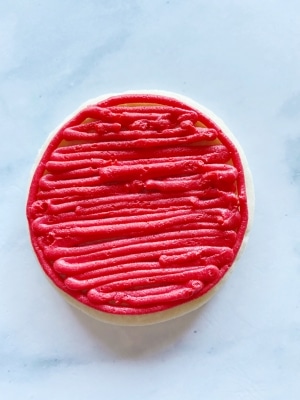
- Attach the tip #5 to the red bag of icing and outline/fill in the whole circle. Remember to make sure that you rinse and dry the tip from any previous icing colors before attaching it to the next color. Then, place these tomato cookies into the freezer for 10 minutes or so.
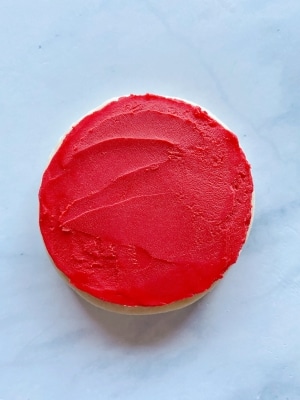
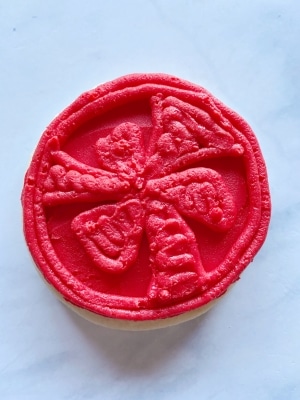
- Once your cookies have been in the freezer for 10 minutes or so, take them out and use the flat spatula to smooth out the frosting. To understand why I recommend this technique, check out my post here: How to Smooth Buttercream for Cookies
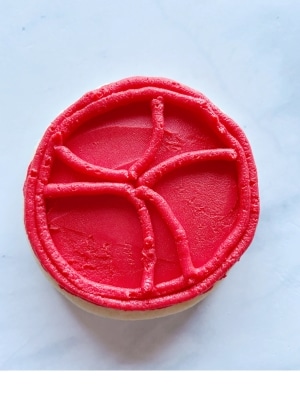
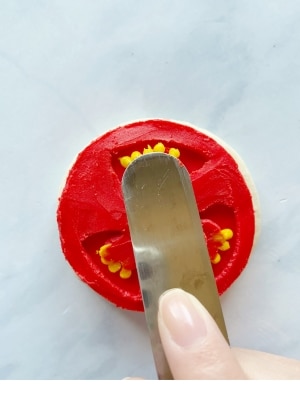
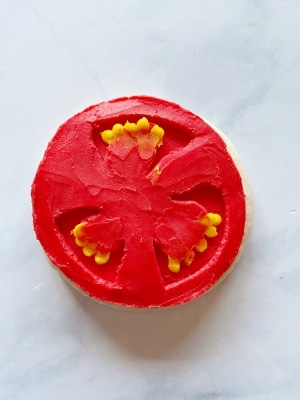
- Next, outline the edge of the cookie twice using the tip #5 and then draw in the inner details of the tomato.
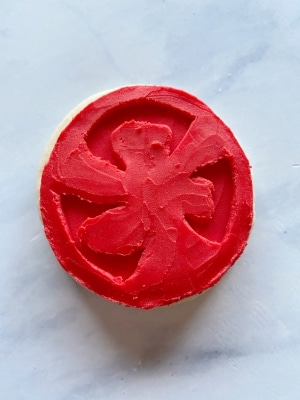
- Place the tomato cookies back into the freezer for at least 10 minutes. You can freeze them for longer if you lose track of time, but you definitely want them pretty frozen. Then, smooth out the inner details of the tomato with the angled flat spatula.
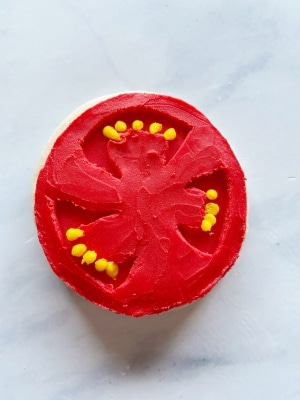
- Remove/rinse/dry the tip #5 from the red frosting and attach it to the yellow. Squeeze out small dots for the seeds.
- Lastly, use the flat spatula to smooth the dots into the red frosting just a bit.
How to Decorate the Cheese Cookies
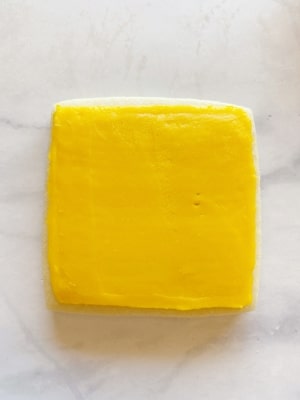
- Attach the tip #5 to the yellow frosting and outline/fill in the square cookie. Place the cheese cookies into the freezer for at least 10 minutes, then smooth with the angled flat spatula. To keep the edges straight, you can use the spatula to clean them up.
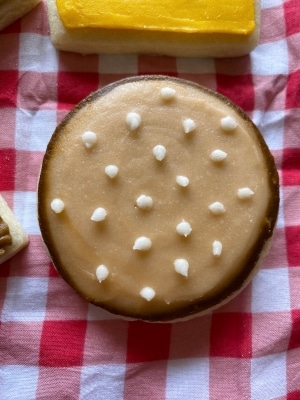
How to Decorate the Hamburger Bun Cookies
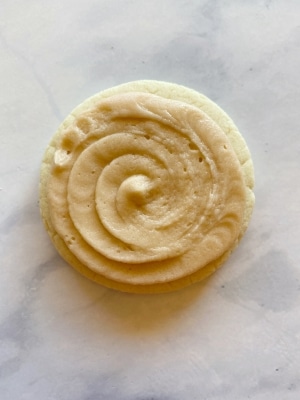
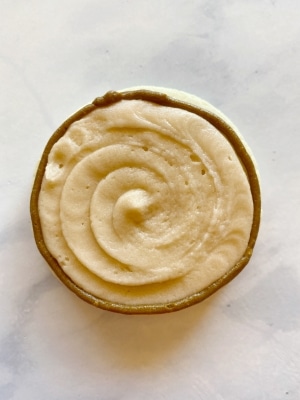
- Attach the tip #10 to the light brown frosting and fill in the round cookies that will be the top and bottom buns. Remember to hold the tip close to the cookie so that the frosting comes out flat as opposed to round logs.
- To create the top bun, take one of the circle cookies and outline the edge of the light brown frosting with dark brown frosting using a tip #5.
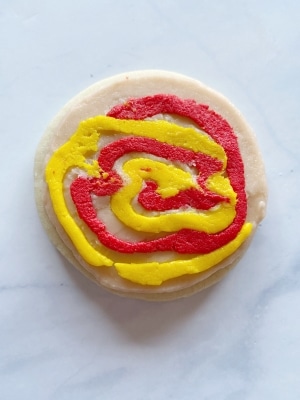
- Place both the top and bottom bun cookies into the freezer for at least 10 minutes. To create the bottom bun, smooth out the cookie once it’s been frozen with the flat spatula. You can add ketchup and mustard by attaching the tip #5 to both the red and the yellow icing bags. I flattened the condiments out a bit with my flat spatula as well after freezing for about 5 minutes.
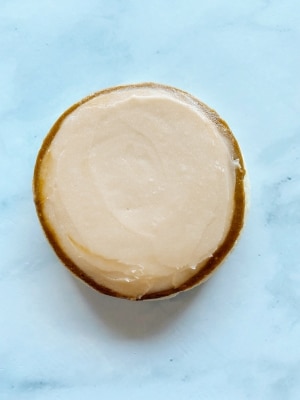
- To create the top bun, use the flat spatula to smooth out the frosting. You will want to smooth in a circular motion because you want to keep the dark brown outer circle that shape.
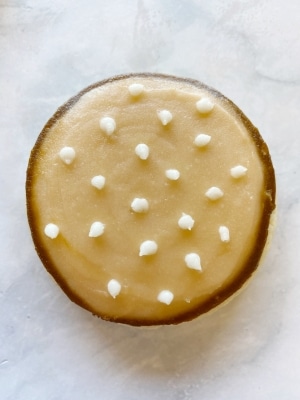
- Attach the tip #5 to the white frosting and squeeze out small dots for the seeds. You can make them more seed like by pulling at the frosting as you move away from the cookie. You can also use a toothpick if you want them more precise.
That’s all of them! Make as many hamburger cookies as you want. You can even lay them out so people can build their own burgers! 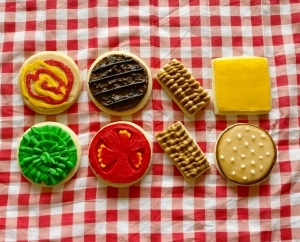
Save the Tutorial for These Cheeseburger Cookies for Later
I hope you were inspired to create your own summer BBQ theme party with these hamburger cookies! Make sure to save this cookie decorating tutorial for later. Use the image below to pin it to your Pinterest account. Alternatively, use the social share icons at the top of the page. Thanks for sharing! 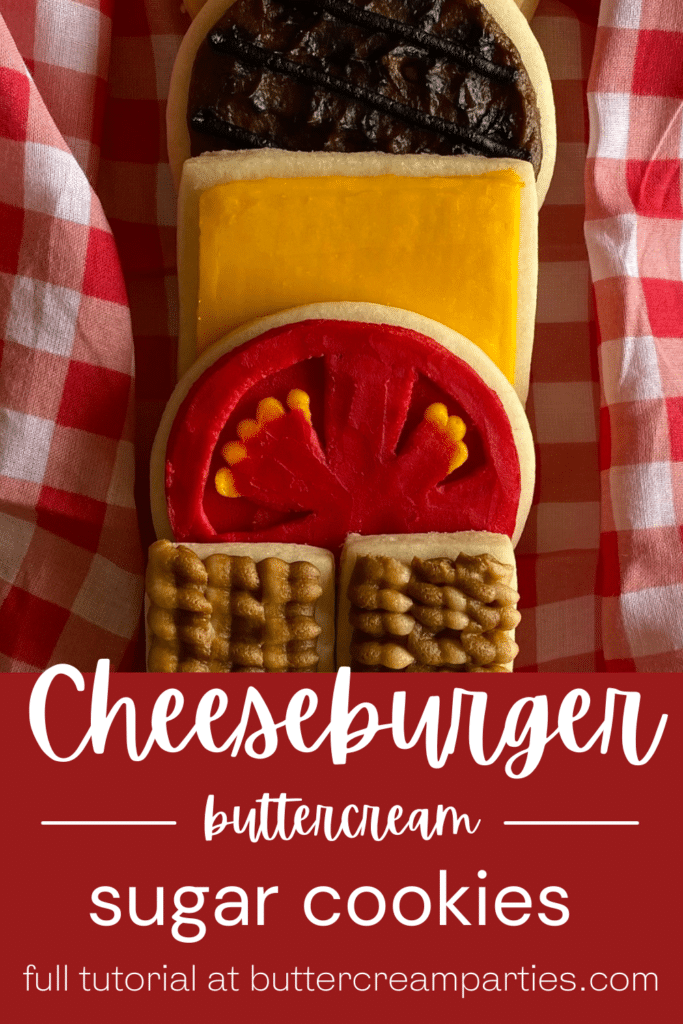
Such a cute idea! I need to make this for my next cookout.
Thanks Bethany! Enjoy!
They are so cute! It’s definitely something I’ll have to try when I meet my nephews again!
I’m sure your nephews will love them!
How adorably cute are these?!? They would be great for summer cookouts!
Thank you Cindy! They would go so well with one of your amazing summer cookout recipes!
This is so cute! I love the idea, can’t wait to try it out!
Thanks Kayla! Have fun decorating!
These are the cutest cookies ever. Such a great idea!!
Thank you Jodi!
Omg those look adorable! Such an awesome idea
Thanks Bianca!