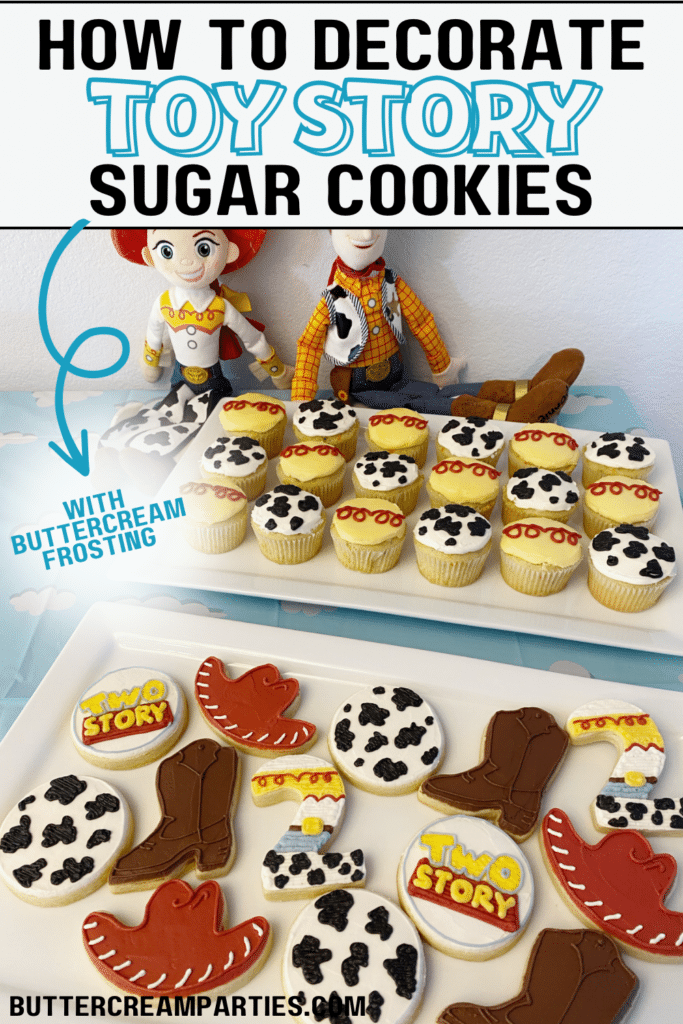
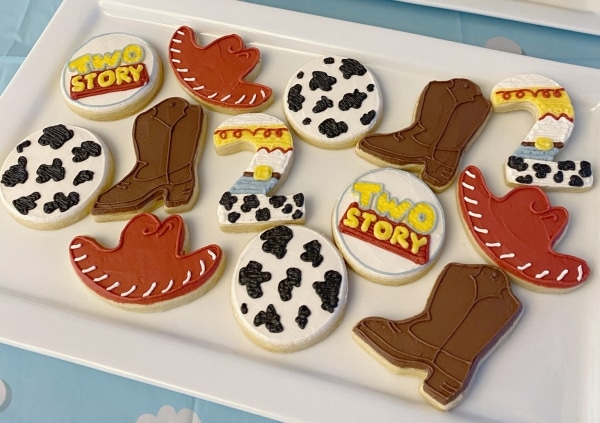
How to Decorate Pastel Toy Story Cookies
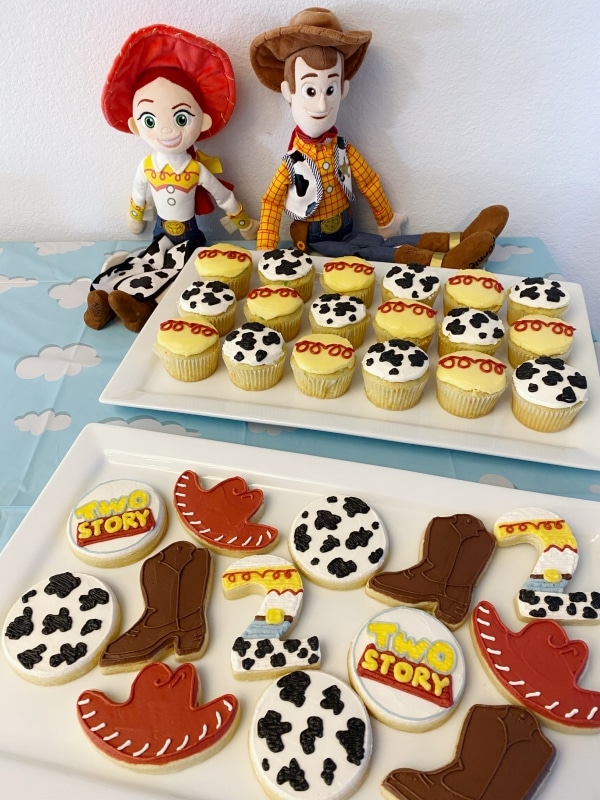
My baby turned two last month and we had the cutest pastel Toy Story birthday party for her. To elevate the cuteness of the party, I baked and decorated Toy Story cookies for her and the guests.
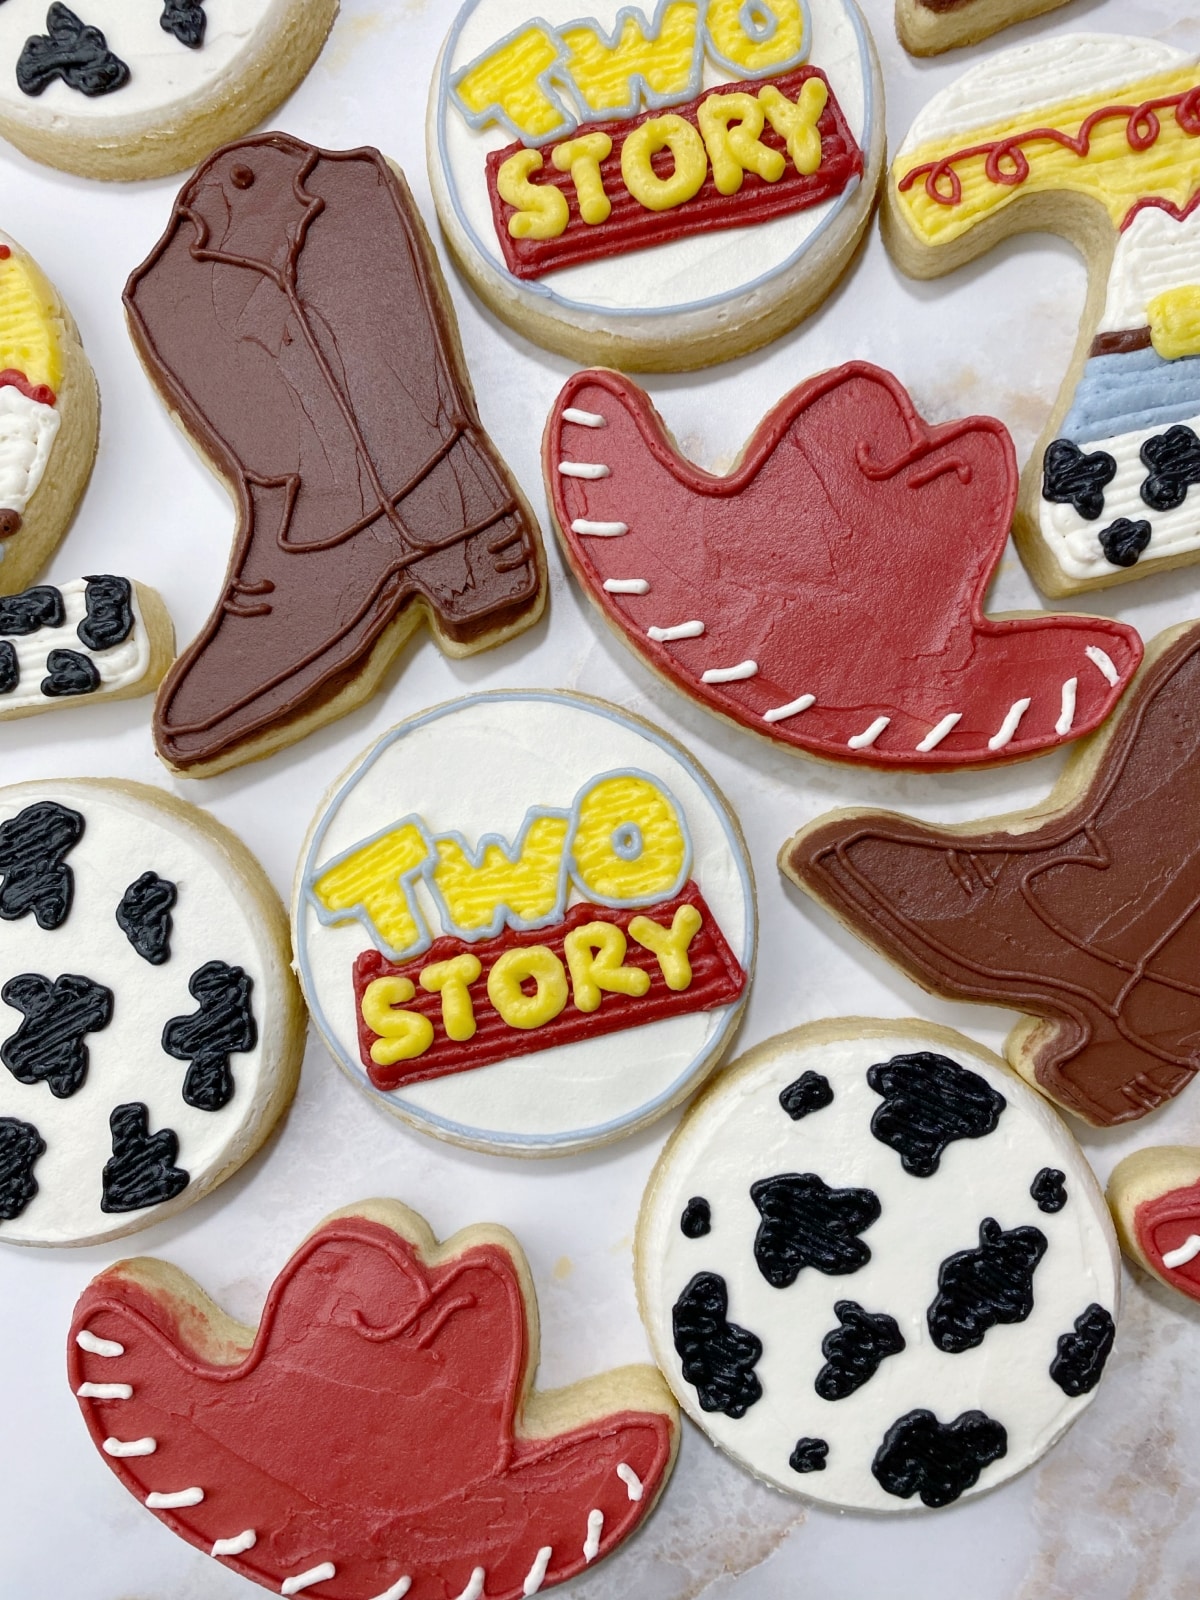
I went with a “Two Story” theme as opposed to the popular “Two Infinity and Beyond” birthday party theme. The pastel cookies would fit both themes well though. Of course, you’d want to skip the Two Story cookie.
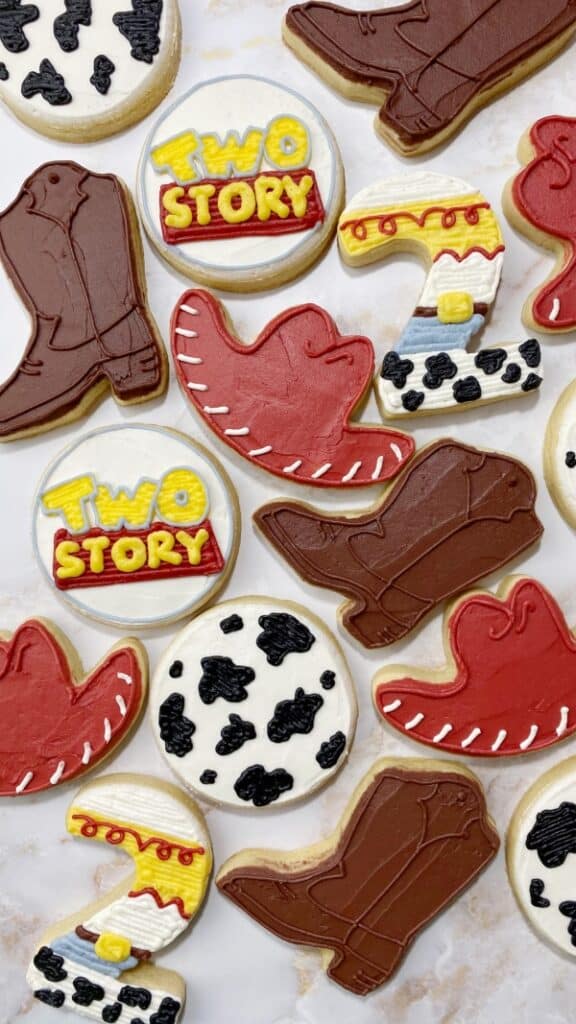
The Toy Story cookies features Jessie’s outfit: her boots, the red hat, the yellow shirt with the red squiggle, and the cow print.
I also made some funfetti cupcakes (just from the box!) with some cream cheese frosting. I like to give the guests options on cupcakes or cookies, or both of course!
So without further ado, let’s jump into the tutorial on these super cute pastel Toy Story cookies!
*This post may contain affiliate links, which means I may receive a commission, at no extra cost to you, if you make a purchase through a link. Please see my full disclosure for further information.*
Part 1: Gathering the Supplies for the Toy Story Cookies
To decorate these cute Toy Story sugar cookies, you will want to gather:
- 6 Icing bags
- 6 Couplers
- One Wilton #2 tip, one Wilton #4 tip, and one PME #1.5 tip
- Hat and cowboy boot cookie cutter – I used the ones in the Wilton 101 cookie cutters set
- Medium sized circle cookie cutter – I used the middle sized circle in the Wilton 101 set linked above
- One number cookie cutter (I used a 2 in the tutorial)
- Black, brown, yellow, blue, and red gel food dye
- Palette knife
- Ingredients for a crusting buttercream, find my crusting buttercream icing recipe here
- Ingredients for sugar cookie dough, find my no spread sugar cookies recipe here
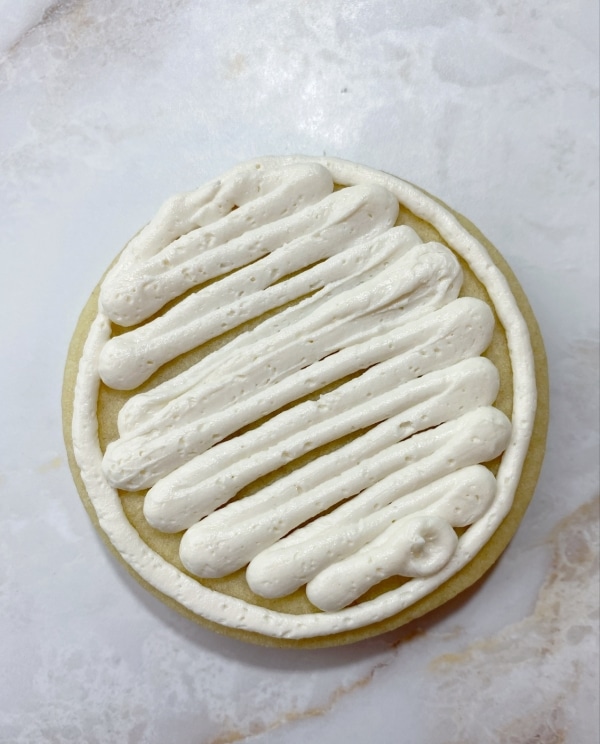
Part 2: Baking the Cookies and Setting up the Icing Bags
- Roll, cut out, and bake your sugar cookies according to the recipe. I made 6 circles (4 will be cow print and 2 will be the Two Story print), 4 hats, 4 boots, and 2 number two cookies. I always make more of the easy designs and less of the more complicated designs.
- Make your buttercream icing and separate it into six bowls:
- One bowl will contain about a quarter cup of the frosting; dye this bowl light yellow
- Another bowl will contain another quarter of a cup of frosting; dye this bowl light blue (mix in just a touch of black to make it a cornflower blue shade if preferred)
- Divvy up the remaining buttercream into four equal amounts: color one black, one rust red (red with just a bit of brown), one brown, and keep one undyed/white
- Set up your icing bags as follows:
- Place a coupler into each of the icing bags and add the frosting to the bags. You do not need to add the decorating tips yet. Remember, only add about a cup of frosting into the icing bags at a time. Keep the remaining icing covered in plastic wrap until you are ready to add more to the bags.
Part 3: Decorating the Pastel Toy Story Cookies
Check out the video tutorial showing all five Toy Story cookies then follow the step-by-step photo series tutorials below.
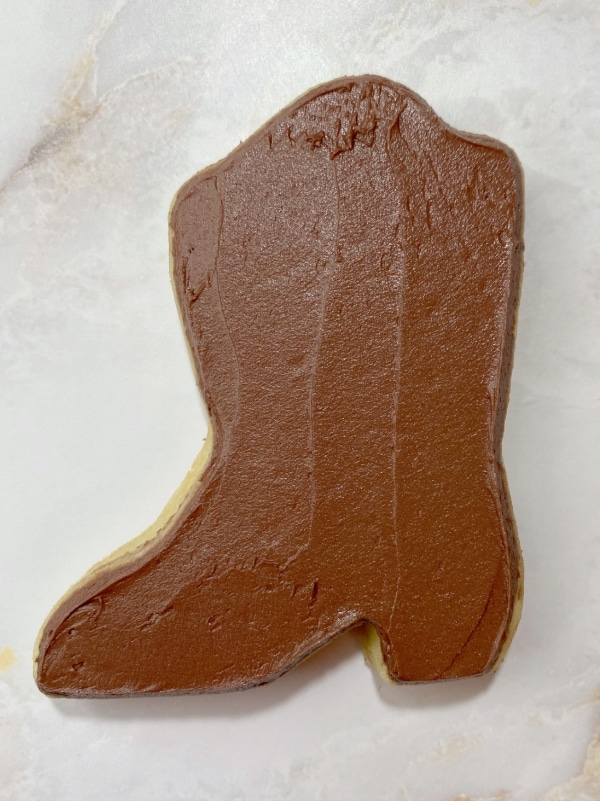
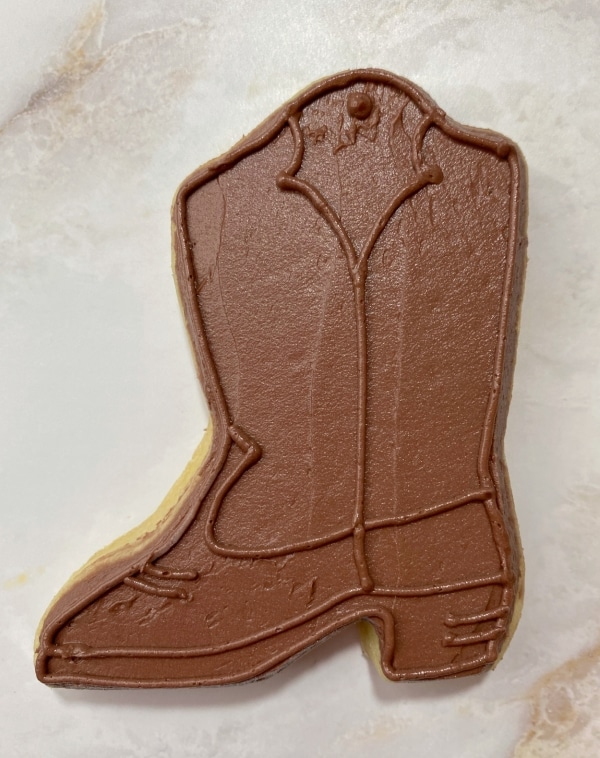
How to Decorate Jessie’s Cowboy Boot Cookies
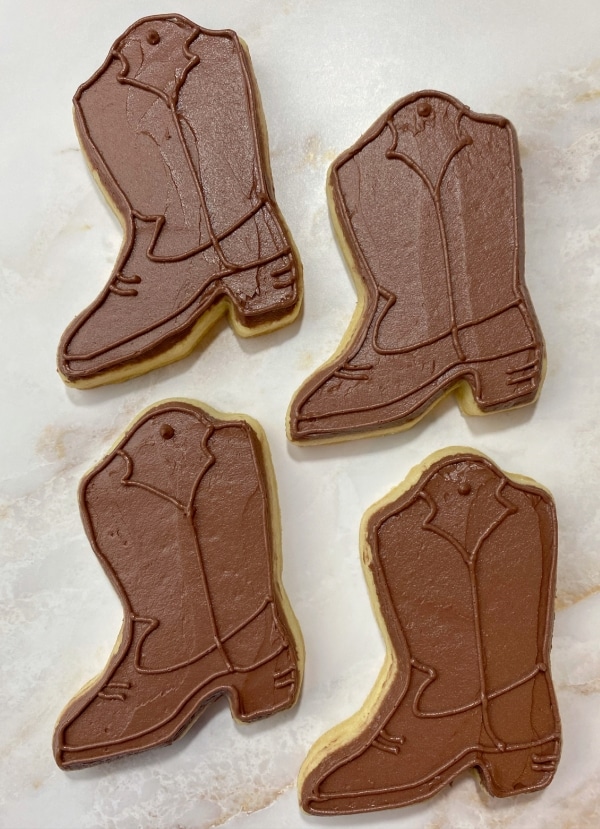
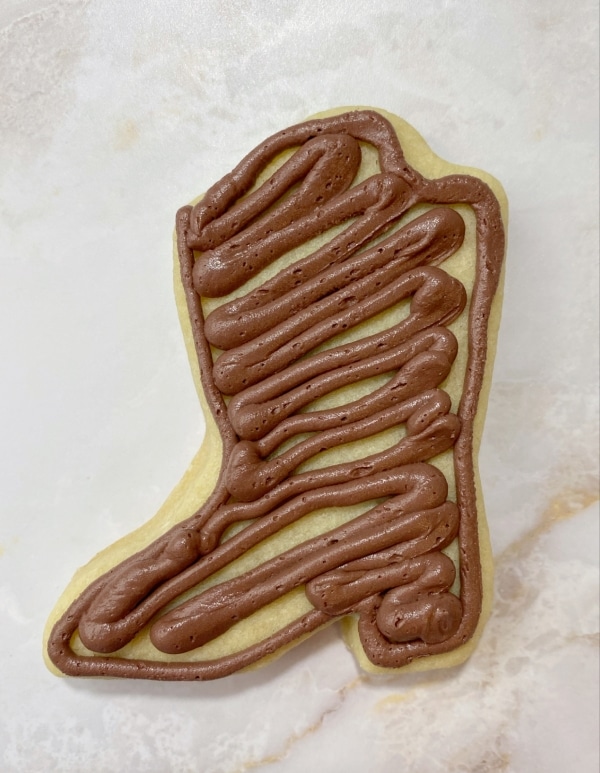
- Attach the tip #4 to the brown bag of frosting and outline and fill in the cowboy boot cookie. You can be sloppy here, as you will fix it in the next step.

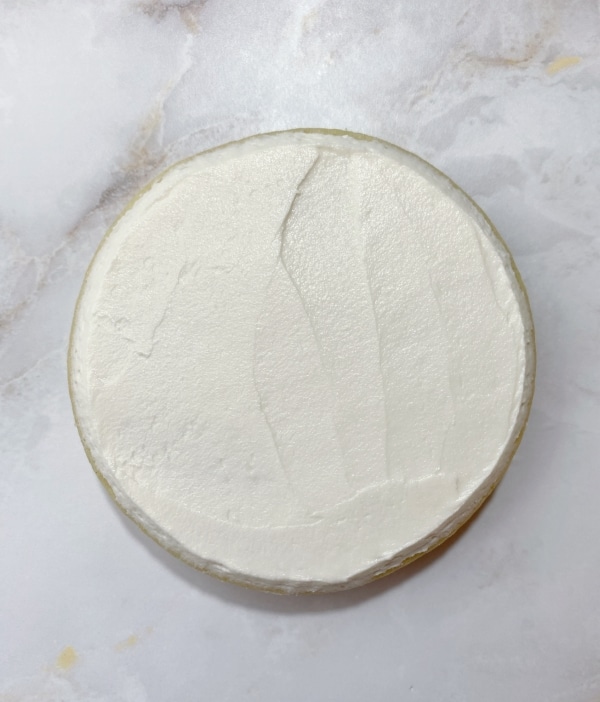
- Using the palette knife, smooth the buttercream frosting so that it covers the entire boot.

- Remove the tip #4 from the brown bag and replace it with the PME 1.5 tip. Outline the boot and fill in the decorative details. You can choose your own pattern or copy mine, whatever you’d like.

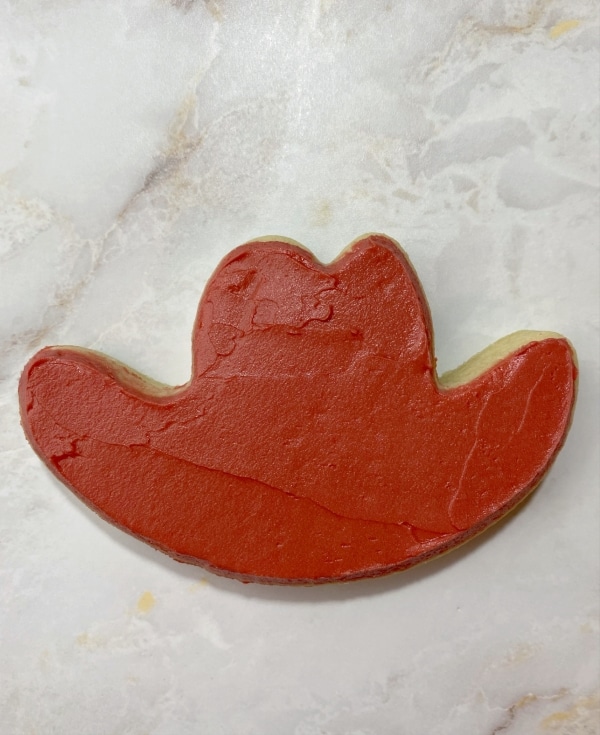
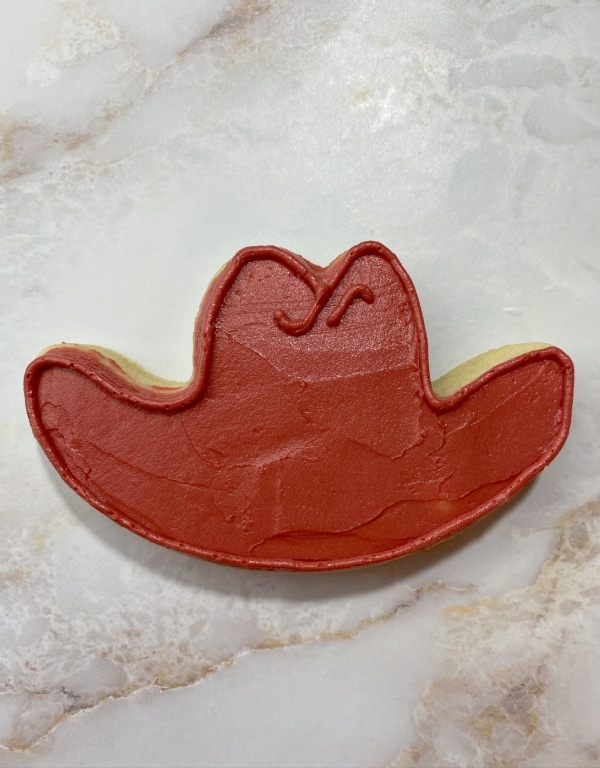
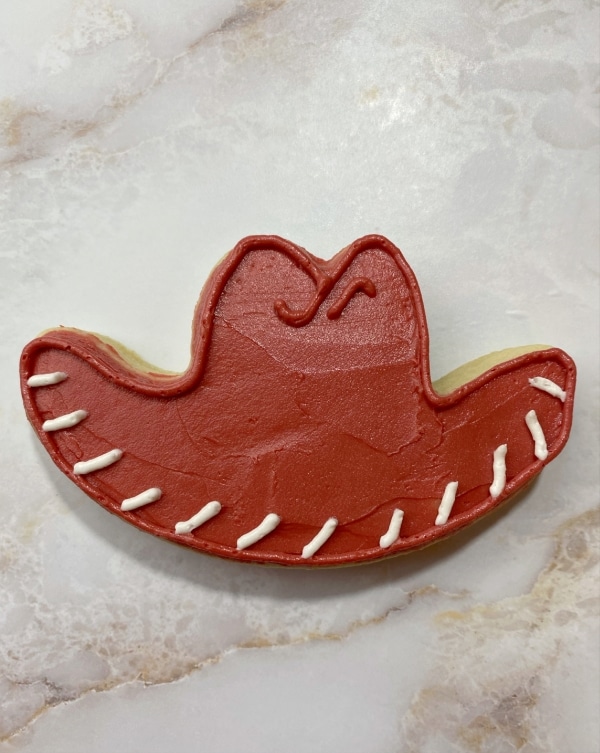
How to Decorate Jessie’s Cowboy Hat Cookies

- Attach the tip #4 to the rust red bag of frosting. Outline and fill in the entire hat. You can be sloppy here again, as you will smooth it out in step two.

- Using the palette knife, smooth the frosting evenly over the hat cookie.

- Remove the tip #4 from the red bag and replace it with the tip #2. Outline the hat and draw in the top detail. Complete steps 1-3 on all of the hat cookies before moving to step four.

- Remove/rinse/dry the tip #2 from the red bag and place it onto the white bag of buttercream. Pipe the string detail onto the cowboy hat cookies.


How to Decorate the Cow Print Cookies
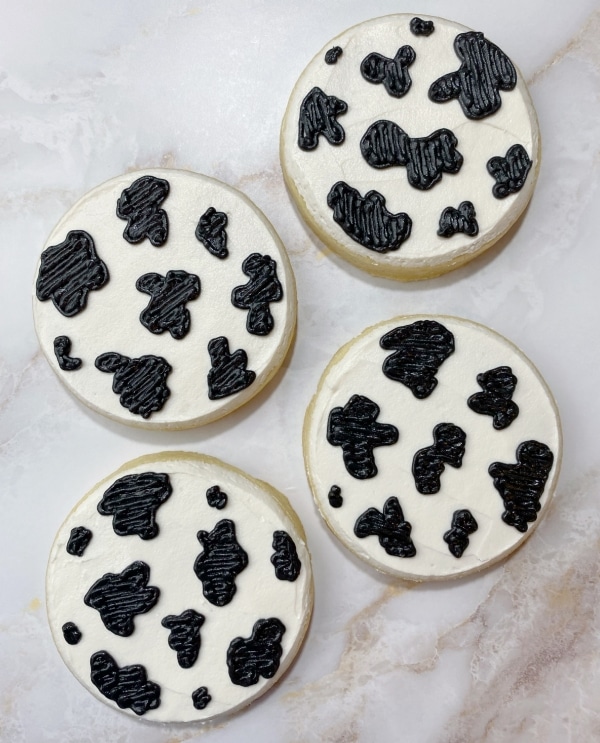
- Attach the tip #4 to the undyed/white bag of buttercream and outline and fill in the circle cookies that will be the cow print cookies. Remember, some of the circles will be the “Two Story” or themed cookies.

- Smooth the white buttercream with the palette knife.

- Attach the tip #1.5 to the black bag of buttercream. Outline and fill in cow print spots all over the cookie. It’s best to go quick and not overthink the shape of the spots.


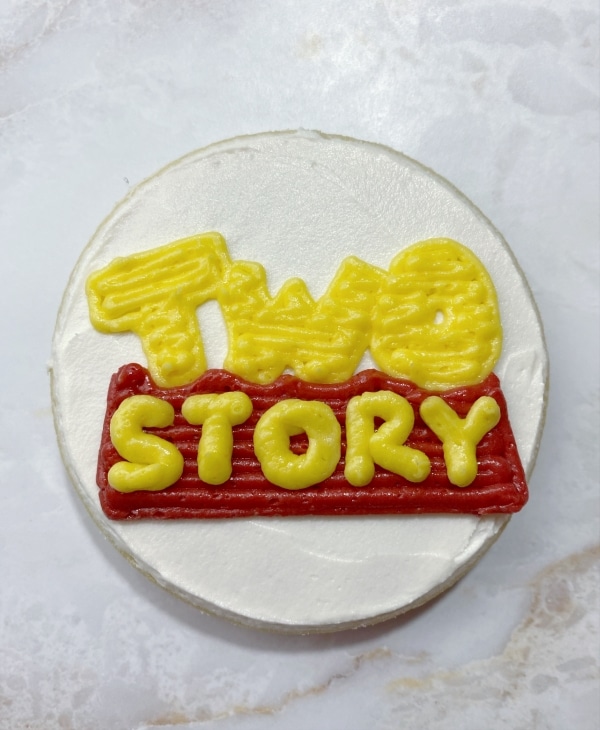
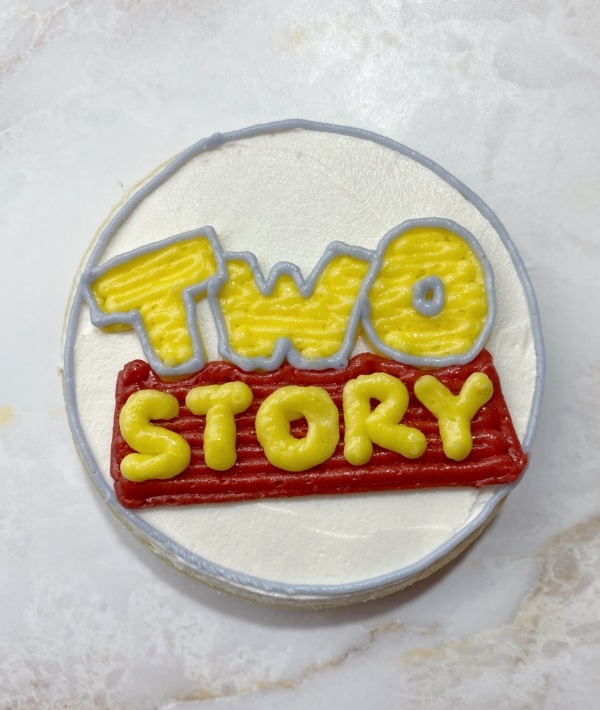
How to Decorate the “Two Story” Toy Story Cookies
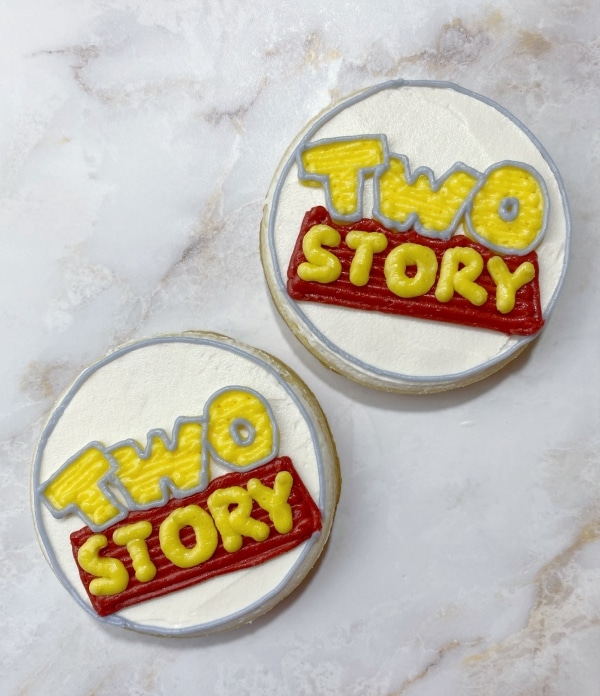
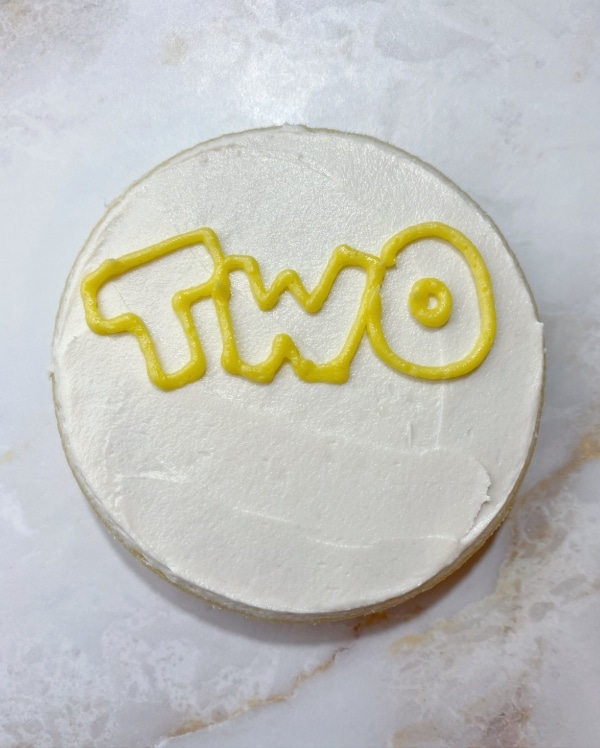
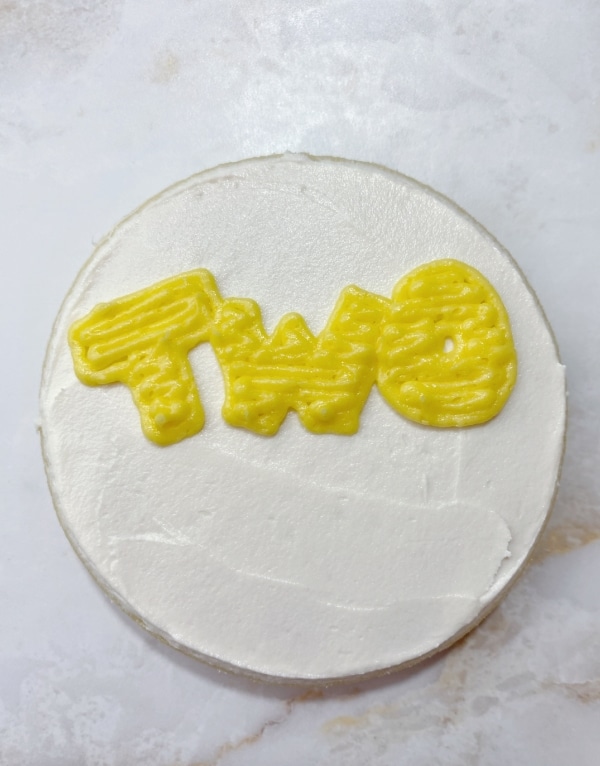
- Attach the tip #4 to the undyed/white bag of buttercream and outline and fill in the circle cookies that will be the “Two Story” cookies.
- Smooth the white buttercream with the palette knife.
- Attach the tip #2 to the yellow bag of buttercream. Outline the word TWO in block letters and then fill them in. Complete steps 1-3 on all the Two Story cookies before moving to step four.


- Remove/rinse/dry the tip #2 from the yellow frosting and attach it to the rust red bag of frosting. Outline and fill in the rhomboid shape. Complete step 4 on all of the Two Story cookies before going to step five.

- Remove/rinse/dry the tip #2 from the red frosting and place it back onto the yellow frosting. Pipe out the word STORY on top of the red rhomboid. I squeezed the frosting out thicker while writing to create more of a block/bubble style of font.

- Attach the PME 1.5 tip to the blue bag of frosting. Outline the word TWO and the edge of the circle.


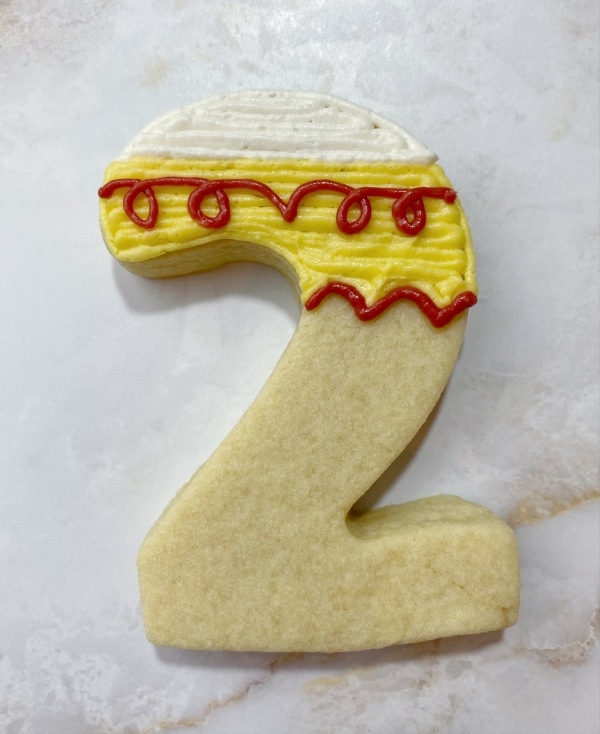
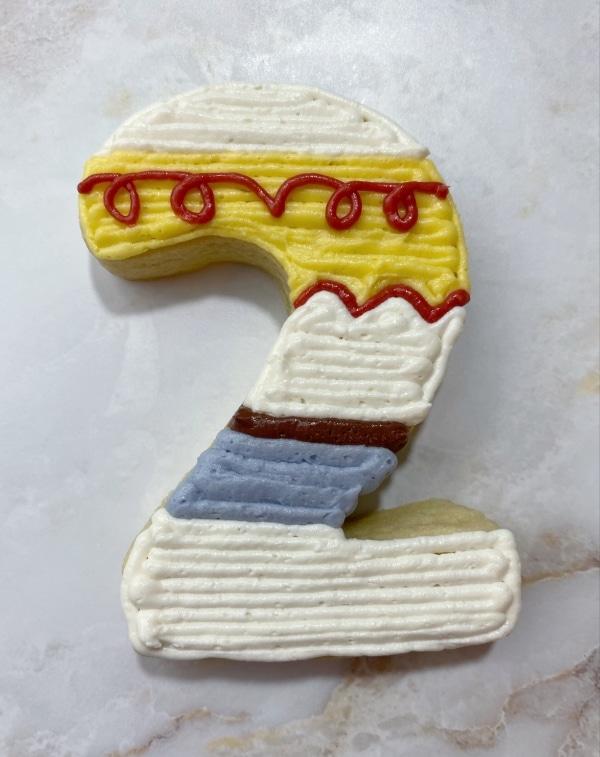
How to Decorate the Two Birthday Cookies
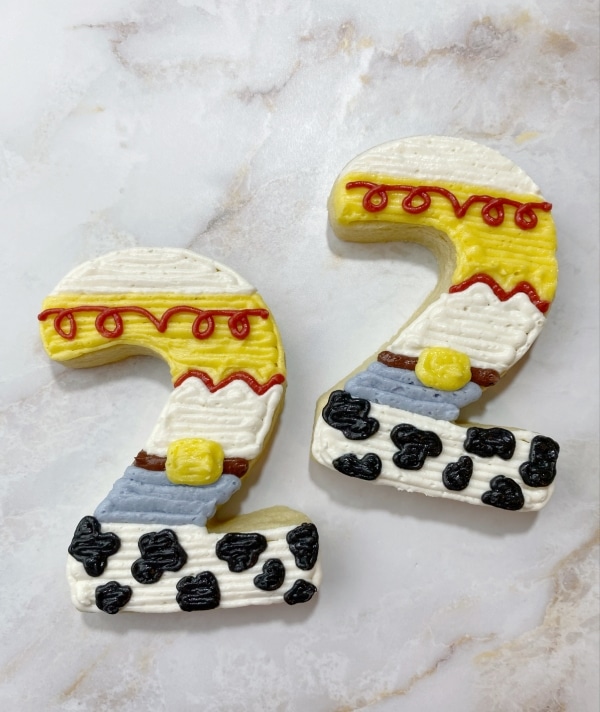
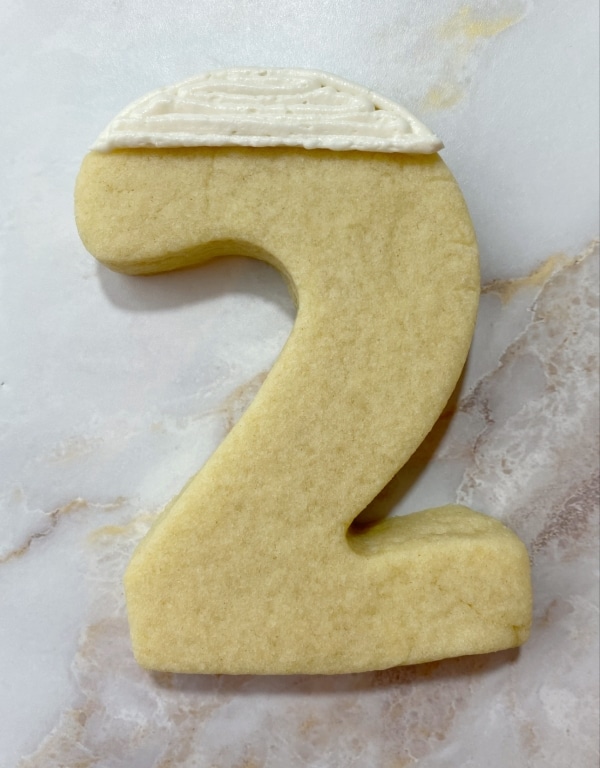
- Attach the tip #2 to the undyed/white bag of buttercream and outline and fill in the top part of the two. Complete all of step one for each “2” shaped cookie before moving to the next step.
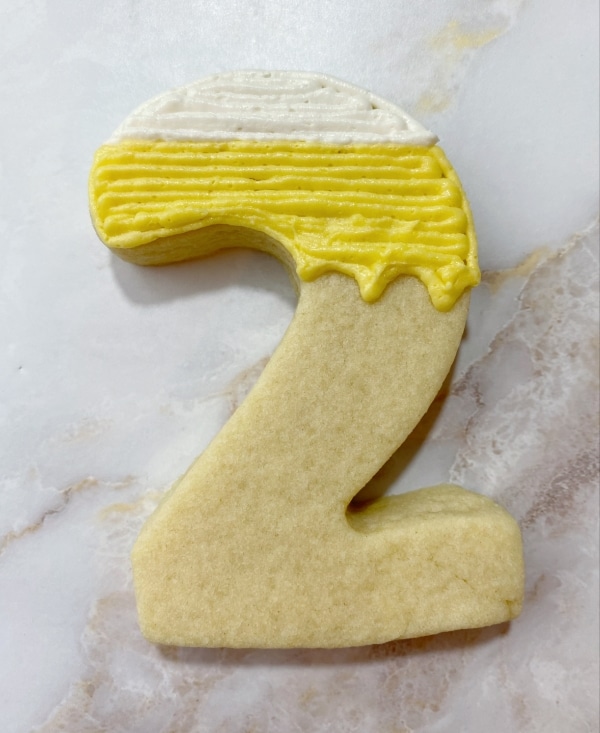
- Remove/rinse/dry the tip #2 from the white bag of buttercream and attach it to the yellow bag of buttercream. Outline and fill in the rest of the top of the “2,” creating a scallop edge at the bottom.

- Attach the PME 1.5 tip to the rust red bag of buttercream. Pipe Jessie’s shirt detail on the yellow frosting and under the scallop edge. Complete steps 2 & 3 before moving to step four on all of the “2” shaped cookies.

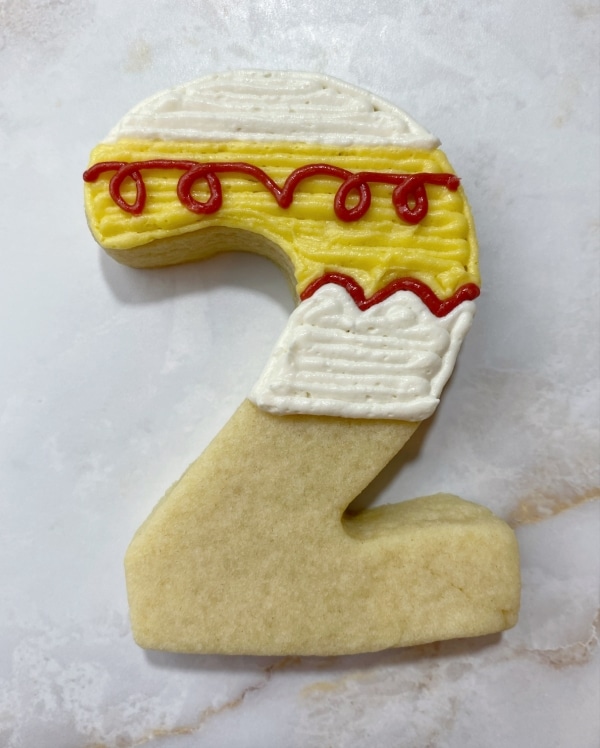
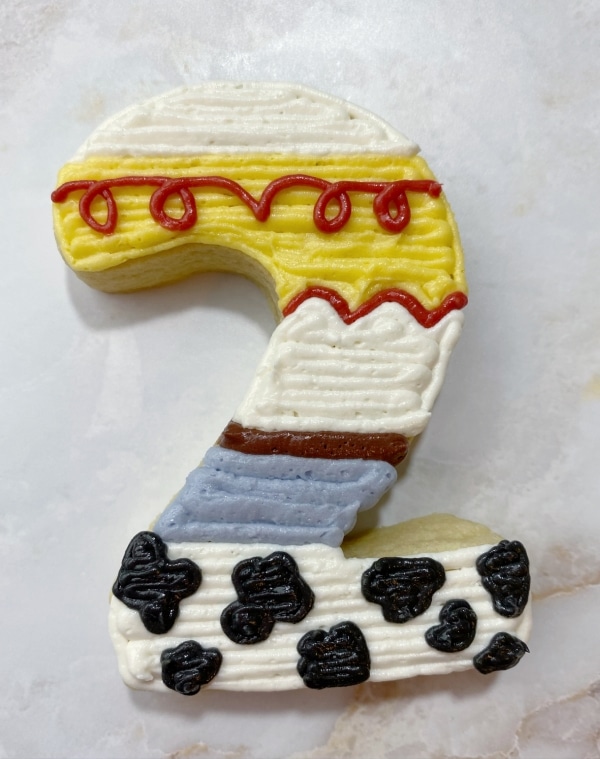
- Remove/rinse/dry the tip #2 from the yellow frosting and attach it to the white frosting. Outline and fill in the upper half of the middle portion of the “2” shape.
- Attach the tip #4 to the brown frosting and pipe a line underneath the white frosting for Jessie’s belt. Complete steps 4 & 5 on all of the “2” shaped cookies before moving to step six.
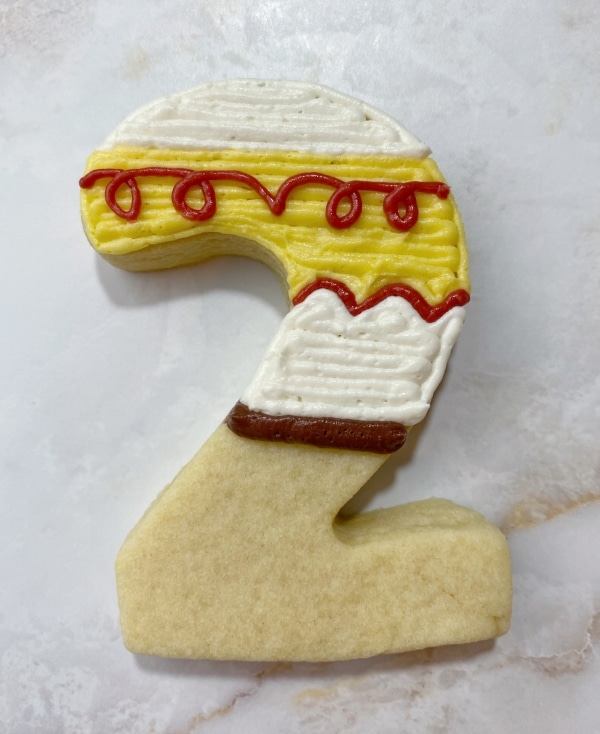
- Remove/rinse/dry the tip #4 from the brown frosting and attach it to the blue frosting. Outline and fill in the bottom half of the middle of the “2” shape.
- Use the white frosting, still with tip #2 attached, to outline and fill in the remaining part of the “2” shaped cookie.

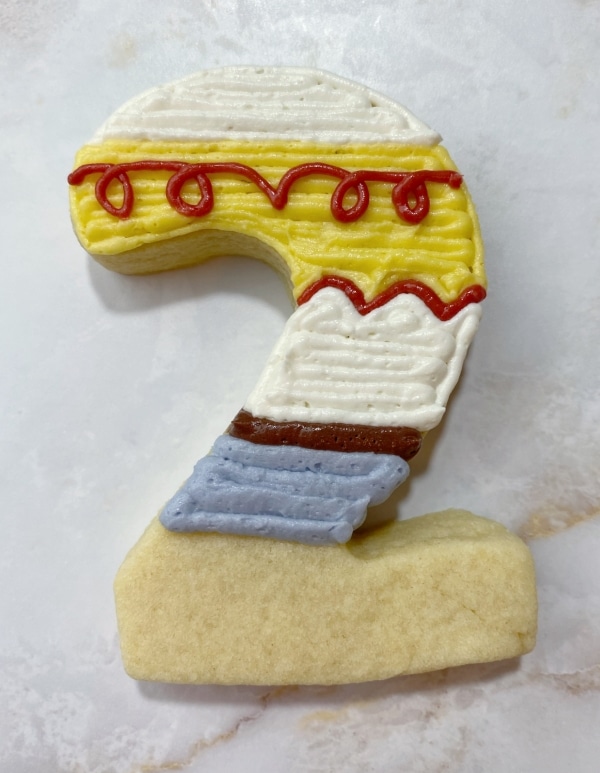
- Remove/rinse/dry the tip #1.5 from the rust red bag and place it onto the black buttercream bag. Outline and fill in small cow print shapes over the white frosting on the bottom part of the “2” shape.

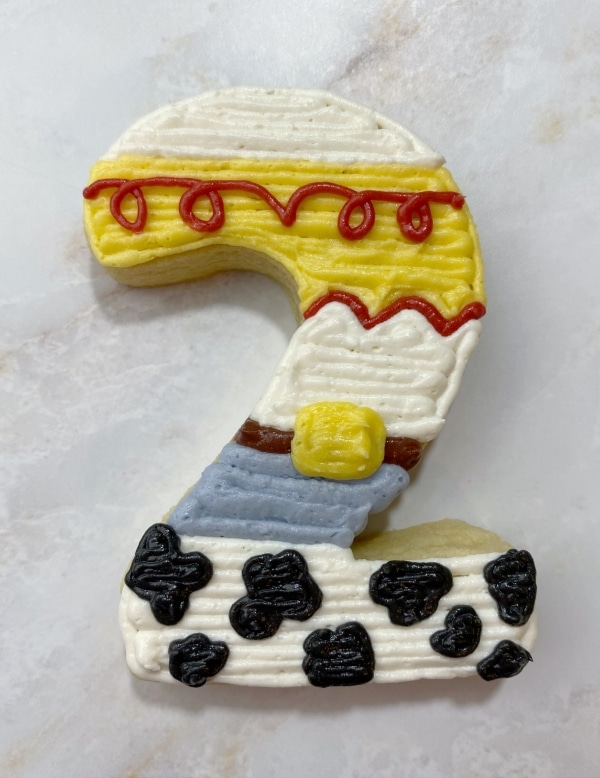
- Lastly, remove/rinse/dry the tip #2 from the white frosting and attach it to the yellow frosting. Pipe in Jessie’s belt buckle.

Aren’t these just the cutest Toy Story cookies? I love the pastel Toy Story birthday party trend that’s been happening lately.
Of course, if you want to go the traditional, primary color Toy Story theme, just swap the shades of buttercream for their brighter, more saturated colors. Your cookies will look amazing!
If you want to make the cupcakes like I did for my daughter’s party, you’ll find them to be very similar to the cookies. I made a cream cheese frosting, dyed some of it yellow, some rust red, some black, and left some undyed.

I just used the palette knife to spread the frosting onto the cupcakes and then used the piping tips to pipe Jessie’s shirt pattern and pant pattern onto the cookies. So easy and so complimentary to the Toy Story cookies.
I’d love to know in the comments below, have you done a Toy Story party? Do you have one coming up?
If you want to package your Toy Story cookies, check out my post that goes over how to package buttercream sugar cookies.
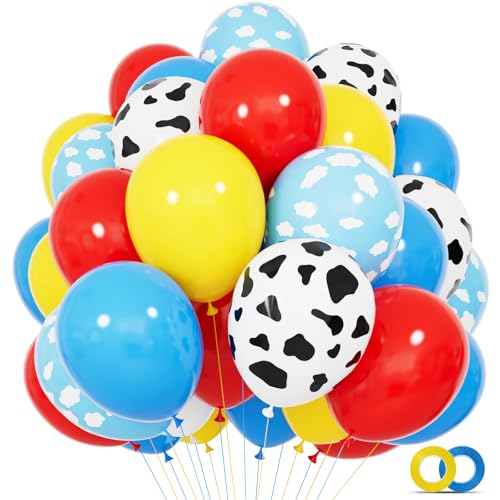
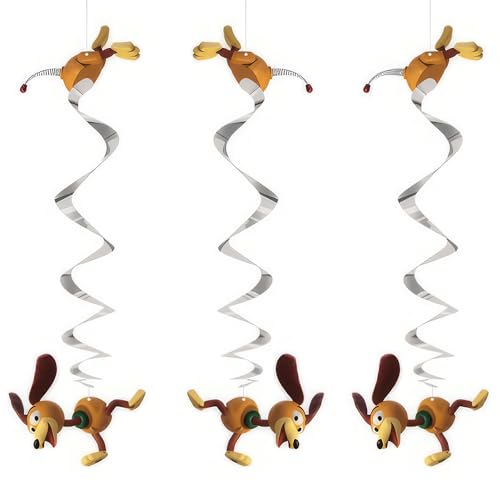
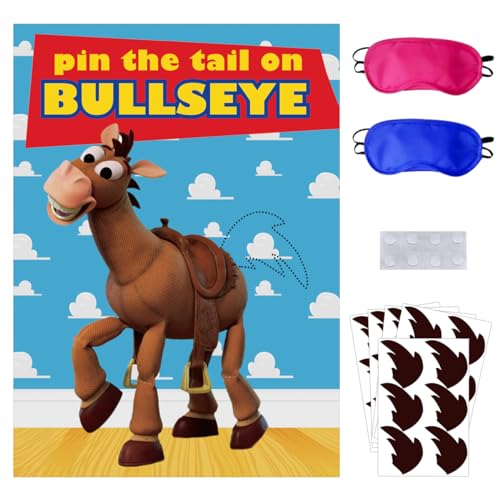
Pastel Toy Story Birthday Party Decorations
A Toy Story birthday party is so fun to decorate. Find some balloons, streamers, tabletop confetti, and a fun background and you’re all set!


Save the Tutorial for These Toy Story Cookies
Use the image below to pin this tutorial for pastel Toy Story sugar cookies to your Disney, party, or birthday board on Pinterest. Alternatively, use any of the social share icons on the top of the page to share it to your favorite social media site.