How to Make Unicorn Sugar Cookies with Buttercream Icing
75 - 75Shares
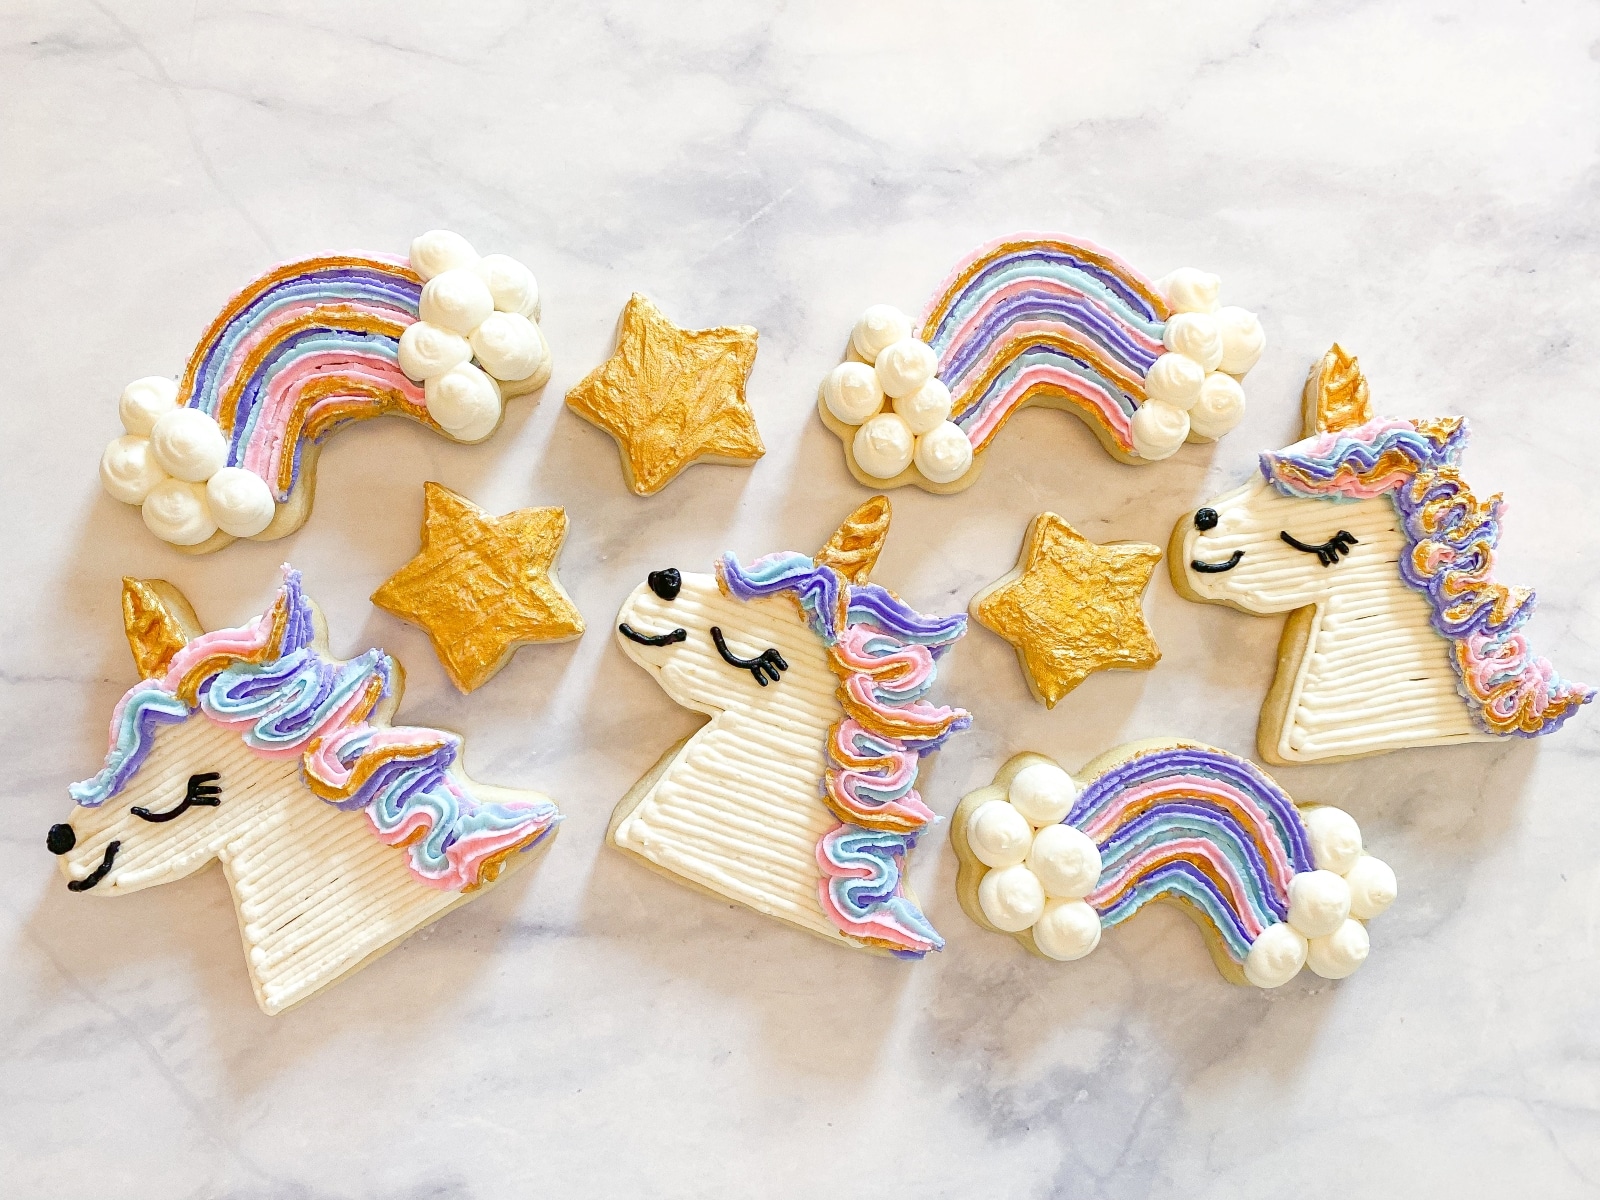
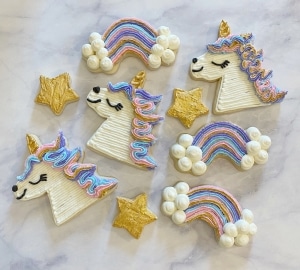
Unicorn birthday parties sure are popular right now. They really have been for quite some time, maybe since the Lisa Frank days? It seems appropriate that I’d create a fun birthday set for unicorn sugar cookies to share with you.
I decided to add some fun gold touches to the cookies using luster powder, too. This really sets the unicorn cookies apart from all the other unicorn birthday parties you’ve probably been invited to this year.
Of course, these decorated cookies are cute without the gold, if you want to skip that step. Painting on cookies is just so relaxing to me. I’d invite you to try it if you haven’t ever done so! I promise it isn’t difficult.
Follow along for the step-by-step video tutorial for decorating these cookies as well as a video tutorial!
*This post may contain affiliate links, which means I may receive a commission, at no extra cost to you, if you make a purchase through a link. Please see my full disclosure for further information.*
Skip to
- Part 1: Gathering your Supplies for the Unicorn Sugar Cookies
- Part 2: Baking the Cookies and Setting up Your Icing Bags
- Part 3: The Tutorial for How to Make Unicorn Cookies
- Part 4: Decorating the Unicorn Birthday Party
- Part 5: Frequently Asked Questions About Buttercream Decorated Sugar Cookies
- Save the Tutorial for Decorating Unicorn Cookies with Buttercream
Part 1: Gathering your Supplies for the Unicorn Sugar Cookies
To make these unicorn sugar cookies, perfect for a unicorn birthday party theme, you will want to gather:
- 3 Icing bags
- 1 Coupler
- One Wilton tip #2, tip #4, tip #10, and tip #16 – buy these individually at a craft store or purchase this kit that I use
- Gold Luster Powder from Fancy Sprinkles
- Small paint brush
- Vodka, if you don’t want a ton of vodka at home you can get one of those airplane mini bottles (50 mL)
- Unicorn Head & Rainbow Cookie Cutter Set as well as a small star cookie cutter, I used the one in this set
- Gel food dye for buttercream frosting in black, white, pastel pink, pastel blue, and pastel purple – find my crusting buttercream icing recipe here
- Sugar cookie dough – find my no spread sugar cookies recipe here
- Butter knife and plastic wrap
You may be asking, “What are couplers?” Couplers allow you to change your tips on your icing bags. Check out my page, Getting Started: Learn How to Decorate Buttercream Cookies, to learn how to do this. Essentially, you will attach a coupler to each icing bag. When you need to attach a tip, just make sure to rinse out the previous color from the tip with hot water. Purchasing a set of couplers is pretty affordable on Amazon: 4 Count Wilton Coupler Set.
Part 2: Baking the Cookies and Setting up Your Icing Bags
- Roll, cut out, and bake your sugar cookies according to the recipe. I like to do 4 of each of the 3 designs for each dozen cookies made.
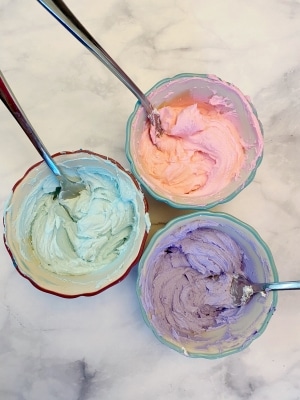
- Make your buttercream icing and separate it into six bowls. You won’t need much black frosting, as that is just used for the unicorn’s face. Divvy up the other bowls as equal to each other as you can. Mix together the pastel pink, blue, and purple frosting shades. I prefer to use the Wilton gel food dye since gel is more vibrant (i.e. more cost effective because you use less) than liquid and doesn’t change the consistency of your frosting. Leave two bowls white, or undyed.
The pretty pastels! - Set up your icing bags as follows:
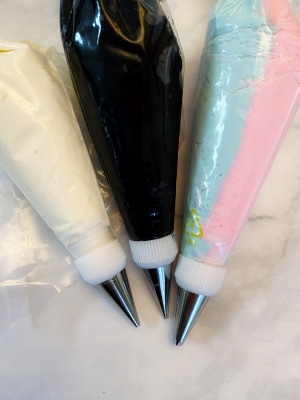
- Place the black frosting into an icing bag with the tip #2 in it.
- Place one of the white bowls of frosting into an icing bag with a coupler. If you don’t know how to do this, just hop over to my Getting Started: Learn How to Decorate Buttercream Cookies page. Attach the tip #4 to the coupler.
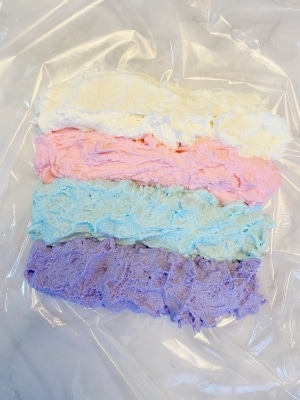
- To create the rainbow bag of frosting, lay out a piece of plastic wrap onto the counter. Place each of pink, purple, blue, and white frostings into rows on the plastic wrap. They don’t need to be perfect rows and you can use forks or spoons to help.
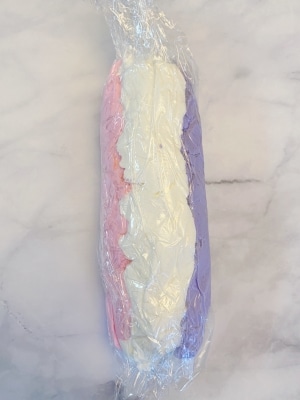
- Fold the plastic wrap in half so that the frosting comes together in a log, similar to rolling sushi. Twist together the sides and then cut one side off. Prepare an icing bag with a tip #16 in it. Place the rolled icing, with the plastic wrap, into the icing bag with the cut open side down. Squeeze the frosting so that it loads up the tip.
*Note, you only need a coupler on the white frosting. I just habitually add couplers to all of my icing bags…
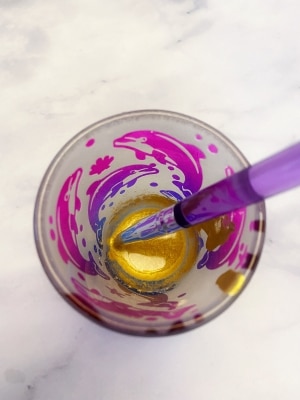
- To create the luster powder paint, mix equal parts luster powder with vodka. I used a shot glass and did a quarter teaspoon each at a time.
Part 3: The Tutorial for How to Make Unicorn Cookies
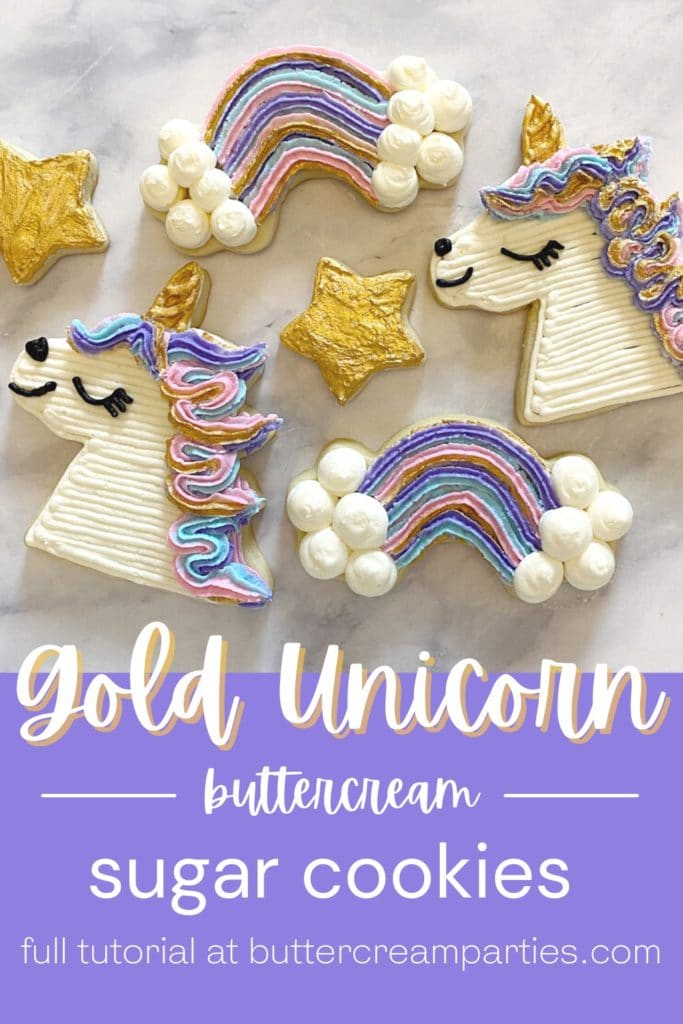
Check out the video here to see how to make these unicorn birthday party cookies. Then, check out the step-by-step photo series tutorials for each decorated cookie below.
How to Frost Unicorn Sugar Cookies
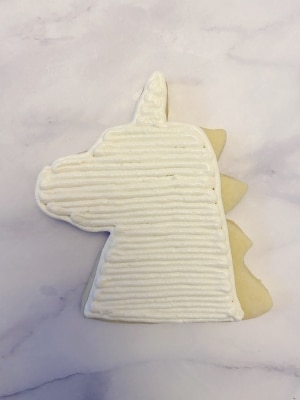
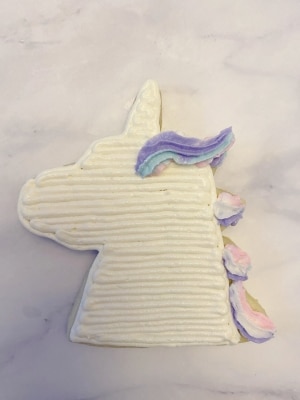
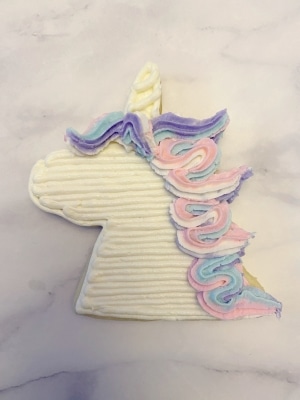
- Using the white icing with tip #4 attached, outline and fill in the unicorn cookie. Don’t worry about going all the way to the edge with the hair.
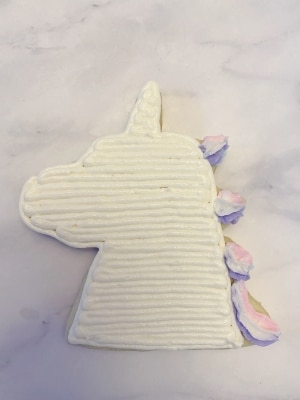
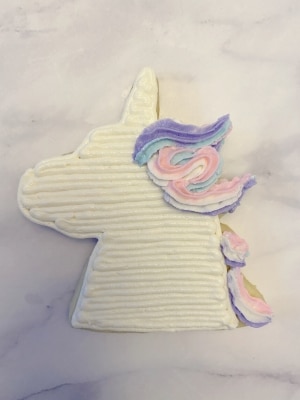
- Use the pastel rainbow frosting bag with the tip #16 in it to pipe out the rest of the cookie. This allows the height to be more even for the rest of the hair.
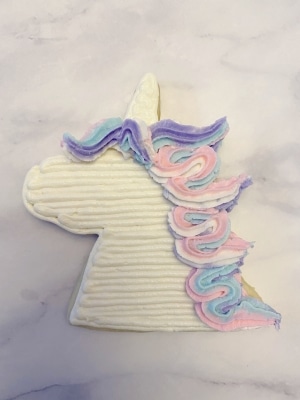
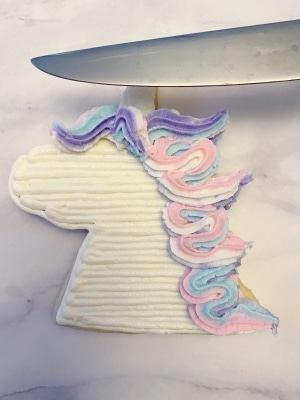
- Pipe out the rest of the hair. You can follow the steps I did but basically, pipe “S” shapes throughout the unicorn’s mane. Make sure to rotate the bag of frosting between “S” shapes so that each color is represented.
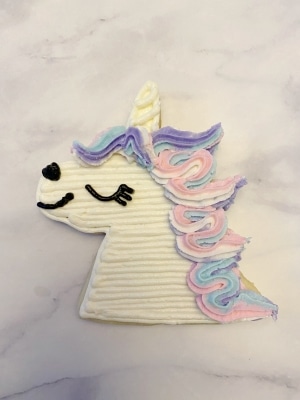
- Using the butter knife, flatten out the unicorn’s horn. It doesn’t need to be perfect.
- Using the white frosting with tip #4 still attached, outline the horn and then draw two curved lines onto it.
- Use the black frosting with the tip #2 to draw the unicorns nose, smile, and eyes, complete with eyelashes of course.
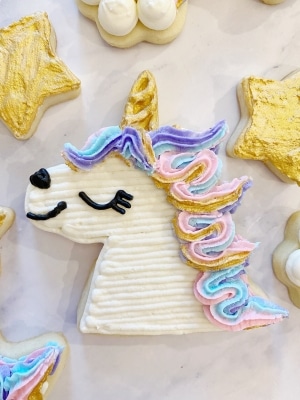
- Allow the unicorn to “crust” for 30 minutes. In other words, the top layer of frosting should harden. Then, paint the horn and the white parts of the unicorn’s mane with gold luster powder paint.
Beautiful! I want those shiny gold highlights in my hair now.
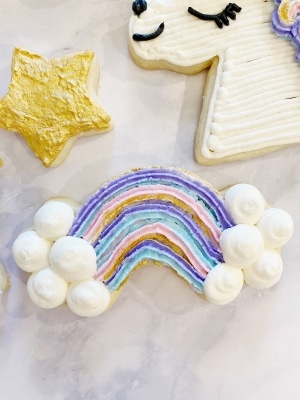
How to Frost Rainbow Cloud Cookies
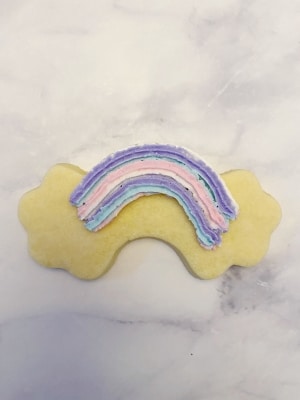
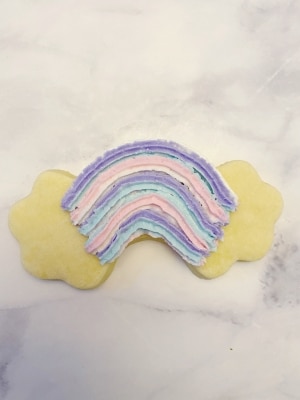
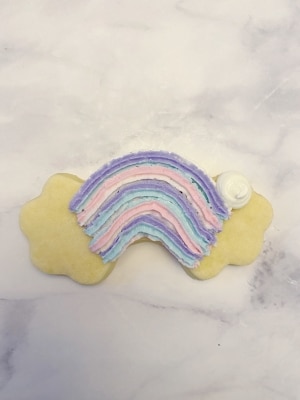
- Using the pastel rainbow frosting bag, pipe out the rainbow curves. You want to go a bit into the cloud area to make sure the cookie will be properly covered in the end. As you pipe out the curves, rotate the frosting bag so that each color gets represented.
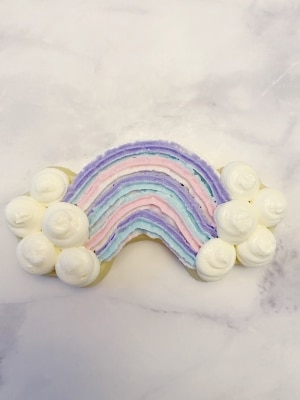
- Use the white bag of frosting with the tip #10 attached to squeeze out clouds of frosting. You can do a little swirl at the top to get rid of points or you can use the butter knife to flatten them.
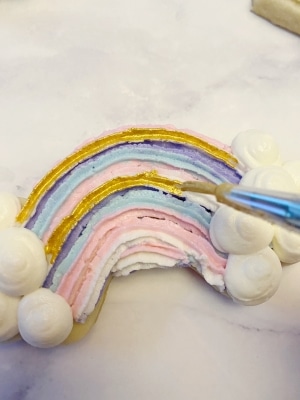
- Allow the cookie to dry for 30 minutes. Then, use the luster powder paint to paint in the white areas of the rainbow.
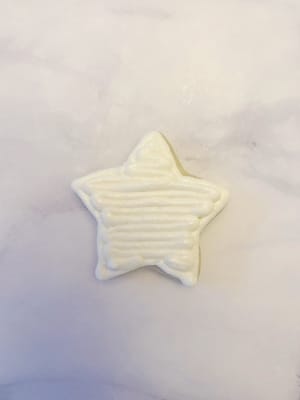
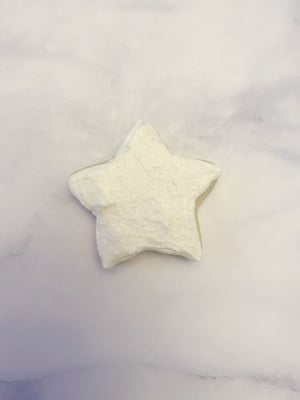
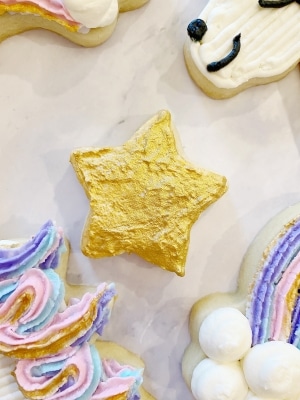
How to Frost Gold Star Painted Cookies
- Using the white icing with tip #4 attached, outline and fill in the mini star cookies.
- Use the butter knife to smooth out the cookie. If you want a more smooth cookie, check out my post for how to smooth cookies. I didn’t mind the texture from using a butter knife for these mini stars.
- Allow the frosting to harden for 30 minutes and then paint the gold luster powder paint onto the cookies.
Isn’t this set so fun and cute? These cookies would definitely be the cutest table decorations. If you end up making them, I’d love to know in the comments below. You can also tag me @buttercreamparties on Instagram! I’d love to see the unicorn party details.
Part 4: Decorating the Unicorn Birthday Party
It’s so fun to decorate an unicorn birthday party. Grab some balloons, streamers, tabletop confetti, and a backdrop and you’re good to go!
- PERFECT UNICORN BIRTHDAY GIFT SET--Our unicorn party supplies has a gold unicorn headband, pink satin sash. The perfect unicorn set makes you become the beautiful little unicorn in everyone’s mind at the birthday party.
- GOLD GLITTER UNICORN HEADBAND--Gold horn, glitter ears with flowers headband. Perfect for you and is sure to bring a smile to her face. Not only for birthday parties, but also for everyday wear, pretend play, play dates, photo props, and more. Funny unicorn party favors.
- ELEGANT PINK BIRTHDAY SATIN SASH--Exquisite satin sash with the design lettering of a golden BIRTHDAY. You are the only protagonist in the party. We hope that unicorn party supplies will bring happy moments to you and your family.
- HIGH QUALITY MATERIAL-- Our handmade unicorn headband is made of high quality fabric materials same as the delicate satin sash with gold lettering unicorn design making this the ideal combination for you.
- AFTER SALES SERVICE--If the unicorn birthday party set has any problems, you can contact us directly, we will reply and solve the problem as soon as possible.
- Size:43*50CM
- Material:Aluminium Foil
- Package:Opp Bag
- Function:Party Decoration
- Content:1 dinosaur balloon+BLOW UP STRAW
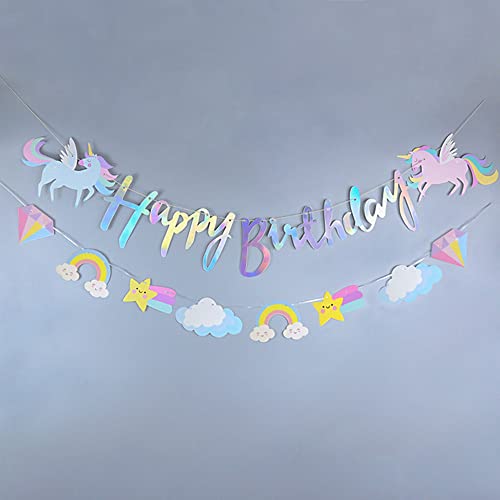
- Package Includes: 1 x Unicorns Happy Birthday Pennant banner. These adorably cute Unicorns themed banner are the perfect addition to many celebration Unicorns Birthday Party Supplies, The overall design is perfect for the ambience of a Unicorn-Themed Birthday Party Supplies Pennant Banner, they can add a highlight to your tea table and create unforgettable memories for your guests.
- Premium Material & Perfect Size: This Happy Birthday Banner are made of high-quality cardstock, sturdy and reusable. Birthday Banner includes 15 pieces of cards and 2 ribbons (each ribbon is approx 8.2 ft). Each banner card has a size approx 7’’×5.5’’.
- Need to Assemble: Our Unicorns Happy Birthday Banner are pre-cut and pre-folded, You need to string these Happy Birthday theme elements onto a hanging rope. You just hang them to the perfect place where you like, also folds easily for storage.
- Multiple Occasions: The Unicorns banner is great for Unicorns Party Supplies. The Unicorns Happy Birthday banner suitable for any deck, patio, porch, balcony backyard, lawn , even yard, outside porch and garden. Will highlight your gathering and leave a deep impression on your guests.
- ❤【TATTOOS FOR THEME PARTY IDEAS】: Glitter Temporary Tattoos for Girls,add a touch of colorful to your arms, shoulders, legs, and other body parts with realistic full-color, a series of funny style to provide big fun for both children and adults alike!
- ❤【QUALITY AND QUANTITY】: You will get 9 sheets (4.73X2.95"in) temporary tattoos! Each tattoo is made of standard quantity material and green paper, which is safe and non-toxic. These standard materials do not cause skin allergies in kids.
- ❤【LONG-WEARING AND VIBRANT COLOURS】: Safe for kids, Waterproof and sweat-resistant. Easy to apply and remove. Just place face down on skin and dampen with water. Hold it down for about 15 seconds, then remove as you see a glitter tattoos look!
- ❤【COLORFUL GIFT FOR GIRLS】: Waterproof and sweat-resistant. These beautiful tattoos typically last about 3-6 days. Can be removed with oil, makeup remover, or by scrubbing off. Safe to wear at the beach or in the shower or pool.
- ❤【MULTIFUNCTION USES】: Suitable for every kids and adult,You can apply them to your body or some smooth objects,for example, glass,tile,stationery,paper,stainless steel,plastic,present box,mobile phone shell,car.
- NON-TOXIC INEDIBLE MATERIAL: The inedible golden unicorn horn and ears of unicorn cake topper are made of soft felt, sturdy and non toxic, suitable for kids to use. Stake is made of food grade plastic which is safe on cake.
- UNICORN PARTY SUPPLIES INCLUDES: One 5.8" gold unicorn horn, a set of ears, 7 flowers to match your unicorn cake. Plastic stake makes it easier and safe to decorate unicorn cake. Four pairs eyelashes makes unicorn cake looks more vivid. Our cake topper works best on cakes up to 12 inches.
- HANDMADE UNICORN CAKE DECORATION: Unicorn Cake Topper is hand-crafted with care, quality assurance; make your cakes or snacks look as yummy as they taste.
- CATCHING YOUR EYES: The unicorn cake topper set can decorate your cakes well, they catch your eyes on the first sight.
- OCCASION: The girls unicorn party favors cake topper is perfect choice for cake decorations of graduation, wedding, birthday, baby shower, bridal shower, Mardi Gras, St. Patrick’s Day, Mother’s Day, Children’s Day, Cinco de Mayo, Thanksgiving, Halloween etc. Also can be used as funny appetizer picks, fruit picks, party food picks, cupcake picks for Christmas, cupcake picks for valentines and kid birthday cupcake picks.
- Contents of the package:The White Horse Unicorn birthday banner includes different sizes of letters "Happy Birthday" rope 9.8 feet long, 1 unicorn head, 2 cute white unicorns, decorated at the party, adding a childlike and dreamy feeling to the party. This banner can be used as one of the main decorations of the party.
- Easy to use:You can easily assemble the unicorn birthday banner, no other tools are required, you can enjoy the DIY process without too much trouble, and can be hung at the entrance of the birthday party, on the food table or candy buffet, on the wall, or above the party table, absolutely a beautiful backdrop for your party.
- High quality materials:Unicorn birthday banner using high-quality cardboard, environmentally friendly glitter, fine workmanship, do not fade, no smell, durable. Whether indoors or outdoors, these unicorn birthday banners create a fantastic scene for you and your friends and family to enjoy the fun of the party.
- The perfect decoration:The White Horse Unicorn Birthday Banner is suitable for all ages, whether it is a child's birthday party or a themed party for adults, Unicorn birthday party supplies and decorations can help you create a party atmosphere full of fun and dreams. The White Horse Unicorn Birthday banner is suitable for baby parties, unicorn themed party decorations, room decorations, photography props, etc.
- Customer Service:We have every confidence in the quality of our products. You will like them. When you receive the package, please check that the items are complete. If you have any complaints after receiving the Unicorn banner, please contact us and we will give you the most satisfactory answer. We will provide you with the perfect shopping experience.
- Package include: the package includes 1 piece of "Happy Birthday" banner, 12 pieces of hanging swirls and 6 pieces of honeycomb centerpieces; you can combine them to create the brilliant party that you want.
- Premium Material: these unicorn birthday party decorations are made of high quality cardboard material which make them durable and reusable; the printing is clear and not easy to fade; chic design will make your unicorn theme birthday party more attractive.
- Exclusive design: the vibrant colors and cute fonts will catch the eyes; the unicorn decorations for birthday party are designed with various charming elements, such as unicorn, rainbow, castle, diamond and so on which will bring unforgettable memory for you.
- Easy to set up: just need to install the cardboard and each card is pre-drilled; when you open the package, please string “happy birthday” card together to get a birthday banner, string the spiral onto the card to get beautiful spiral hanging swirls, and the honeycomb centerpieces can be easily assembled; because of its easiness and fast installation, it's a great time saver for the rest of party activities.
- Applied in a Variety of Occasions: our unicorn hanging swirl decorations adopt different unicorn patterns, and it is appropriate for girls' birthday parties, unicorn-themed parties and so on; you can easily use the overhead hook to hang it anywhere you like, like ceilings, doorways, windows, backyard branches... it will bring a whole new feel to your party.
- Package includes: 60 pieces balloons, include 25 pieces in white unicorn pattern, 25 pieces pink unicorn pattern,10 pieces rose gold confetti balloons, enough quantity meet your decoration needs
- Material: made of latex, non-toxic and safe for use, usually inflatable balloon can last more than 7 days
- Cute design: printed with unicorn pattern, make your party decoration more impressive and interesting
- Measurement: inflatable balloon can be blow to approx. 12 inches, suitable size for most party decoration needs
- Wide applications: you can use them in unicorn party, and other party like birthday, baby shower, weddings and other occasions you like
- 【Unicorn Party Decorations】This birthday banner consists of cartoon unicorns, clouds, stars, rainbow, diamond patterns and happy birthday letters pendants, beautiful and eye-catching
- 【Happy Birthday Party Decorations】Unicorn hanging banner is an ideal party decoration for baby shower and birthday party.This happy birthday party decorations set can be hung on walls, branches, ceilings, dessert tables, and other party spaces
- 【 Fabric & Size】 The unicorn banner is high quality, lightweight and washable, tear-resistant and durable to be reused. The birthday sign measures 10.4X7.2inch(26.5X18.5cm), a decent size for birthday party decorations and photos
- 【Add Atmosphere】Add style to your party, it will make an eye-catching decoration for your party. And it can coordinate with other unicorn themed party supplies and cartoon party decorations to create a completely party atmosphere
- 【Easy to Use】Our unicorn theme happy birthday banners are easy to set up, just connect all parts with white strings. Helps you save time for other birthday party planning activities.
Part 5: Frequently Asked Questions About Buttercream Decorated Sugar Cookies
Yes, you can! I use self-sealing bags and wait until the cookies have completely crusted. For more information on how to successfully package buttercream iced cookies, check out my detailed post. I also include how to travel with these cookies as well.
The short answer is no. In fact, they store better if you leave them on the counter. The ratio of sugar to fat in a crusting buttercream recipe is high enough to be shelf stable. If you want your cookies to be safe from outside summer heat, though, you may consider storing them in an ice chest until it’s time for dessert. Put them into an air tight container and lay the cookies into single layers.
This one really depends on the texture of your cookie. If you have mostly line work and not many petals/leaves/fur/etc. then it is easy to stack the cookies. Make sure they have been allowed to crust for at least 8 hours before stacking them. To test if they are ready, use your finger and put light pressure onto the frosting. If it feels hard, they can be stacked.
If you have floral or textured cookies, I’d wait to stack them until plating for the party. Of course, allow them to fully crust prior to doing so.
Save the Tutorial for Decorating Unicorn Cookies with Buttercream
I hope you were inspired to create your own unicorn sugar cookies with this tutorial! Use the image below to pin the tutorial to your Pinterest account for later. Alternatively, use the social share icons at the top of the page. Thanks for sharing!




These unicorn cookies were so much fun to make with my kids!
I’m so glad you enjoyed them!
I really enjoy how you make these buttercookies look easy! These unicorn design is great for kiddie parties too.
There’s an assumption that cookie decorating is hard, but it’s really quite simple with a little practice. I’m sure you could decorate these. I’m coming out with a free course soon, I’ll let you know when it launches!
I love to watch you decorate cookies. You are so talented. Perfect for a birthday party.
Thank you so much Gina!
Oh gosh these are super cute! They would be a hit at a kids birthday party 🙂
I’d love to attend a unicorn party with these cookies, so fun! Thank you!
These are super cute cookies, perfect for any unicorn lover!!
Thank you so much Cindy!