Camo Buttercream – How to Easily Decorate Camo Cookies with Buttercream
I’m here to tell you that camo buttercream is possible! You don’t need to go the royal icing route to create a camo cookie.
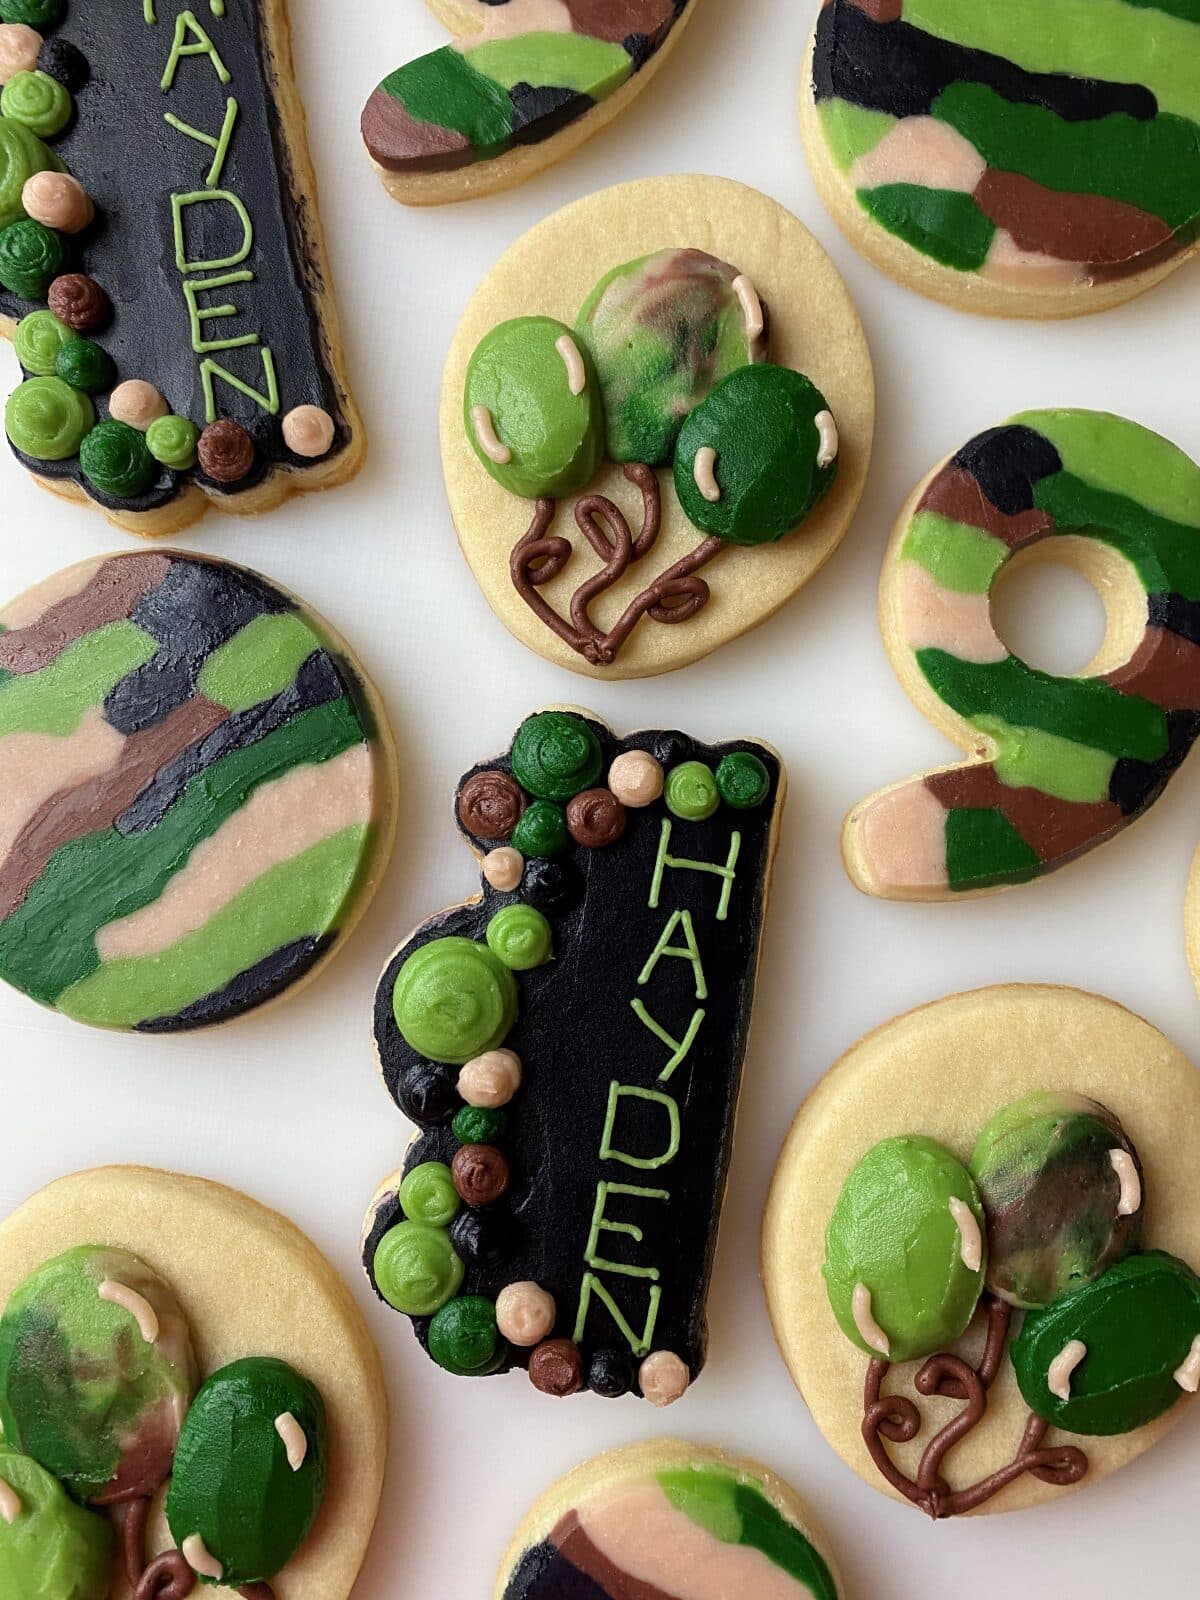
These buttercream camo cookies were requested by my nephew for his ninth birthday. And, as usual, I’m inviting you to learn how to make this set along with me.
I’ll be teaching you my fool-proof buttercream smoothing method and showing you both video and step-by-step photos of how to make these birthday cookies.
I have also included my buttercream sugar cookie recipe and my crusting buttercream recipe. Let’s get started!
This post may contain affiliate links to Amazon, which means I may receive a commission, at no extra cost to you, if you make a purchase through a link. Please see my full disclosure for further information.*
Skip to
Part 1: Gathering the Supplies for the Buttercream Camo Cookies

To decorate these buttercream camo sugar cookies, you will want to gather:
- 6 Icing bags
- At least one Wilton #4 tip, at least one Wilton #10 or #12 tip, and one PME 1.5 tip
- 6 couplers
- Circle cookie cutter, egg cookie cutter, birthday number cookie cutter, and balloon arch cookie cutter
- Black, brown, and green gel food dye
- Palette knife (I love this one for cookies!)
- Parchment paper & plastic wrap
- Ingredients for a crusting buttercream & sugar cookie dough – found below in recipe card
Part 2: Baking the Cookies and Setting up the Icing Bags
Use the recipe card below for the sugar cookie and buttercream frosting recipes.

Make your buttercream icing according to the recipe and separate it into five equal bowls:
-
-
- dye one bowl a deep green color
- dye another bowl a moss green frosting color or a light green color
- dye another bowl a light brown
- dye another bowl a dark brown
- and dye the last bowl black
-
Add each of these colors into their own icing bags with a coupler. You don’t have to add the tips yet but you can add some small round tips to help create the camouflage icing bag.
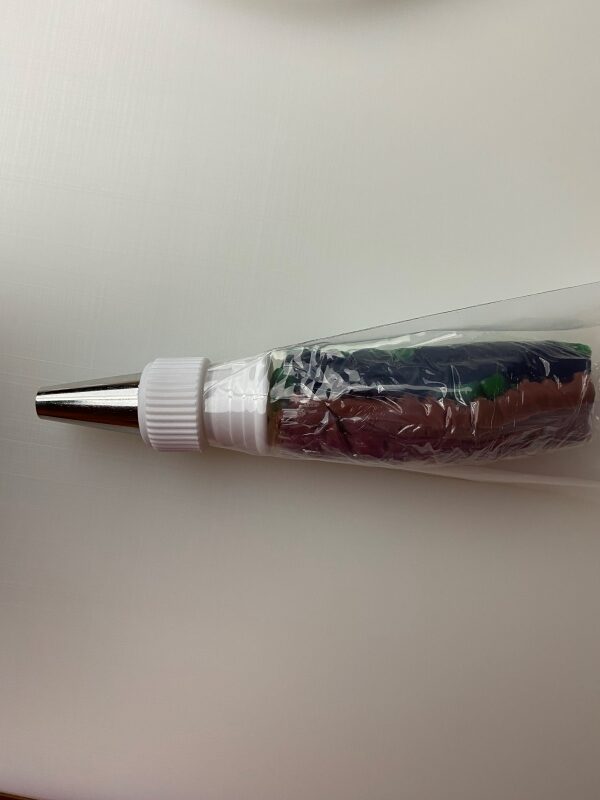
To create your camouflage icing bag, squeeze some of each color onto a piece of plastic wrap that it is about the length of an icing bag. I didn’t want too much black in case it muddied up the camo.
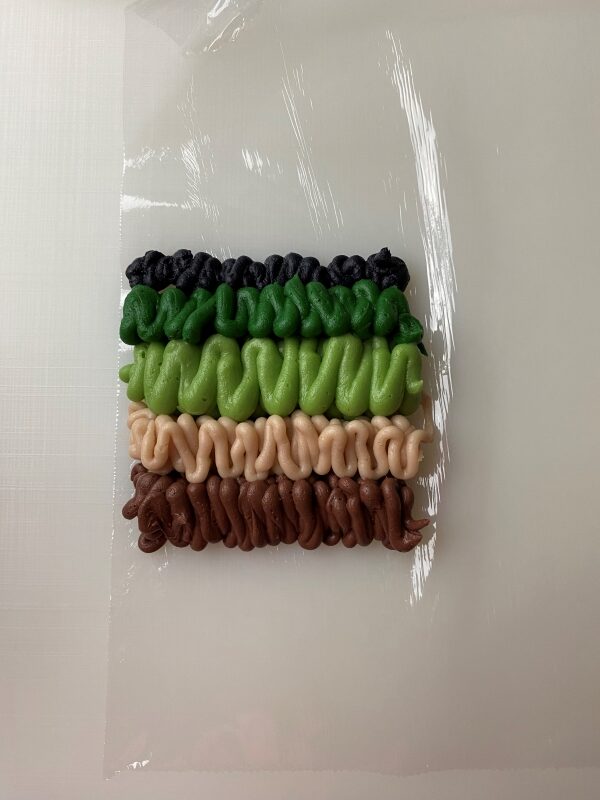
Roll the buttercream up in the icing bag into a log.
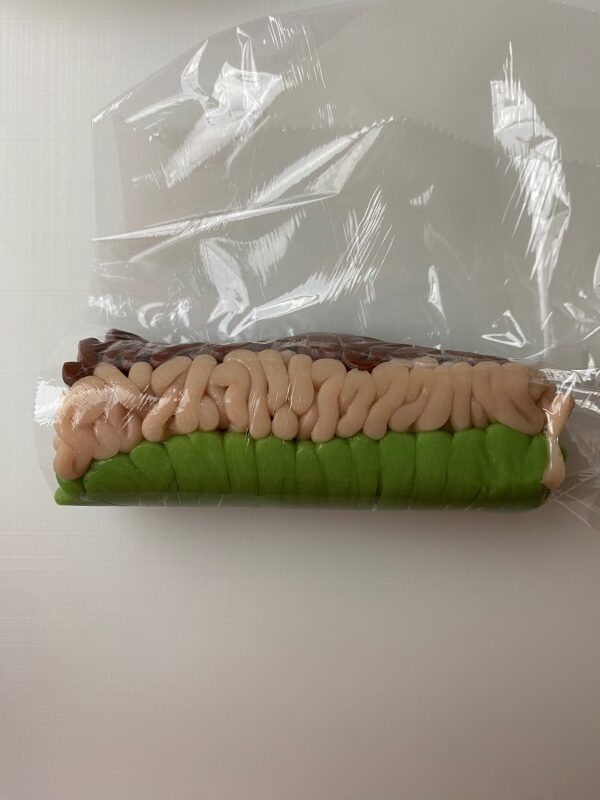

Then, add the rolled camouflage icing (still with the plastic wrap) into an icing bag with a coupler. You can then manipulate the icing so that it fills the icing bag shape.
Part 3: Decorating the Camo Cookies with Buttercream Frosting
Check out the video tutorial showing the overall process for decorating the buttercream camo sugar cookies then follow the step-by-step photo series tutorial below.
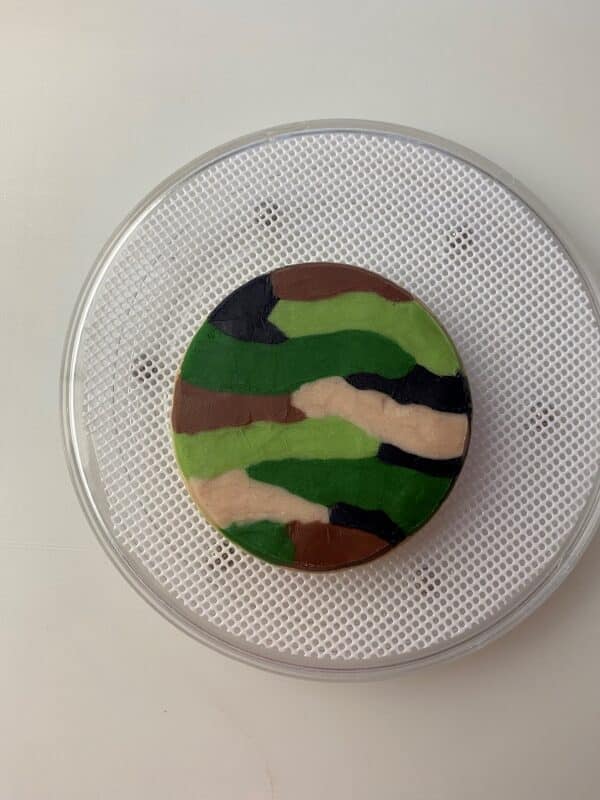
How to Decorate the Basic Camo Cookies with Buttercream
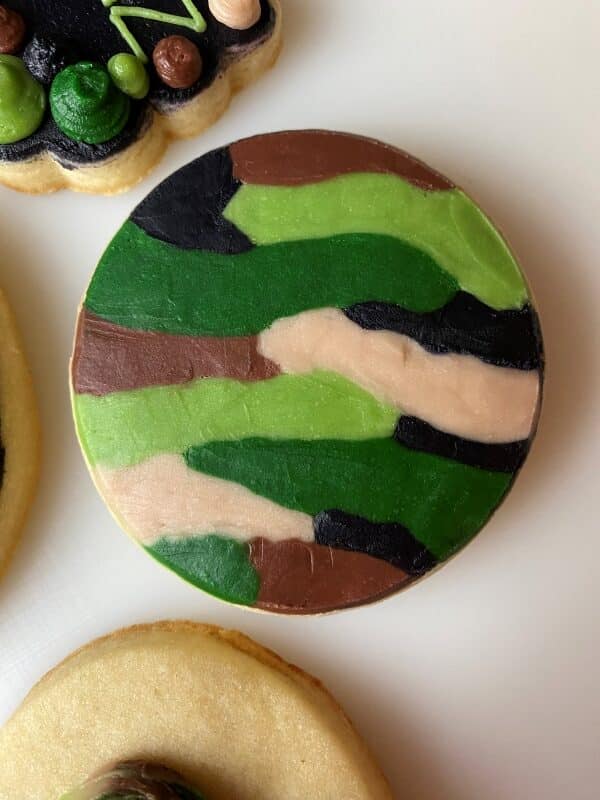
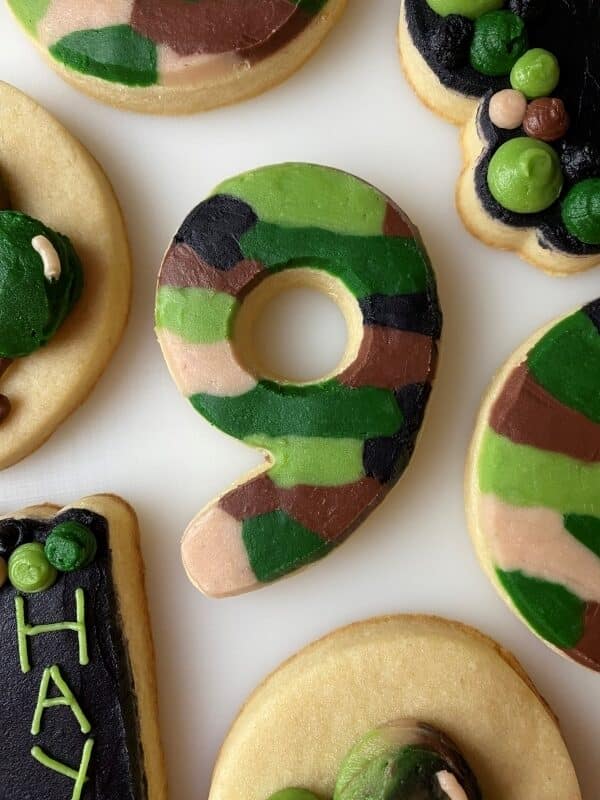
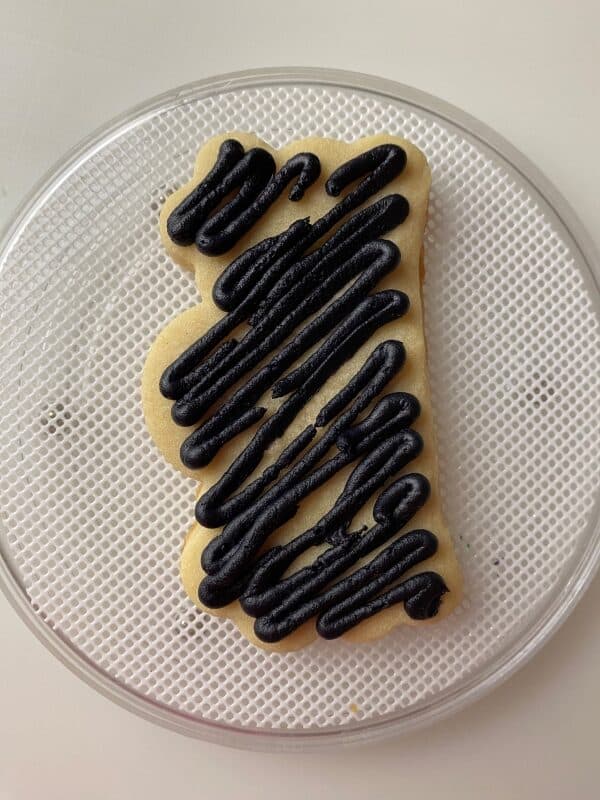
- Using the tip #4 on each of the frosting colors, outline and fill in camo stripes on the entire cookie. Do one color at a time to make it easier.

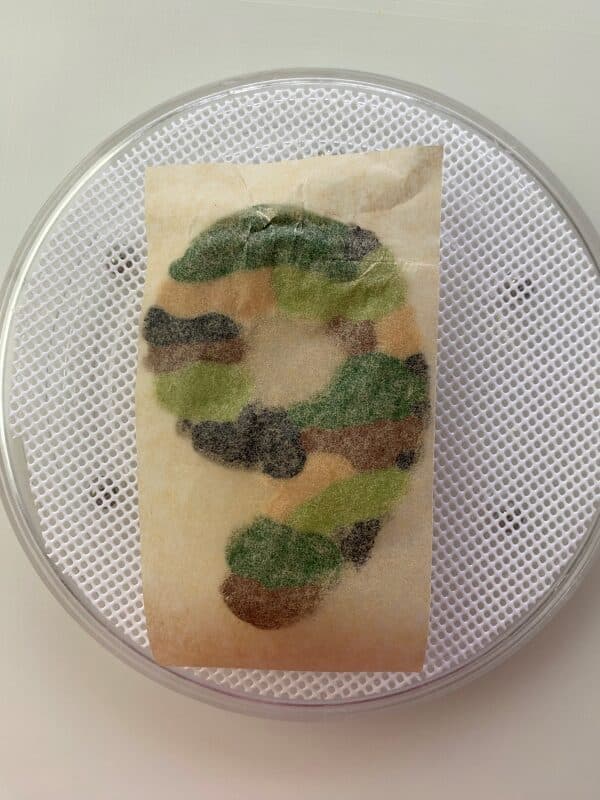
- Cut a piece of parchment paper to be slightly larger than the cookie. Then, lay the parchment over the cookie and press it into the frosting using your finger.
- Place the cookie into the freezer for ten minutes. While it is in the freezer, work on the other camo cookies. Once the ten minutes is up, remove from the freezer and then pull the parchment off.
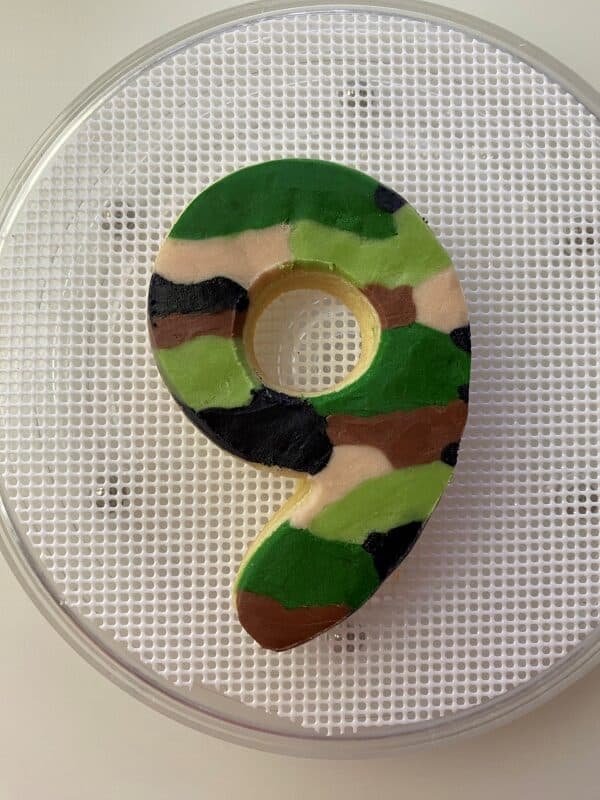
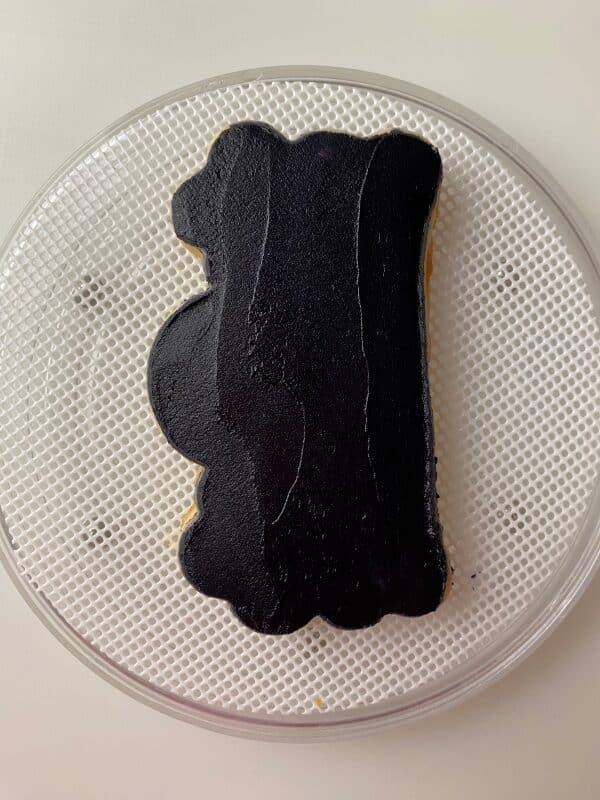
- Use the palette knife to smooth the colors, one color at a time. Make sure to wipe the knife between each color change to not transfer the colors.
- Use the palette knife again to clean up the edges of the cookie.
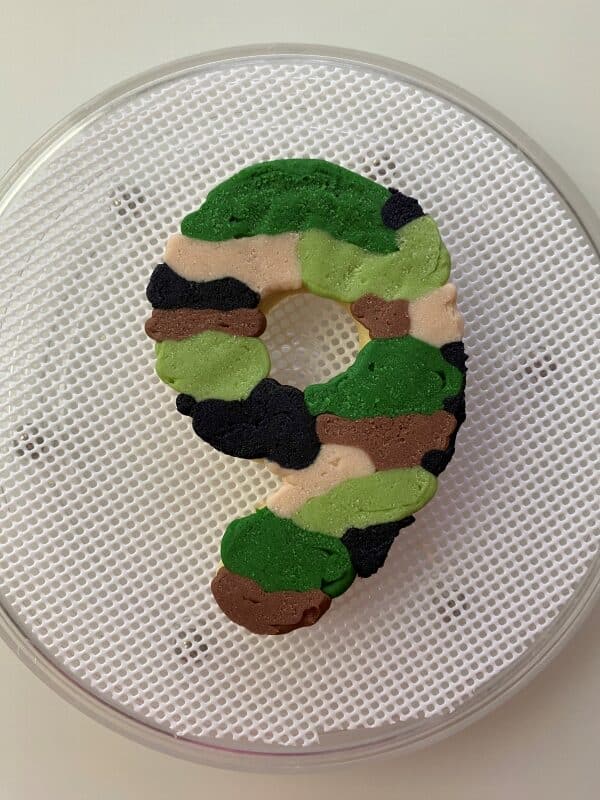
- Use the same steps above to make the camo birthday number cookies.


How to Decorate the Birthday Camo Cookies with Buttercream
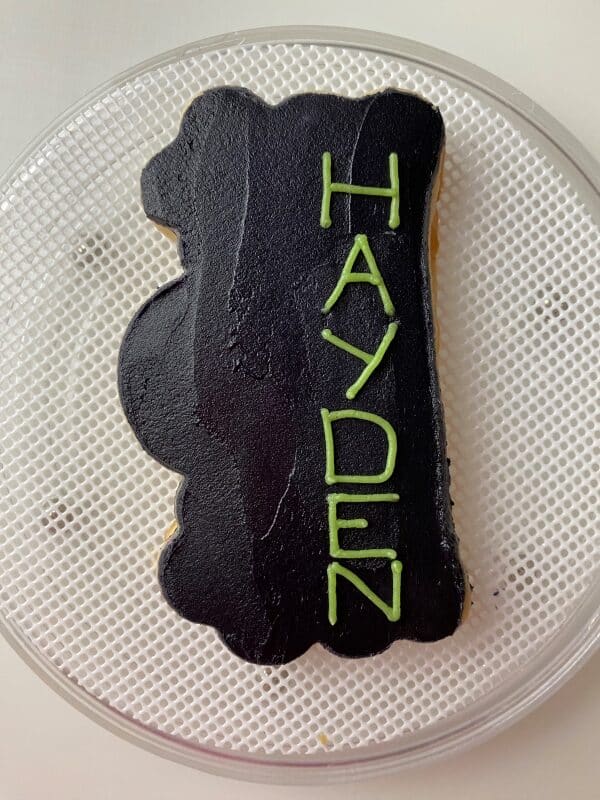
- Using the tip #4 on the black buttercream to fill in the balloon arch cookies.
- Smooth the buttercream with the palette knife & clean up the edges of the cookie if needed.
- Attach the PME 1.5 tip to the light green icing bag and pipe the birthday person’s name onto the cookie vertically.
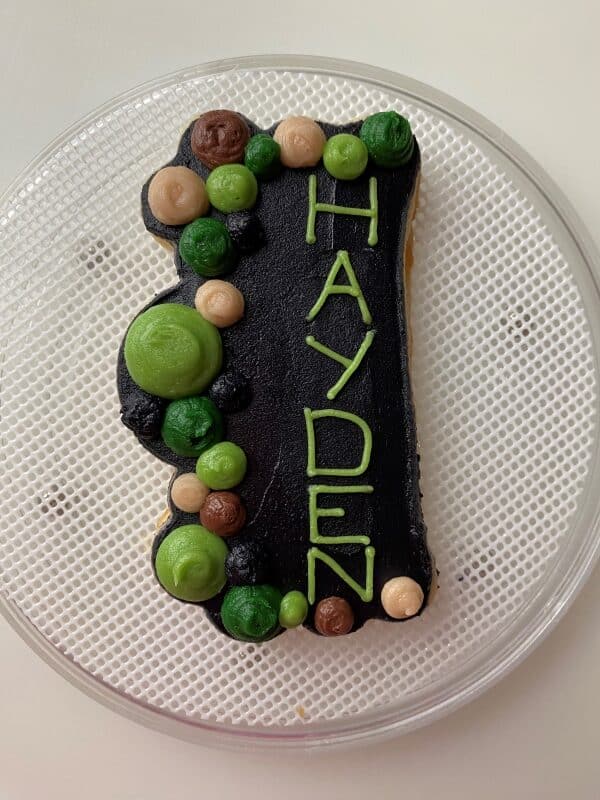
- Use a mix of the large (tip 10 or 12) and small (tip 4) to add balloon colors onto the cookie.
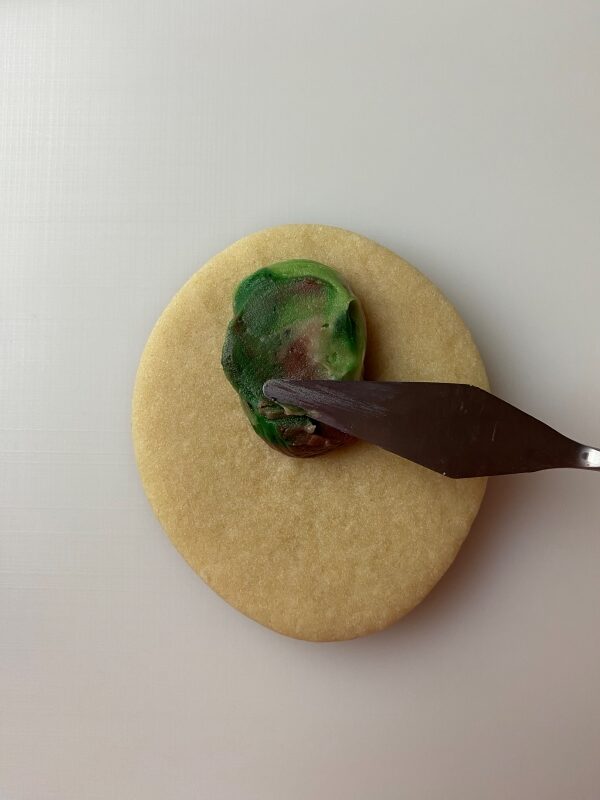
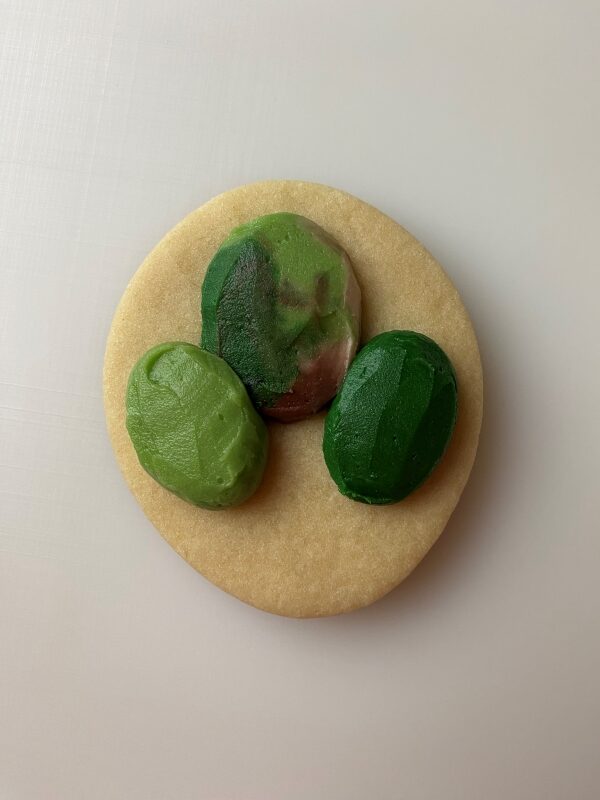
How to Decorate the Camo Balloon Sugar Cookies with Buttercream

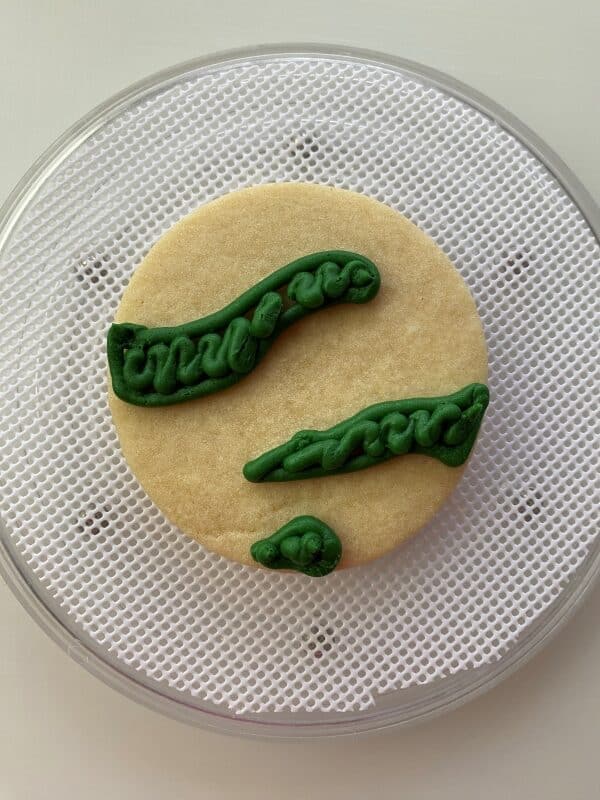
- Use the camouflage icing bag with the tip #10 or 12 to pipe a balloon shape near the top center of the cookie.
- Smooth the buttercream with the palette knife & shape the balloon if needed.
- Attach the tip #10 to the dark green frosting to pipe another balloon and remove/rinse/dry the tip and place it onto the light green/moss green icing to pipe another balloon. Then smooth & shape the balloons.
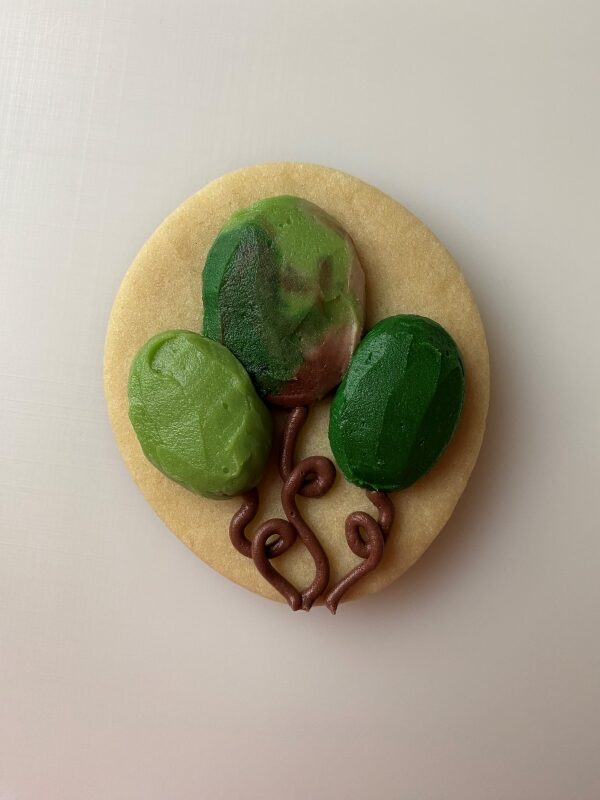
- Attach the tip #4 to the brown icing bag and pipe the balloon curling ribbon.
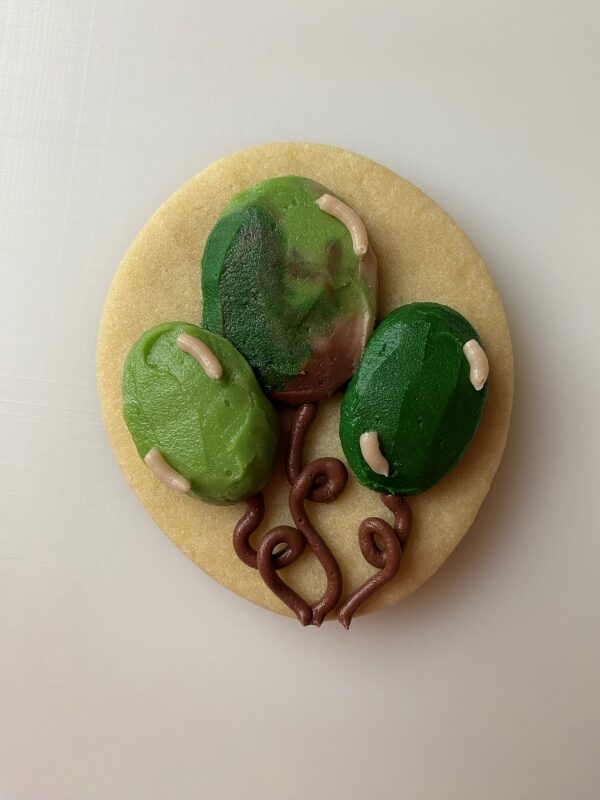
- Remove/rinse/dry the tip #4 and place it onto the light brown cookie to pipe the highlights onto the balloon.


Now that you know my fool-proof method to smooth buttercream sugar cookies, you can make all kinds of fun prints.
These camo cookies are perfect for anyone who loves camo and needs a fun birthday themed cookie.
If you want to bring these cookies to a birthday party, make sure to read my post on how to package and transport buttercream sugar cookies.
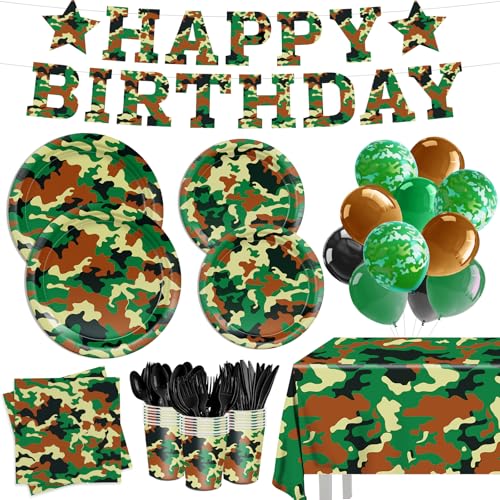
Camo Birthday Party Decorations
A camo birthday party is so fun to decorate. Find some balloons, streamers, tabletop confetti, and a fun background and you’re all set!


Save the Tutorial for These Camo Buttercream Cookies
Use the image below to pin this tutorial for camo buttercream cookies to your birthday party board on Pinterest. Alternatively, use any of the social share icons on the top of the page to share it to your favorite social media site.