How to Decorate Minnie Mouse Cookies with Buttercream
9 - 9Shares
Minnie Mouse cookies are cute, fun, and perfectly sweet. It’s a dream for many young girls to have a Minnie Mouse birthday party theme and these sugar cookies are the perfect addition.
To make Minnie’s bow and dress, you will use a buttercream technique that isn’t used on cookies too often. That being said, it is used for decorating buttercream cakes all the time.
This buttercream technique will result in a similar appearance to royal icing cookies that use the wet-on-wet decorating technique.
So without further ado, let’s jump into these cute Minnie Mouse cookies!
*This post may contain affiliate links, which means I may receive a commission, at no extra cost to you, if you make a purchase through a link. Please see my full disclosure for further information.*
Skip to
Part 1: Gathering the Supplies for the Minnie Mouse Cookies
To decorate these cute Minnie Mouse sugar cookies, you will want to gather:
- 3 Icing bags
- 3 Couplers
- One Wilton #3 tip, one Wilton #10 tip, one Wilton #101 tip, and one PME #1.5 tip
- Minnie Mouse dress cookie cutter
- Minnie Mouse bow cookie cutter
- One number cookie cutter (I used a 4 in the tutorial)
- Black and pink (or red) gel food dye
- Palette knife
- Ingredients for a crusting buttercream, find my crusting buttercream icing recipe here
- Ingredients for sugar cookie dough, find my no spread sugar cookies recipe here
Part 2: Baking the Cookies and Setting up the Icing Bags
- Roll, cut out, and bake your sugar cookies according to the recipe. I used mini cookie cutters and was able to bake around two dozen cookies.
- Make your buttercream icing and separate it into three bowls:
- Half of the frosting will be colored with the pink (or red) gel food dye
- Separate the other half into two portions and color one half black while leaving the other undyed
- Set up your icing bags as follows:
- Place a coupler into each of the icing bags and add the frosting to the bags. You do not need to add the decorating tips yet. Remember, only add about a cup of frosting into the icing bags at a time. Keep the remaining icing covered in plastic wrap until you are ready to add more to the bags.
Part 3: Decorating the Minnie Mouse Cookies
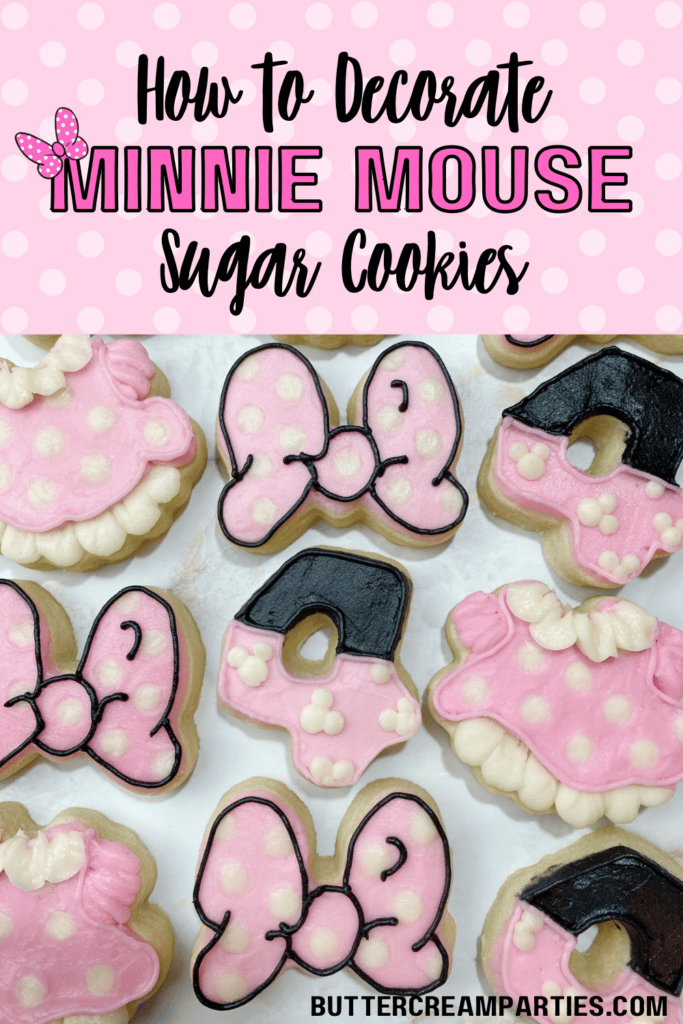
How to Decorate The Minnie Mouse Bow Cookies
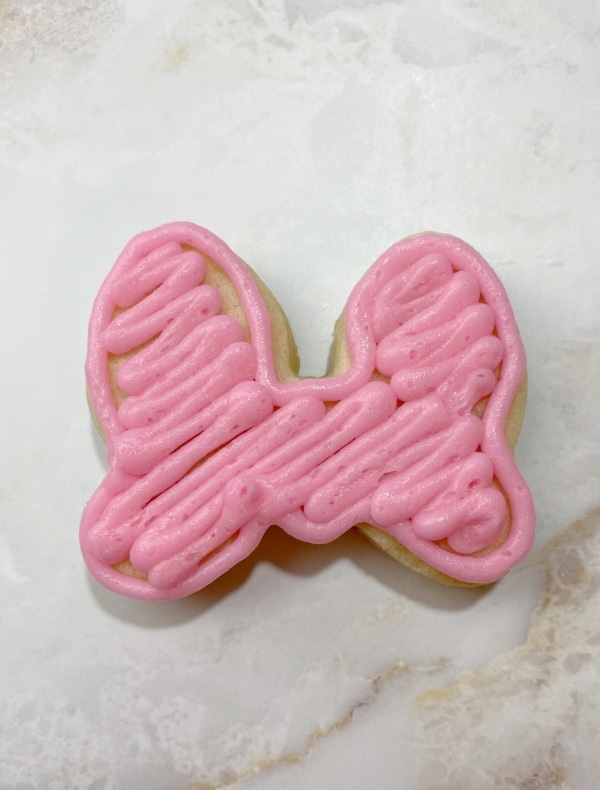
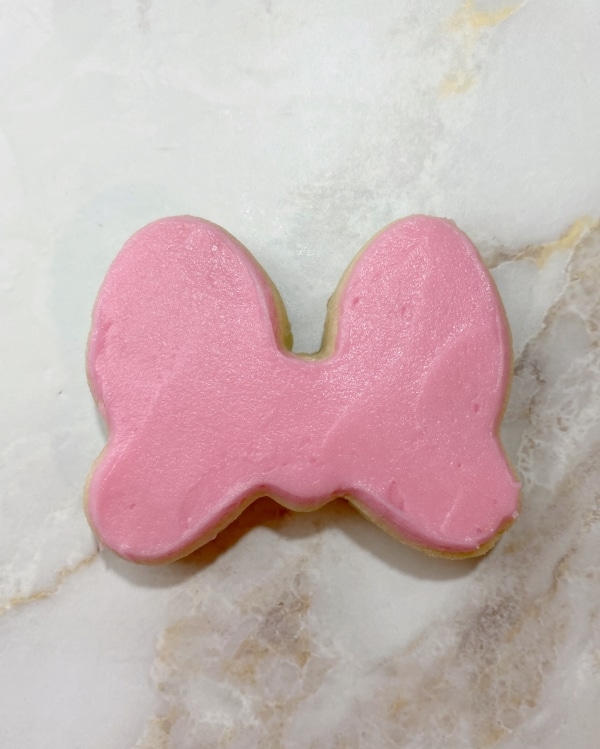
- Attach the tip #3 to the pink bag of frosting and outline and fill in the Minnie Mouse bow cookie. You can be sloppy here, as you will fix it in the next step.
- Using the palette knife, smooth the buttercream frosting so that it covers the entire bow. Then, place the cookie into the freezer. While the cookie is freezing, go ahead and do steps 1 and 2 for all the bow cookies.
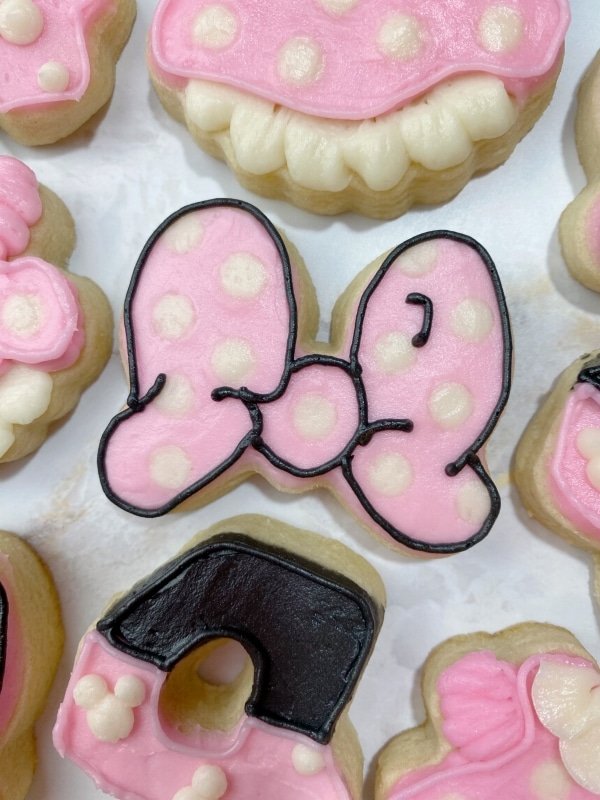
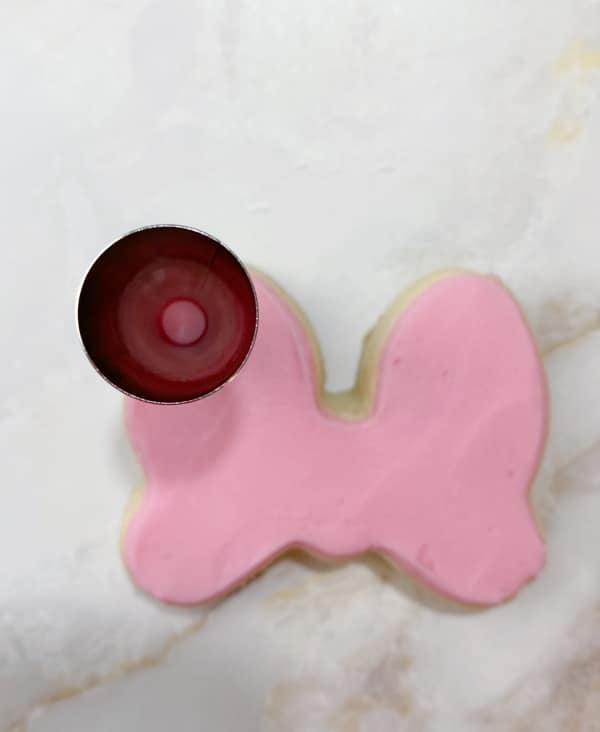
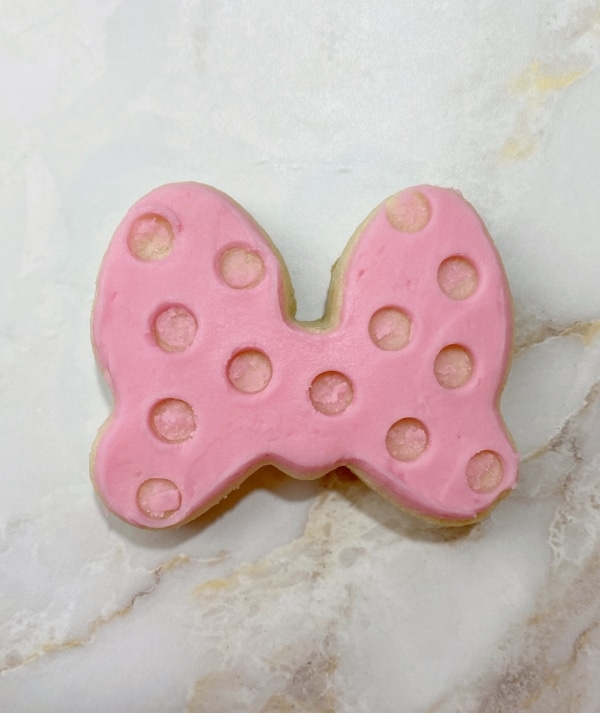
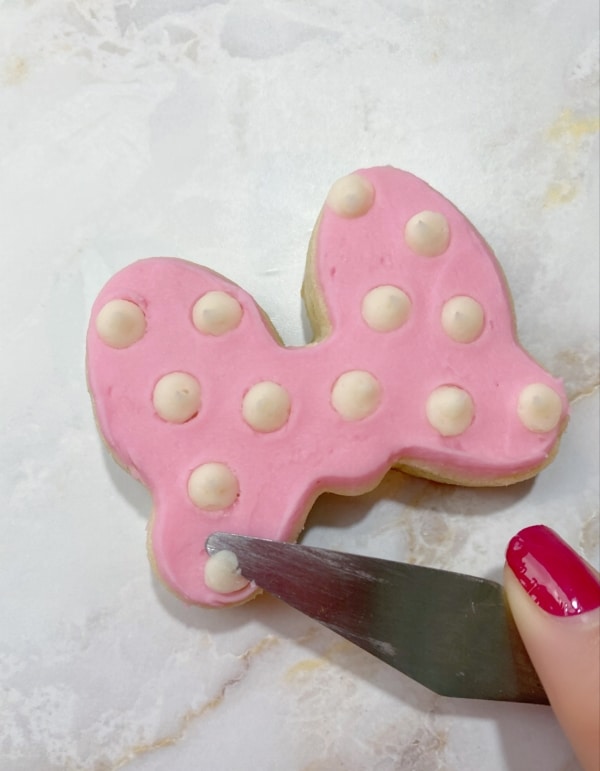
- Once the cookie has been in the freezer for about 10 minutes, remove the cookie. To create the polka dots on the bow, take the tip #10 and press it into the bow where you want the polka dots. To get the frosting circles to come off the cookie, twist the tip as you press it into the cookie.
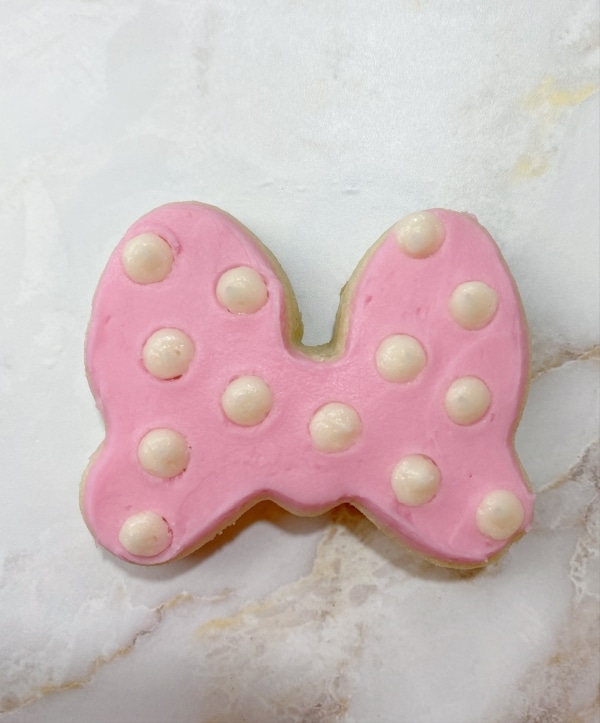
- Remove/rinse/dry the tip #3 from the pink frosting and attach it to the bag of undyed/white frosting. Fill in the circles with the white frosting then place the cookie back into the freezer. Do steps 3 & 4 for all the bow cookies.
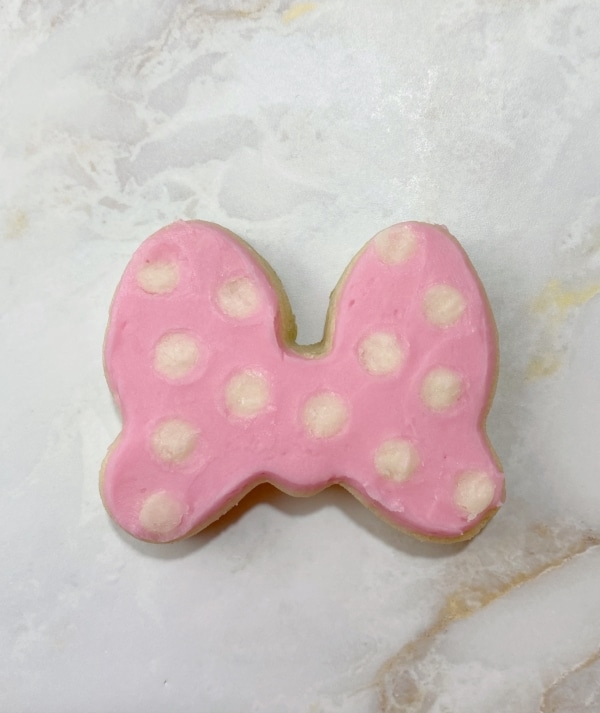
- Once the cookie has been in the freezer for around 10 minutes again, remove it and begin to smooth out the white polka dots. You can use the palette knife to cut off the tops of the polka dots so that it lays at the same height as the pink frosting.
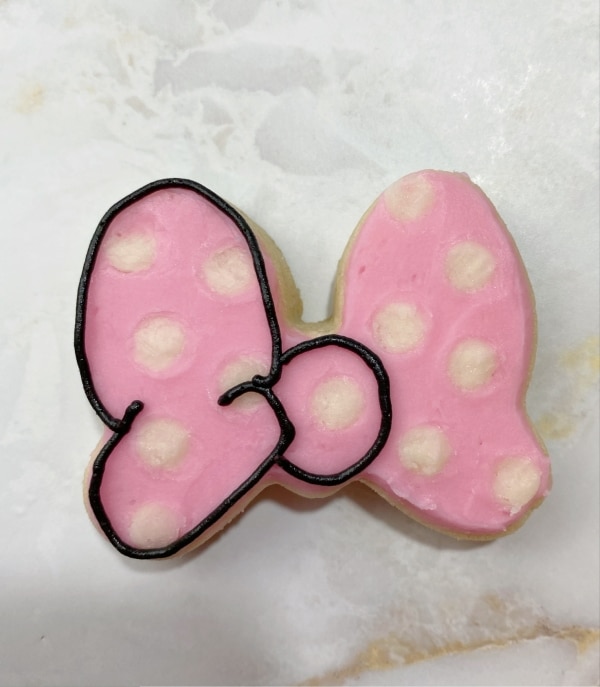
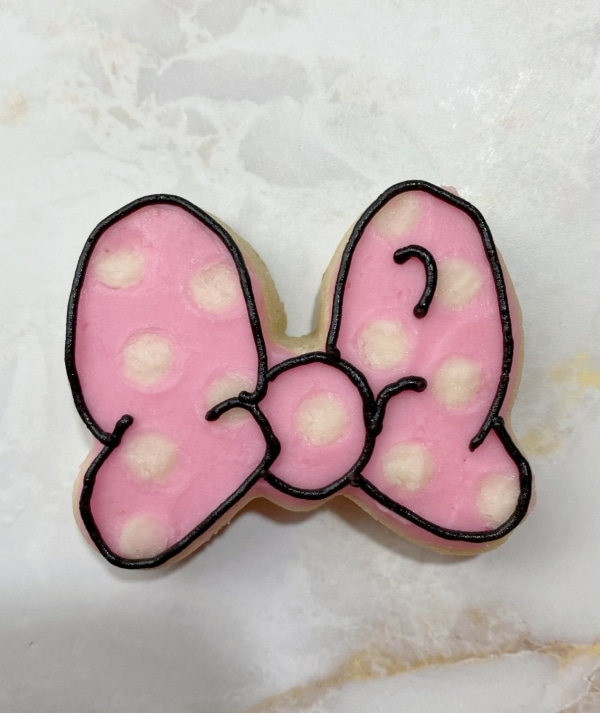
- Attach the PME 1.5 tip to the black bag of frosting. Outline the bow with the black frosting.
How to Decorate The Minnie Mouse Dress Cookies
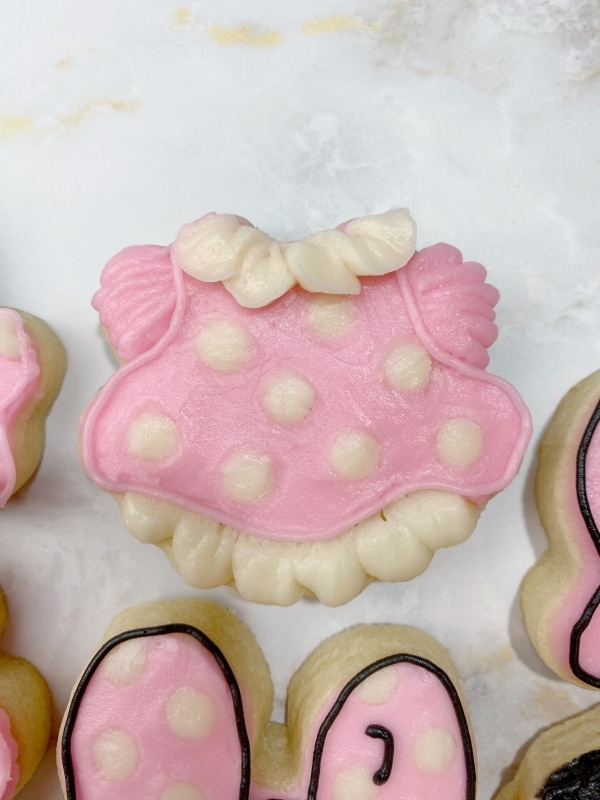
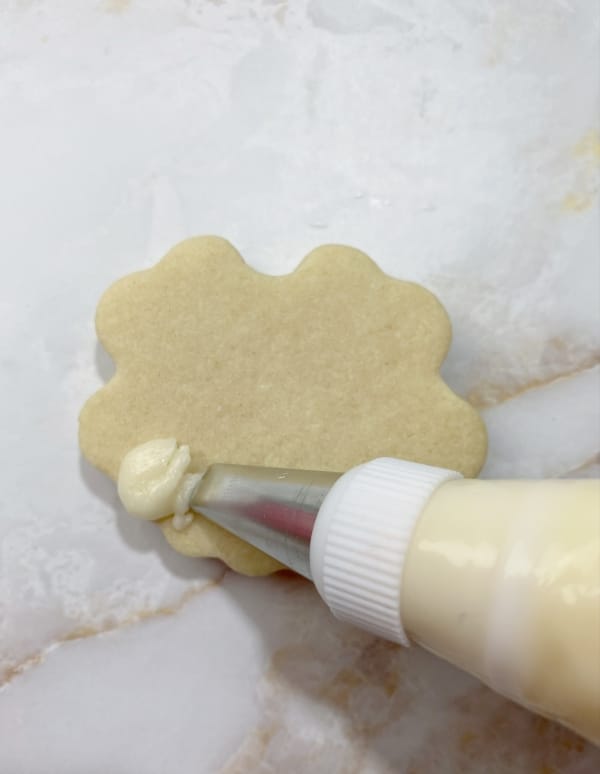
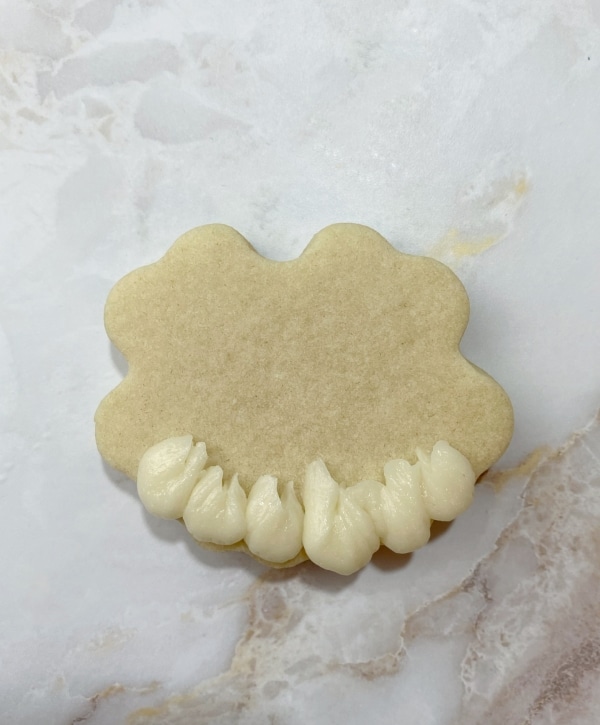
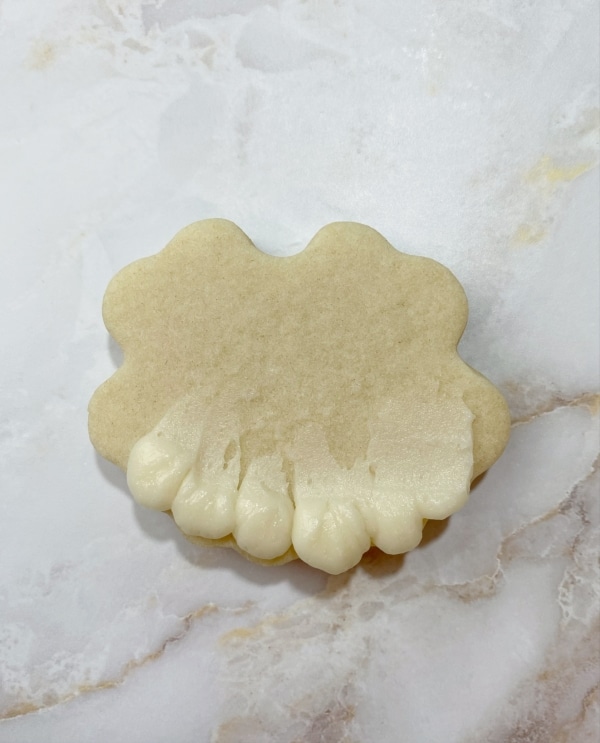
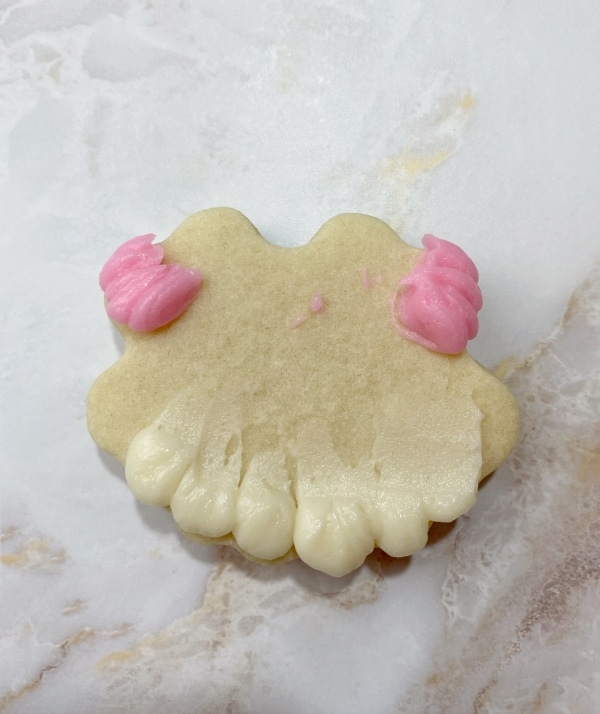
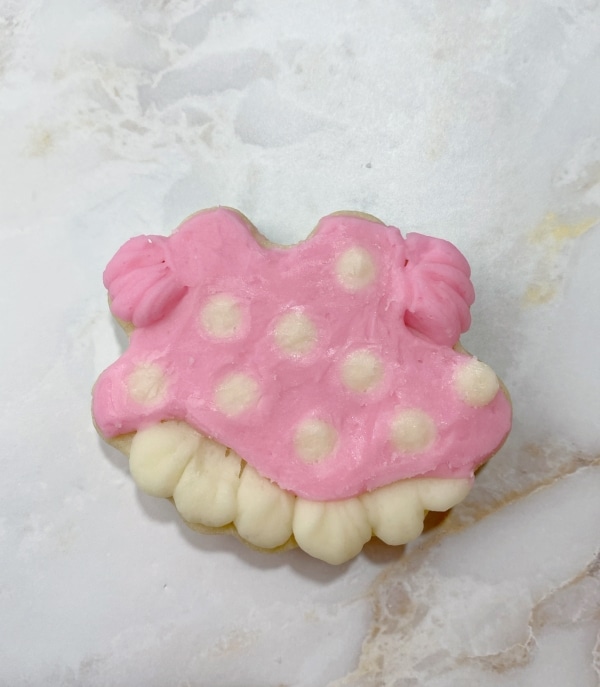
- Attach the tip #101 to the white bag of frosting. Pipe the ruffle bottom of Minnie’s dress by positioning the tip so that the wide side of the tip is at the bottom of the dress and the thin side is toward the top of the dress. Use the palette knife to smooth the inner edges down.
- Do step one on all of the dress cookies. Then, remove/rinse/dry the tip #101 from the white frosting and attach it to the pink frosting. Pipe the ruffle sleeves in the same manner as the ruffles on the bottom – wide side on the outer part of the sleeve and thin side on the inner part of the sleeve.
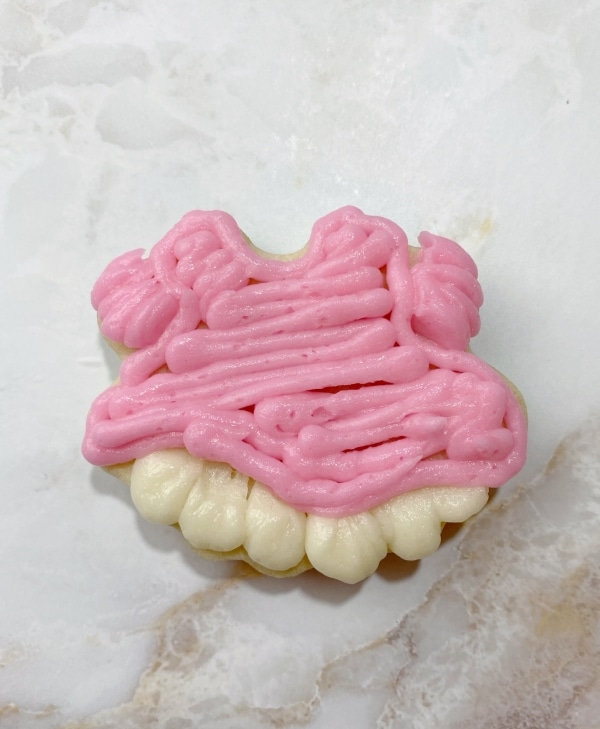
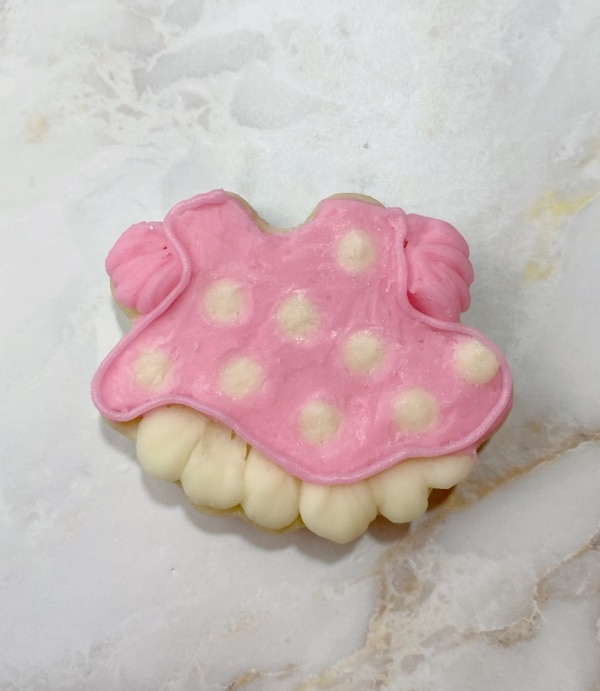
- Attach the tip #3 to the pink bag of frosting and outline and fill in the rest of the dress.
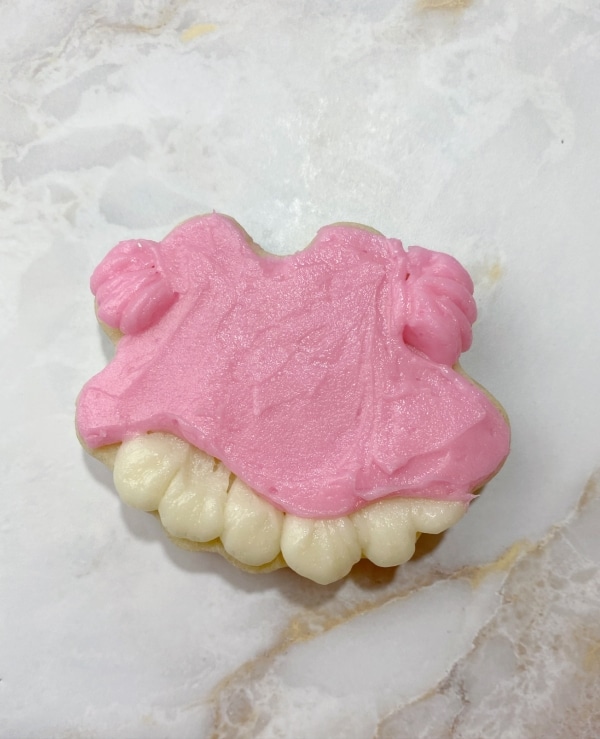
- Use the palette knife to smooth the pink frosting, excluding the ruffle sleeves.
- Place the dress cookie into the freezer. While it is freezing, do step 3 on all of the dress cookies, placing them into the freezer as well.
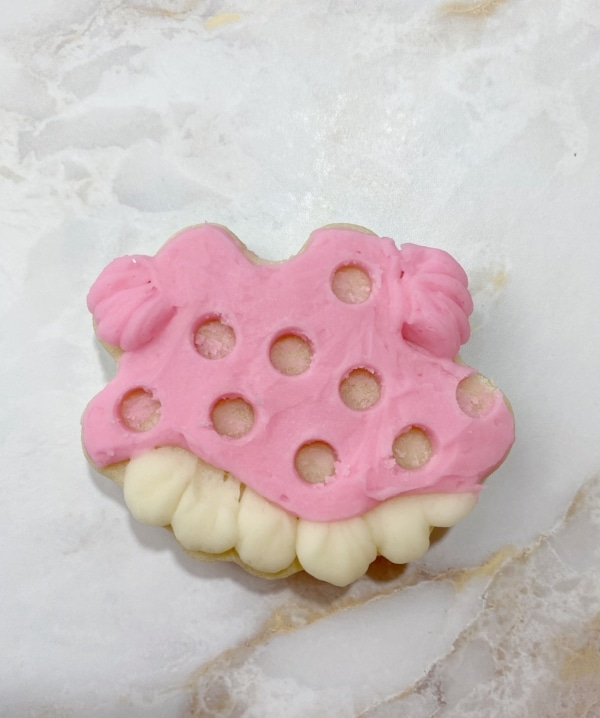
- Once the dress cookie has been in the freezer for about 10 minutes, remove it from the freezer and create the polka dots in the same manner as Minnie’s bow. Refer to steps 3-5 above.
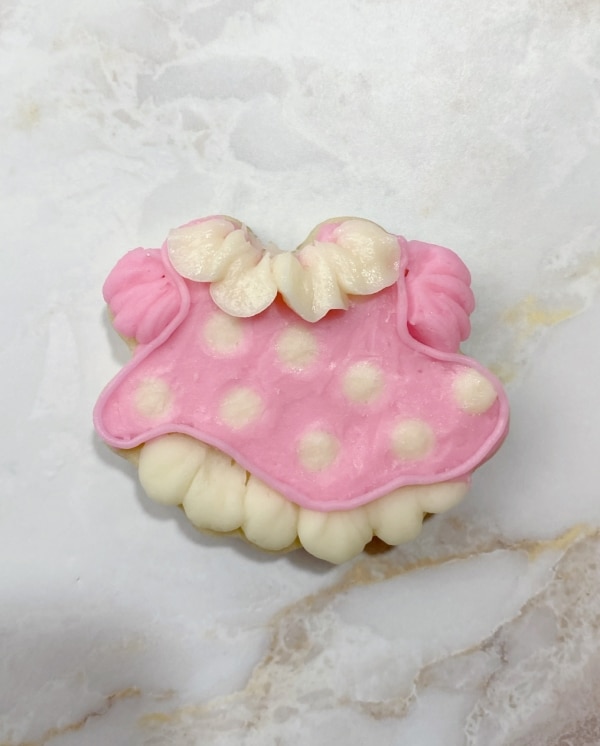
- Remove the tip #3 from the pink frosting and replace it with the PME 1.5 tip. Outline the dress, excluding the ruffle sleeves and ruffle bottom.
- Lastly, attach the tip #101 to the white frosting and pipe the ruffle top. Position the piping tip the same way as before, with the wide side on the outer edge of the cookie and the thin side on the inside of the cookie.
How to Decorate The Minnie Mouse Birthday Number Cookies
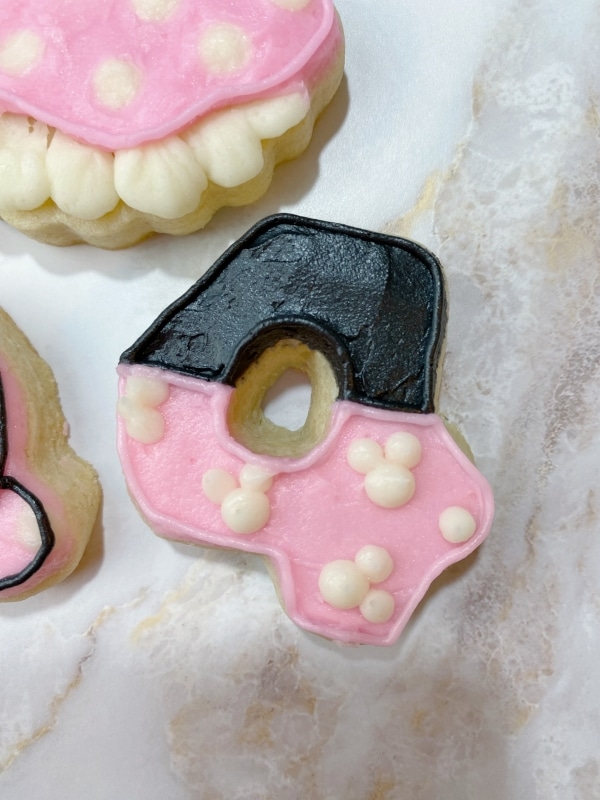
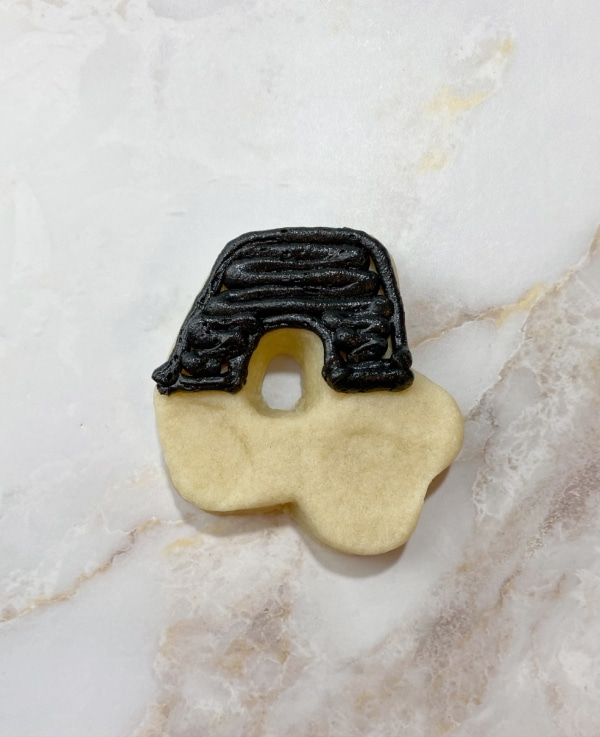
- Attach the tip #3 to the black bag of buttercream and outline and fill in the upper half of the number cookie.
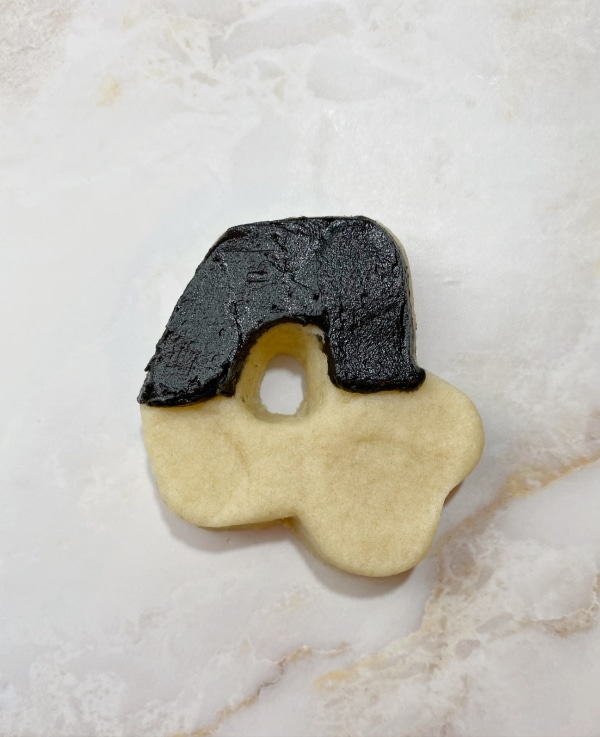
- Smooth the black buttercream with the palette knife.
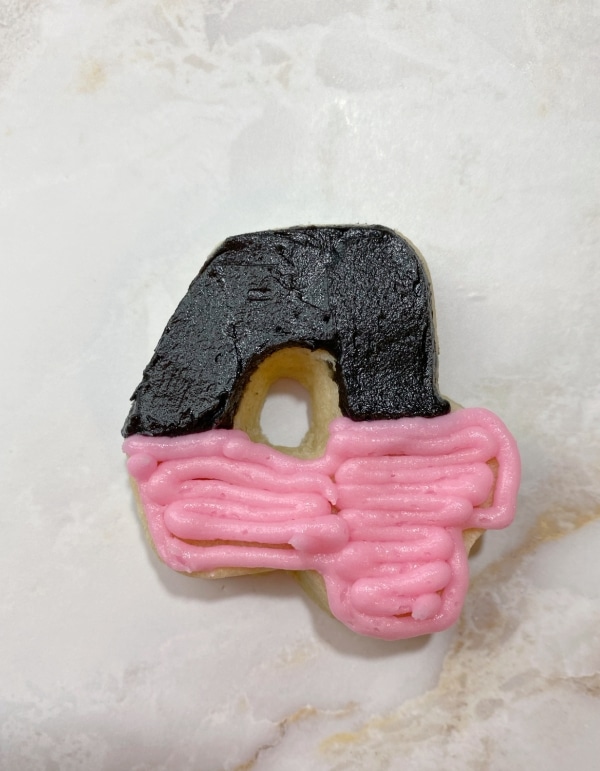
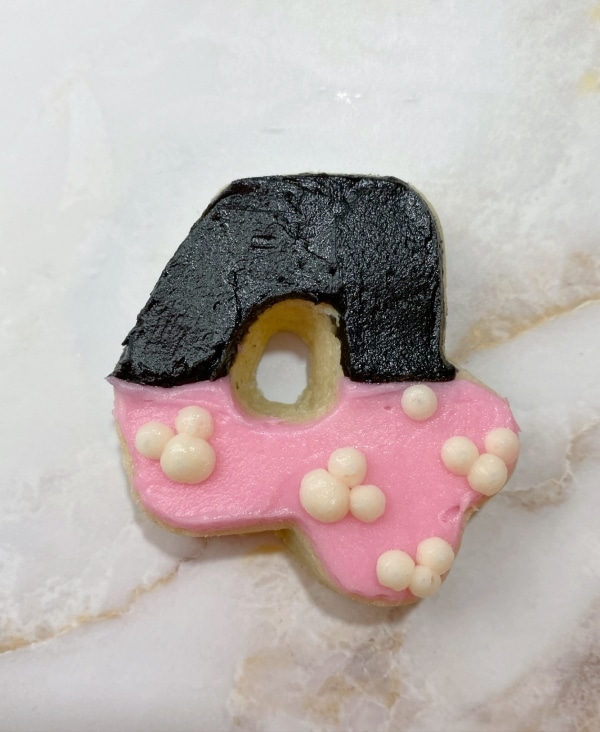
- Do steps 1 & 2 on all of the birthday number cookies. Then, remove/rinse/dry the tip #3 from the black frosting and attach it to the pink bag of buttercream. Outline and fill in the bottom half of the number cookie with the pink frosting.
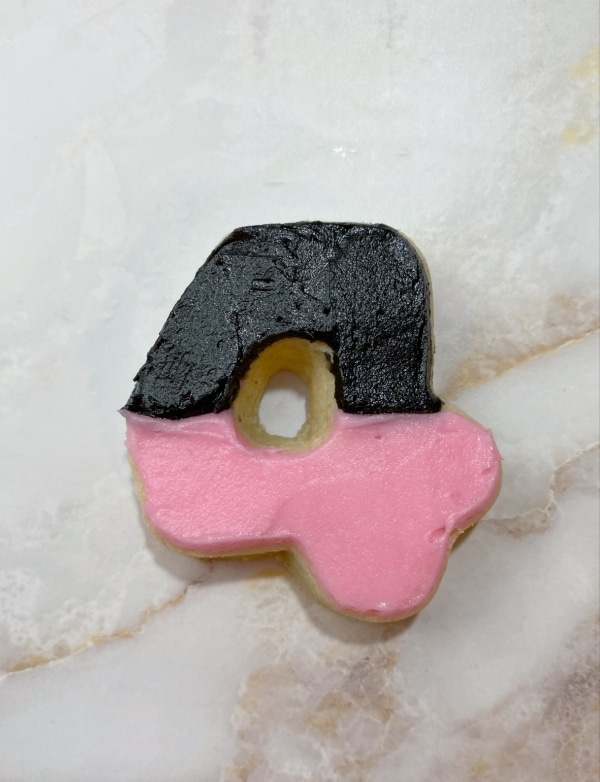
- Smooth the pink frosting with the palette knife.
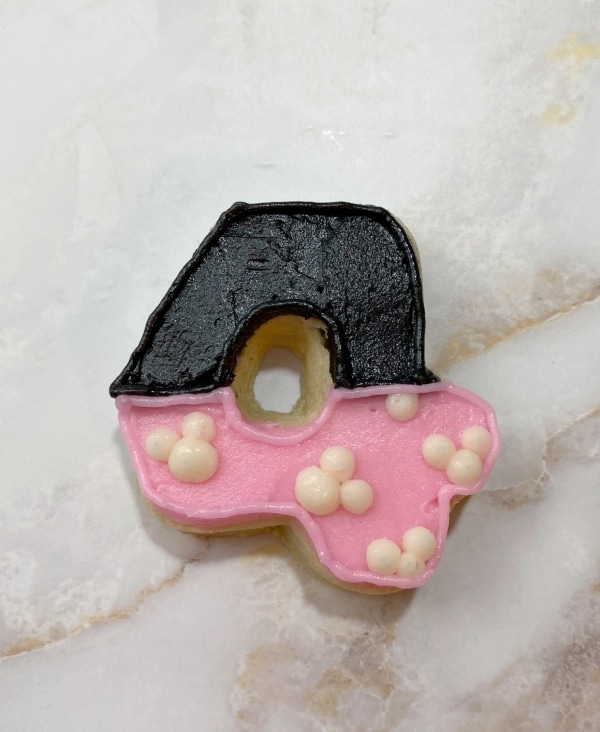
- Do steps 3 & 4 on all of the number cookies. Then, remove/rinse/dry the tip #3 from the pink frosting and attach it to the white frosting. Pipe out mini Mickey Mouse heads on the pink part of the cookie. If the spacing becomes wonky, add polka dots where needed.
- The last step is to outline the top half of the cookie with the PME 1.5 tip on the black frosting and then outline the bottom half of the cookie with the PME 1.5 tip on the pink frosting. Remember to rinse and dry the tip in between color changes.
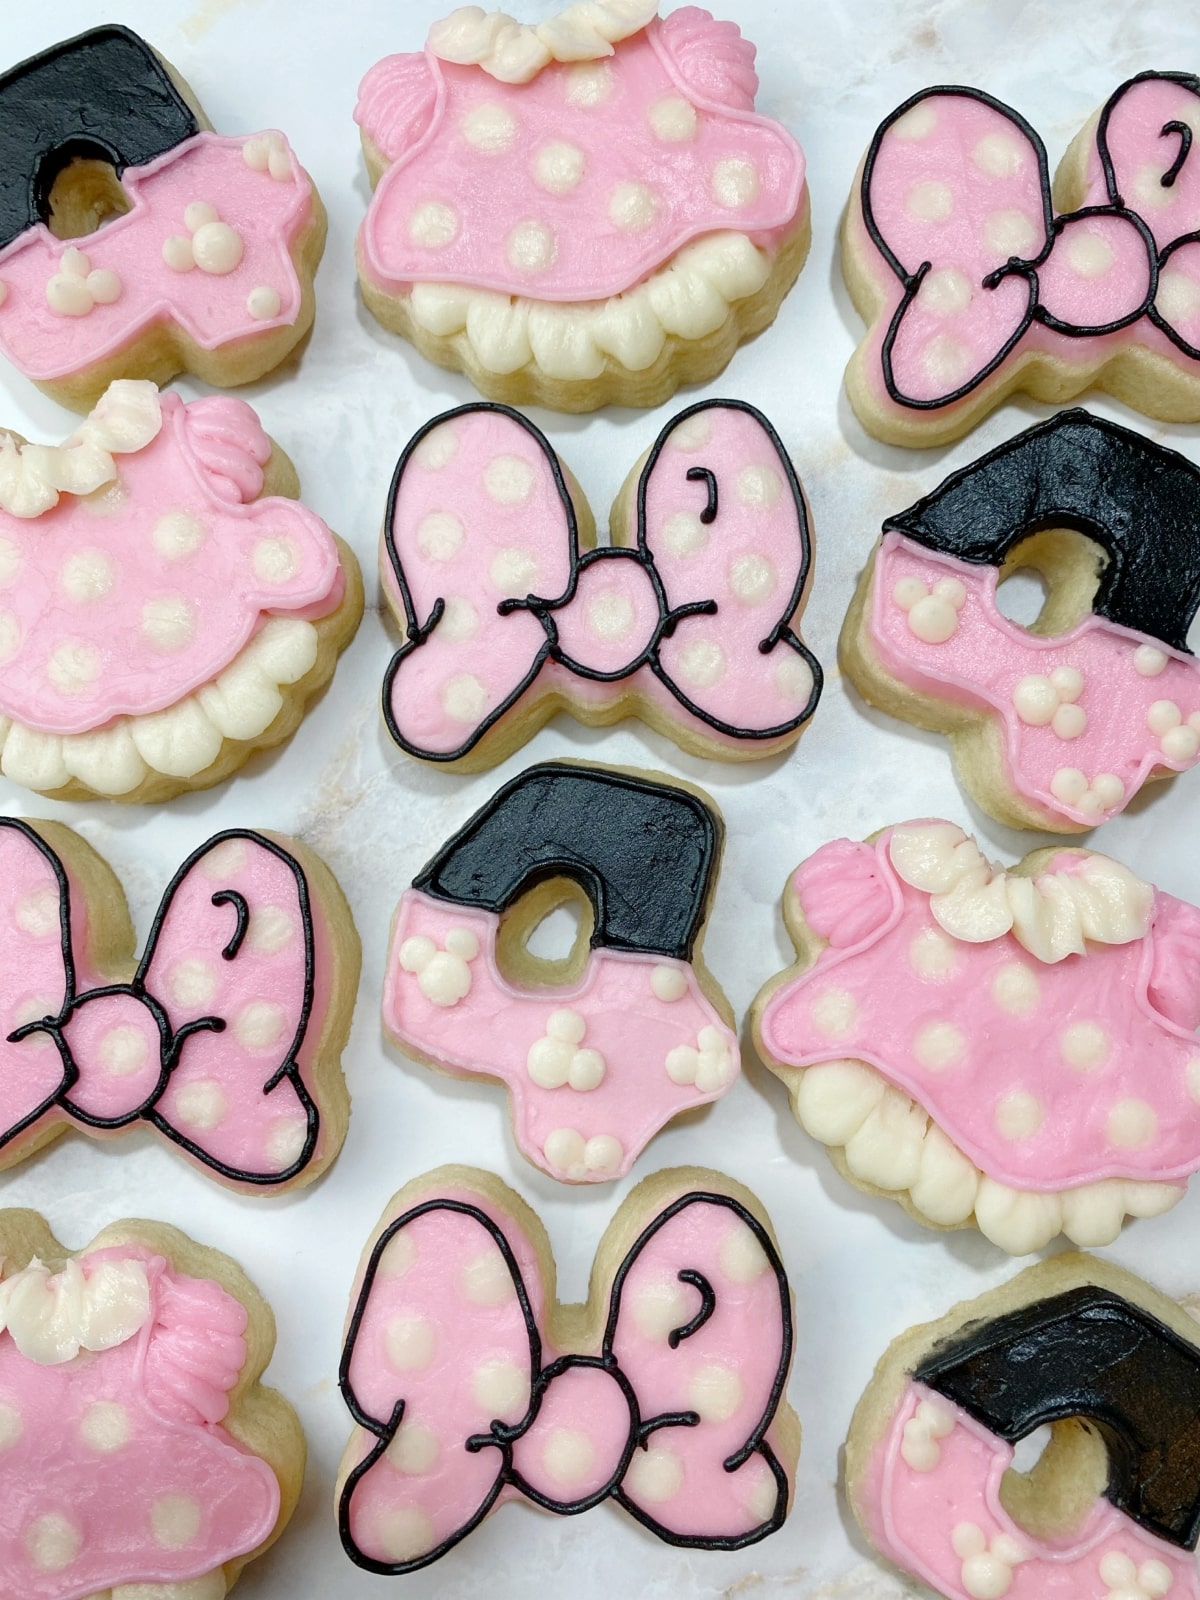
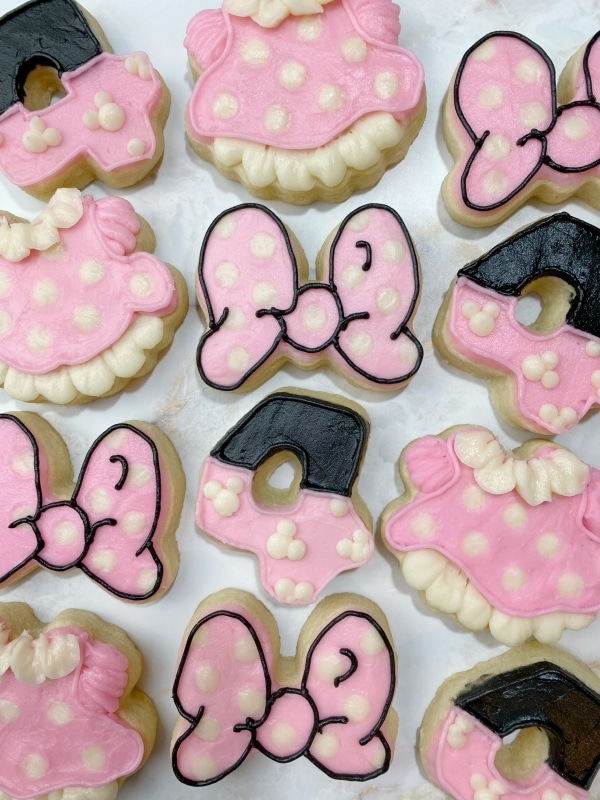
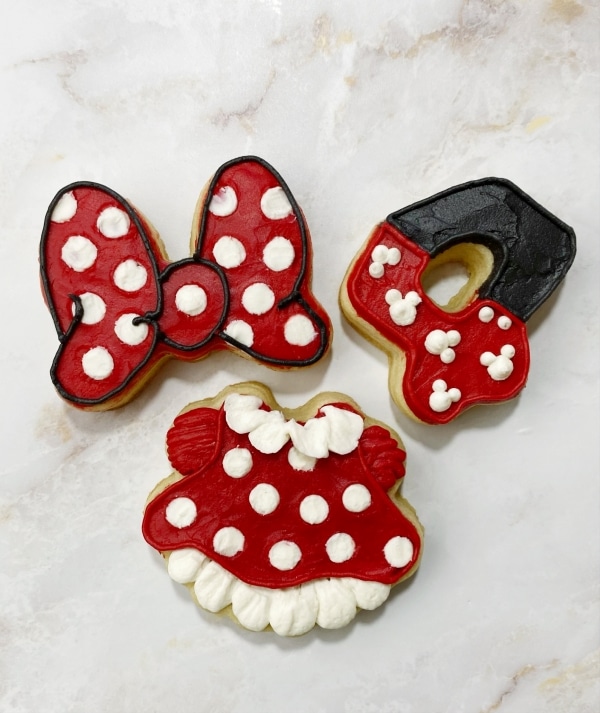
Aren’t these just the cutest Minnie Mouse cookies? I love the appearance of the polka dots. They look just like the wet-on-wet royal icing cookie decorating technique but in delicious buttercream frosting.
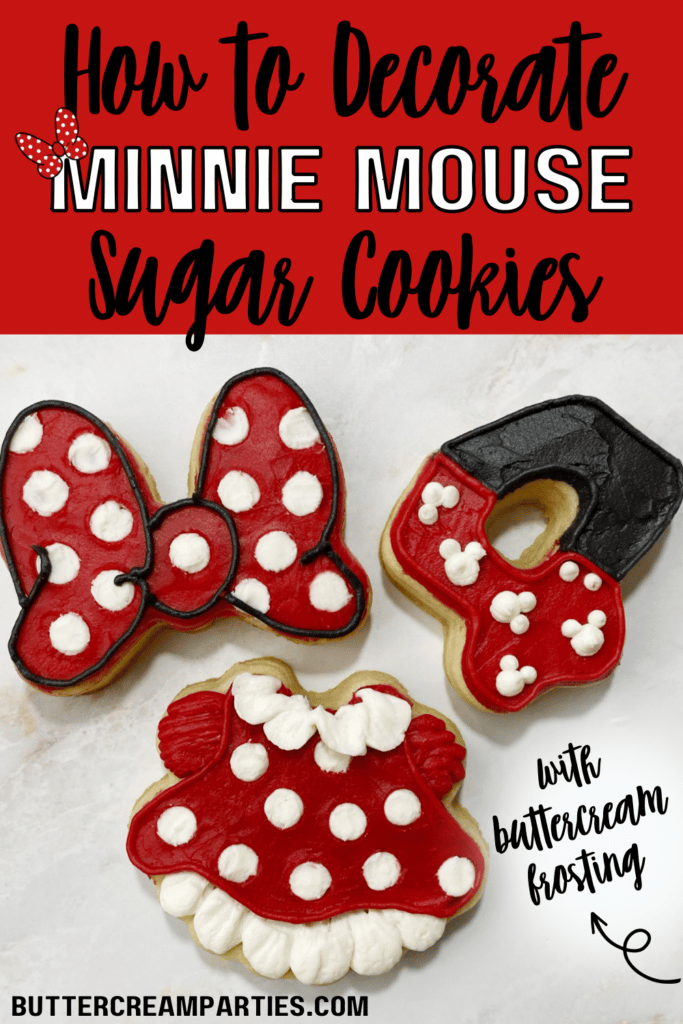
I also made a few cookies using red buttercream. You can really see the polka dots with the larger contrast in colors.
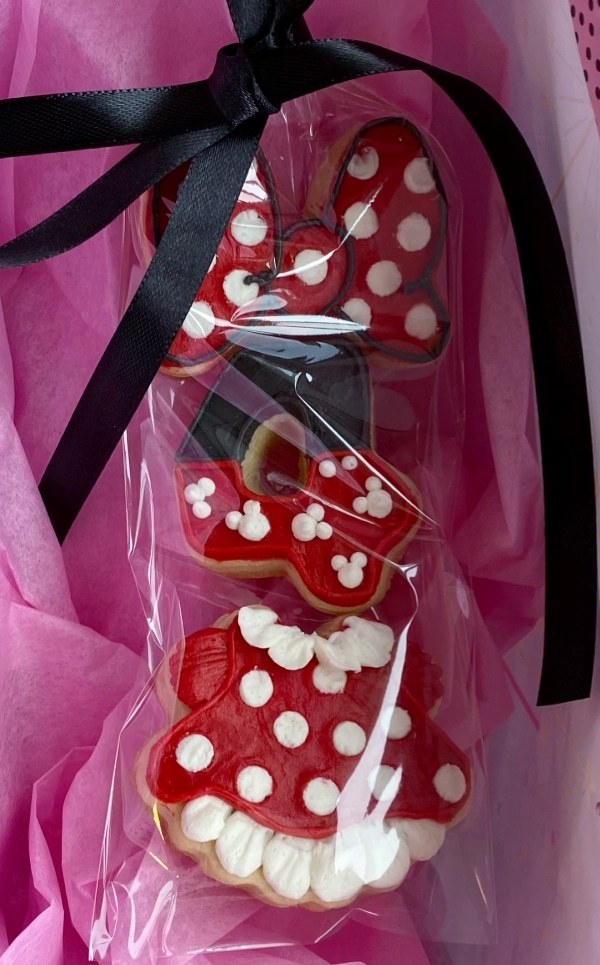
If you want to package your Minnie Mouse cookies, check out my post that goes over how to package buttercream sugar cookies.
Part 4: Decorating the Minnie Mouse Birthday Party
Decorating for a Minnie Mouse birthday party is so fun. Grab some balloons, streamers, tabletop confetti, and a backdrop and you’re ready to go!
- MAKE EVERYDAY MEALS FUN WITH DISNEY PAPER PLATES FOR KIDS – We aim to make the pickiest eaters smile by dressing up daily meals with kid-friendly designs on paper plates and matching disposable dishware
- STURDIER THAN PARTY PLATES – Glad for Kids disposable tabletop products are sturdier than traditional paper plates! They’re soak-proof & cut resistant for little hands still mastering motor skills
- DEEPER PAPER PLATES FOR MESSY FOODS – Parents love that our plates have a deeper well than most plates, making these kid-friendly plates perfect for messy foods like mac-n-cheese, spaghetti, or ice-cream cake
- MICROWAVE SAFE DISPOSABLE PLATES- Leftover night is supposed to be a night off from cooking. Shouldn’t it be a night off from cleaning, too? Our disposable dinnerware can handle microwaved meals so you can give the dishwasher a break
- 8.5 INCH PAPER PLATES - This 40-count pack of kid-friendly Mickey & Friends themed plates includes disposable paper plates that are 8.5 inches, making them perfect for snacks, meals, and desserts
- PACKAGE INCLUDES: 1 door poster - 27" x 60"
- LOVELY DESIGN: Greet your party guests with this door poster that features Minnie Mouse in her signature pink polka-dotted dress and head ribbon.
- PERFECT FOR ALL OCCASIONS: This door poster is perfect for birthdays, kids' parties, or any Minnie Mouse-themed event and occasion.
- WEATHER RESISTANT: Made from quality and durable plastic material that can withstand any weather.
- EASY TO USE: Just simply tape and attach it on the door.
- Package Includes: 24 pcs mickey and minnie bubble wands in 2 color and 2 design.Each bubble wand is the same size, and the capacity is 35ml, easy to carry.
- Material: These bubble water bottles are designed with material of safety and quality. bubble is safe and non-toxic, Kids can play with confidence.
- Design: Bubbles are designed with mouse on top, turn out cute. each bubble wand has 3 holes of different sizes, children can blow out more colorful bubbles of different sizes.
- These mouse bubbles perfect for birthday party favors,birthday gifts for kids, classroom rewards, fits for party gift bags and etc.It would be a huge hit for your party.
- 100% satisfaction is our service tenet ,if you have any problem with our product,please fell free to contact us any time.We will offer you a satisfactory solution.
- GREAT VALUE: Come with 20 pcs Mouse Ears Headbands in 2 style (10 ears blackfor boys and 10 ears with Pink bow for girls )The set of 20 Mouse ears party supplies are the must-have items for anyone who wants to have themed party. These headbands will amuse kids and adults.
- MATERIAL:Made of soft, felt-like fabric while the ears have a cute pink dotted bow. With the size of 8.7 x 7.1 x 0.6 inches, this mouse ears headband fits for adults' head as well as toddlers
- Favorite KIT:- this mouse ears is always a children's favorite and has been a children's favorite for generations, let your kids be a part of the fun with these great Mouse ears .The headband will be a super cute favorite kit for your guests. You'll surely have an unforgettable party.
- One Size Fits Most: The flexible headbands are designed to fit most head sizes, making them suitable for both women and girls.
- Perfect Gift: These mouse ear headbands make a great gift for fans of all ages, and they can be used as party favors or for adding a touch of magic to any outfit.
- FRUIT FLAVORED SNACKS: Fruit flavored treats shaped like your favorite Mickey & Friends characters for maximum fun; Packaged for on-the-go convenience, these fruit flavored snacks are a treat the whole family can enjoy
- FUN KIDS SNACK: These packaged snack bags are the perfect treat to include in a packed school lunch box
- GLUTEN FREE: Tasty treats made without gluten for snacks you can feel great about
- ON-THE-GO SNACK: These Fruit Flavored Snacks are the perfect addition to your pantry and a snack every member of the family will love
- CONTAINS: 22 ct
- 【Beautiful Design】 The vivid Minnie Mouse print and vibrant colors of our Minnie Mouse party Honeycomb Centerpieces set will create the most celebratory atmosphere for you and your guests. With its stylish design and cute characters, it's sure to be a hit with both kids and adults!
- 【Great Material】 These cute Minnie Mouse table decorations are made of thick cards, using high-tech digital printing, with patterns on both sides, which are safe and non-toxic. They are seamless, durable, lightweight, no fading and safe to be used for children.
- 【Easy to Use】 Just tear off the glue dot sticker on the back of the honeycomb, unfold the honeycomb ball, and paste the cardstock pattern, you can get a cute honeycomb decoration!
- 【Widely Use】 Minnie Mouse themed Honeycomb Centerpieces decorations are suitable for most events, such as children's parties, family gatherings, school recreational activities, or other decorations. These decorations can create an enjoyable and active atmosphere to these scenes. If you are going to throw a Minnie Mouse theme party, the Party Centerpieces kit make for fantastic decorations.
- 【Satisfaction】 If your order doesn't completely excite or delight you, please click "seller contact" button in your Amazon account to email us, we'll make it right with a hassle-free exchange or refund as quick as can be.
- 30 pcs in package.
- Great design for your party.
- About 9.5 inches x 6.5 inches (length x width).
- Can be used as candy bags, gift craft bags, gift bags, perfect bags, can accommodate a variety of party supplies and small gifts, such as cookies, candy, small toys, etc.
- If any question please contact with us.
- 【DESIGN】 We combine cartoon stories with mouse ears headbands and are committed to innovation to design and create unique mouse ears.
- 【MATERIAL】 mouse ear cartoon headband with stitch ears, covered with plastic fabric, the surface material of the part is made of colorful accents, fillers inside.
- 【MULTI-FUNCTIONAL OCCASIONS】 Mouse ears headpiece are perfect for presents, cosplay, girls headwear, party decorations, Christmas, Halloween, costuming, park trip or daily wear.
- 【PACKAGE & SIZE】 One piece of mouse ear headband in a package. The width of the headband part is approx 5 inches.
- 【100% SATISFACTION 】Once you find any problem of the our bow headband, please contact us, We will solve it as soon as we can.
- MAKE EVERYDAY MEALS FUN WITH DISNEY PAPER CUPS FOR KIDS – We aim to make the pickiest eaters smile by dressing up daily meals with kid-friendly designs on paper cups and matching disposable dishware
- STURDIER THAN PARTY CUPS – Glad for Kids disposable tabletop products are sturdier than traditional paper cups! They’re soak-proof, so they won’t go soggy while your little one finishes their last bites
- SMALLER SIZED CUPS FOR KIDS HANDS – Parents love that our 9oz cups are slightly smaller than most paper cups, making them perfectly sized for little hands to hold
- FUN KID-FRIENDLY DISPOSABLE CUPS- Keep the whole family happy – including the clean-up crew! Take the night off of doing dishes with fun disposable everyday paper cups
- 24 PAPER CUPS - This 24-count pack of kid-friendly Mickey & Friends themed cups includes disposable paper cups that are 9 ounces
- PINK MOUSE BIRTHDAY PARTY SUPPLIES - 88pcs latex balloons (40pcs 12in balloons, 24pcs 10in balloons, 24pcs 5in balloons), 2pcs mouse-head balloons, 2pcs pink bow balloons, 2 gold heart-shape foil balloons, 1 set happy birthday banner, backdrop, pink polka dot table cloth, 12pcs cupcake toppers, happy birthday cake topper, and a mouse headband. 1 roll of silk ribbon, point glue and balloon arch strip. We have everything you need to take your party to new heights.
- HIGH-QUALITY MATERIALS - Cartoon mouse party banner and cake topper are made of quality felt, having vibrant color and clear printing. Adopted high quality latex balloons that heavier than other normal balloons. More elastic and durable
- EASY TO ASSEMBLE - Pink gold mouse birthday party decorations are easy to assemble, you can hang the banner on the wall, fireplace, cake or dessert table. The cake topper come with dot glue, you can glue the cupcake sticks and the back of the cake topper card together, enjoy the fun of DIY.
- WIDE APPLICATIONS - These pink mouse party decor are suitable for girls mouse themed birthday party, pink mouse themed baby shower, tea party, family gathering and more. Complete cute mouse party decorations for you to create the perfect party vibe.
- CUSTOMER SERVICE : If there is any Omission or Quality Problem, Contact us freely. After-sales Services isn’t Restricted by Time to make sure you have a pleasant shopping experience.
Save the Tutorial for Minnie Mouse Cookies for Later
Use one of the images below to pin this tutorial for Minnie Mouse birthday cookies to your party board on Pinterest. Alternatively, use any of the social share icons on the top of the page to share it to your favorite social media site.

