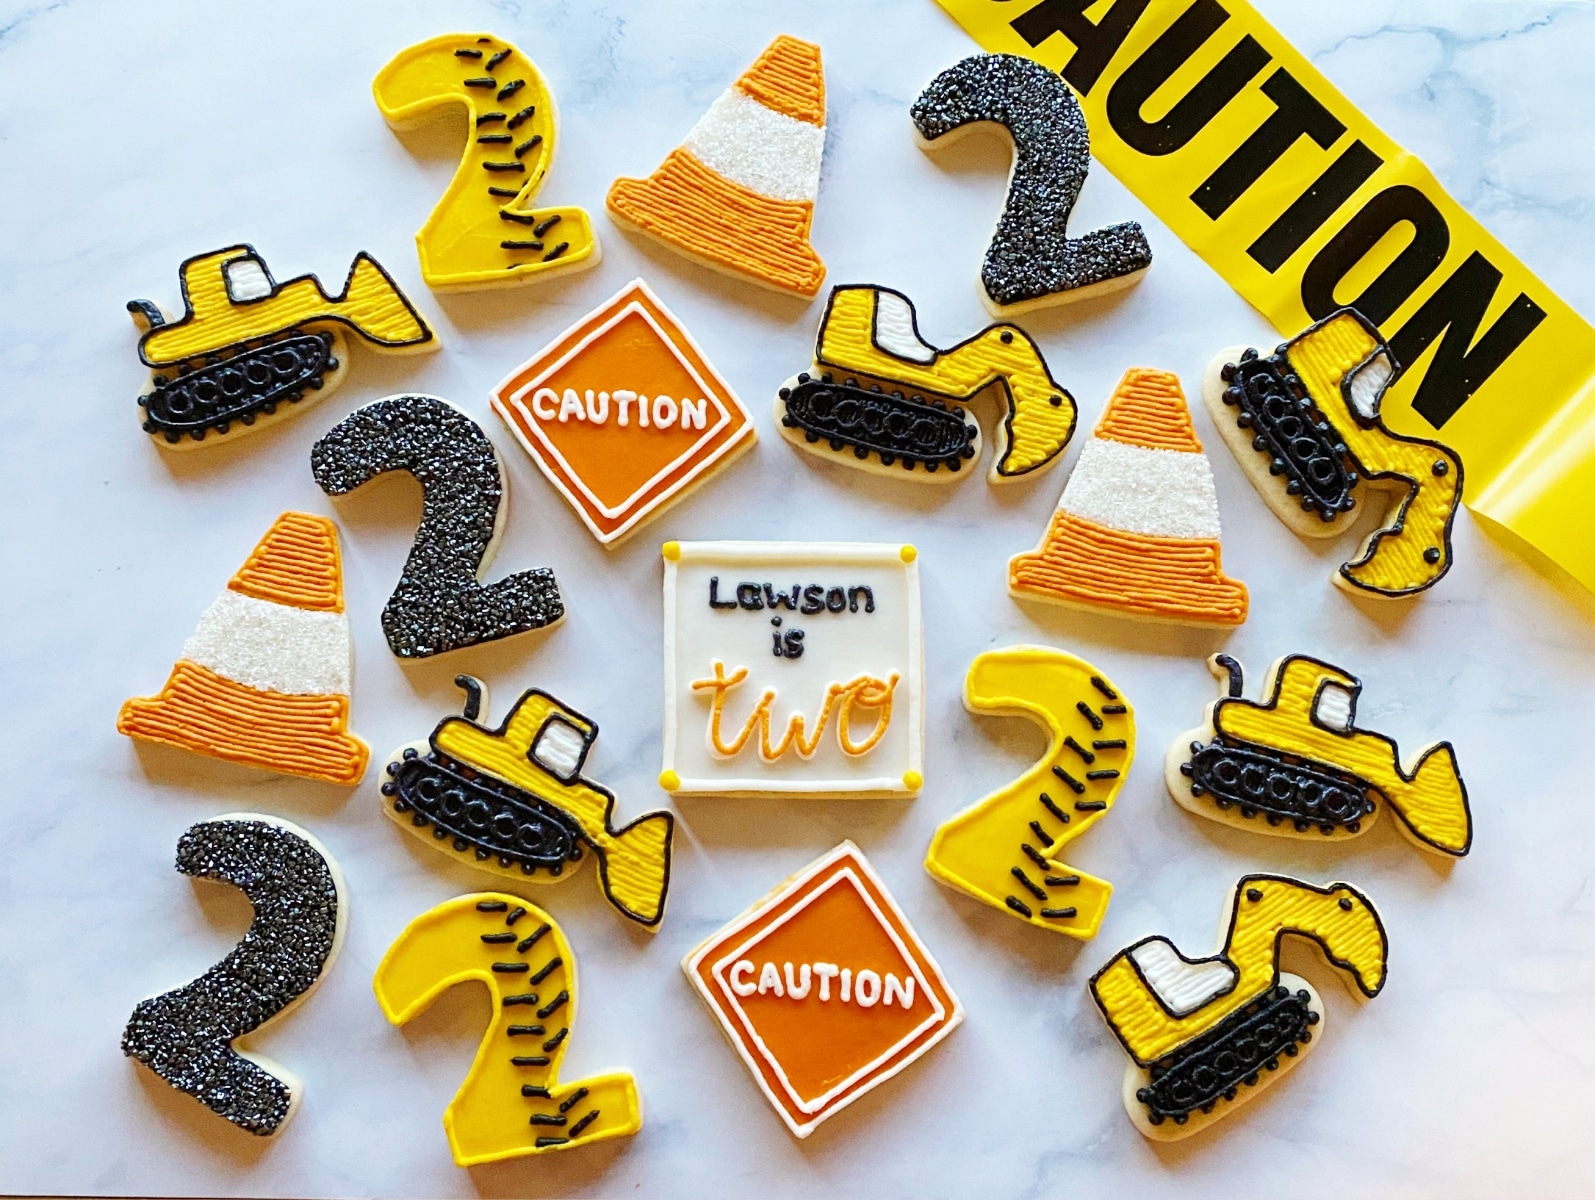
How to Decorate Construction Cookies for a Construction Party Theme
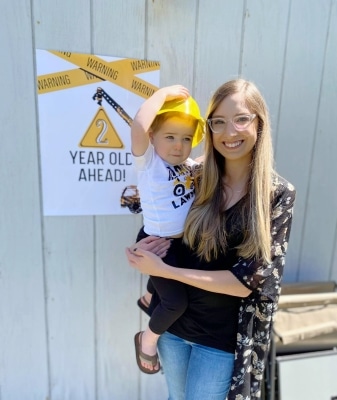
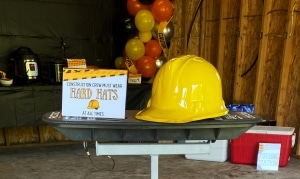
If you are looking for the cutest two year old birthday party ideas, look no further than a construction party theme! For my son’s 2nd birthday party, I decided to go with a “Caution, 2 Year Old Ahead” theme.
He has recently been loving his excavators, front loaders, and dump truck toys.
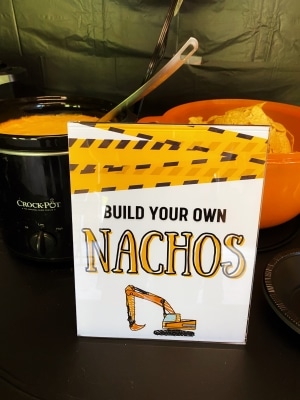
For the construction food menu, we had a “Build Your Own Nachos” bar and a “Dig In” dessert table with construction cookies and chocolate cake cups.
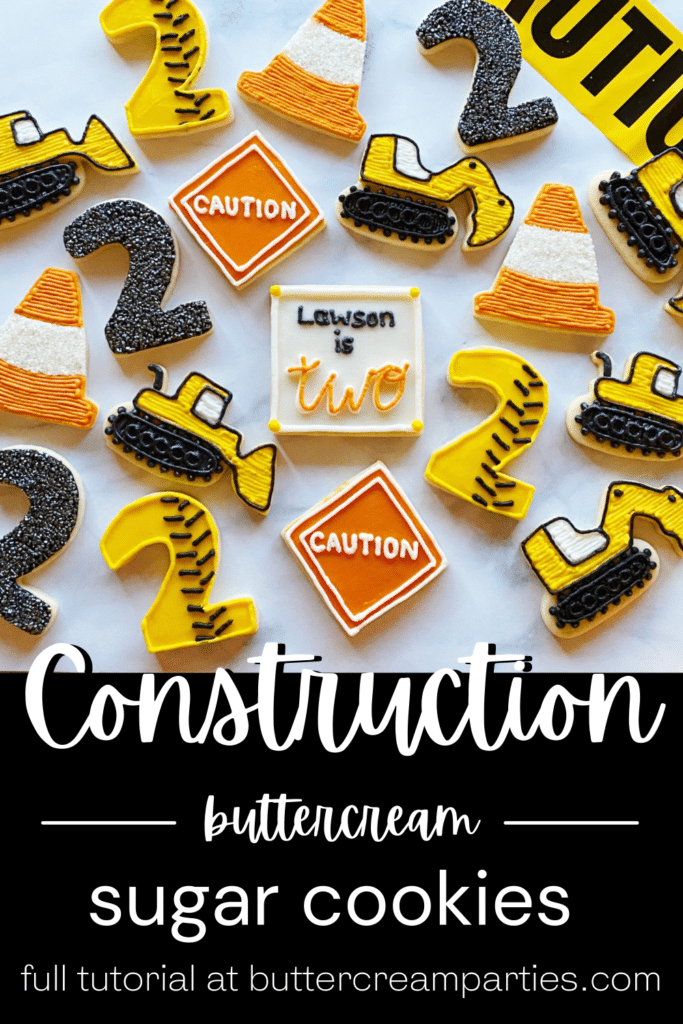
For today’s post, I will be sharing the tutorial for the construction sugar cookies. Follow along for the step-by-step photo series tutorial.
*This post may contain affiliate links, which means I may receive a commission, at no extra cost to you, if you make a purchase through a link. Please see my full disclosure for further information.*
Part 1: Gathering your Supplies for the Buttercream Construction Cookies
To create these construction sugar cookies, you will want to gather:
- 4 Icing bags
- 4 Couplers
- 9″ flat spatula
- One Wilton tip #2 and one tip #4 – buy these individually at a craft store or purchase this kit that I use all the time if you become addicted to decorating cookies like me
- Excavator, front loader, and traffic cone cookie cutters
- Number 2 cookie cutter
- Non serrated knife or square cookie cutters – If you want to eyeball the squares and cut them then just use the knife but I love this set for perfect squares!
- Sanding sugar in clear and sanding sugar in dark silver. These are pretty easy to find but if you want the exact ones I used, you can find them here: Wilton Clear Sanding Sprinkles Set and Wilton Silver Sanding Sprinkles Set
- Buttercream frosting in black, white, yellow, and orange – find my crusting buttercream icing recipe here
- No spread sugar cookie dough – find my no spread sugar cookies recipe here
- Plate to pour the sanding sugar onto – make sure the plate is larger than the cookies
You may be asking, “What are couplers?” Couplers allow you to change your tips on your icing bags. Check out my page, Getting Started: Learn How to Decorate Buttercream Cookies, to learn how to do this. Essentially, you will attach a coupler to each icing bag. When you need to attach a tip, just make sure to rinse out the previous color from the tip with hot water. Purchasing a set of couplers is pretty affordable on Amazon: 4 Count Wilton Coupler Set.
Part 2: Baking the Cookies and Setting up Your Icing Bags
- Roll, cut out, and bake your sugar cookies according to the recipe. I did 6 number 2 cookies, 3 front loaders, 3 excavators, 3 cones, 2 smaller squares, and 1 large square. There was still leftover dough if you want to go for two dozen!
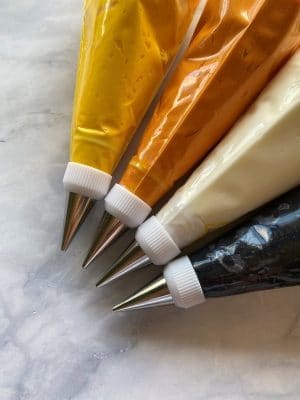
- Make your buttercream icing and distribute it evenly into four bowls as best you can. Mix up your black, orange, and yellow frosting shades. Remember that the color will deepen as it sets. I prefer to use the Wilton gel food dye since gel is more vibrant (i.e. more cost effective because you use less) than liquid and doesn’t change the consistency of your frosting. To create my yellow, I mixed Wilton Golden Yellow with Wilton Lemon Yellow until I liked the shade. I did the same eyeballing method for the orange using Wilton Copper and Wilton Golden Yellow.
- Set up your icing bags as follows: Place each of your frosting colors into their own icing bags set up with couplers. If you don’t know how to do this, just hop over to my Getting Started: Learn How to Decorate Buttercream Cookies page. You don’t need to attach any tips to the bags yet.

Part 3: How to Decorate Construction Sugar Cookies with Buttercream
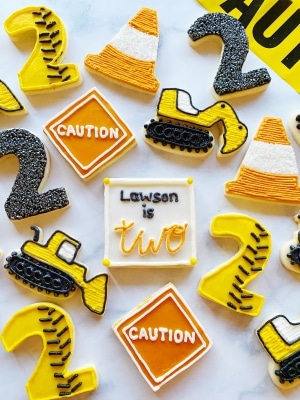
Here all the details for each decorated cookie in the set. Choose some or all for your DIY construction party!
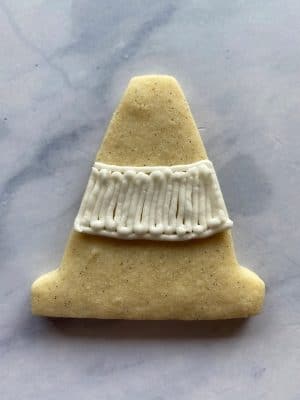
How to Decorate the Traffic Cone Sugar Cookies
- Attach the Wilton tip #4 to the white frosting. Outline and fill in the area that will become the reflective stripe on the cone.
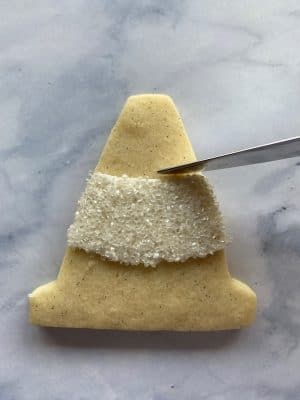
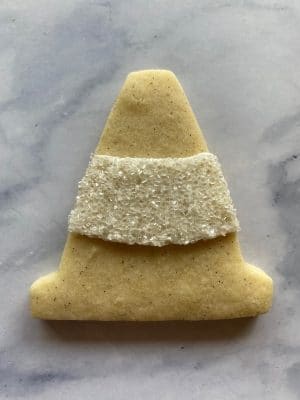
- Carefully dip the cookie, frosting side down, into a plate of clear sanding sugar sprinkles. Then, take the flat spatula or a knife and clean up the edges of the sprinkles/frosting to create a clean line.
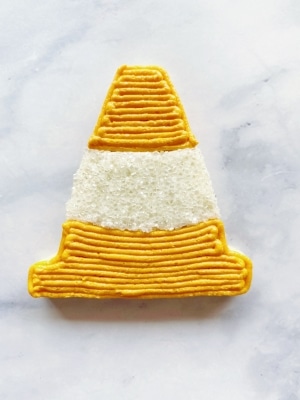
- Once you’ve completed steps 1 & 2 for all of your traffic cones, remove/rinse/dry the tip #4 from the white frosting and attach it to the orange. Outline and fill in the rest of the cookie with the orange frosting.
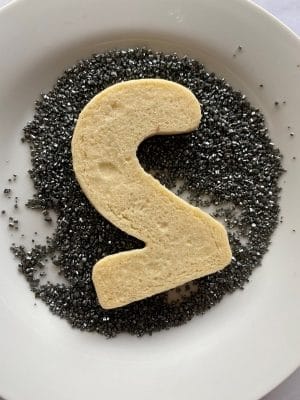
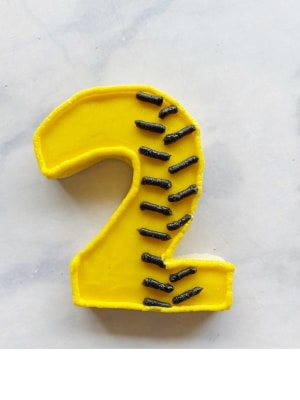
How to Decorate the Rocky Two Sugar Cookies
- Attach the Wilton tip #4 to the black frosting and outline/fill in the whole cookie.
- Pour some of the metallic gray sanding sugar sprinkles onto a plate. Flip the cookie over and press the cookie into the sugar/sprinkles.


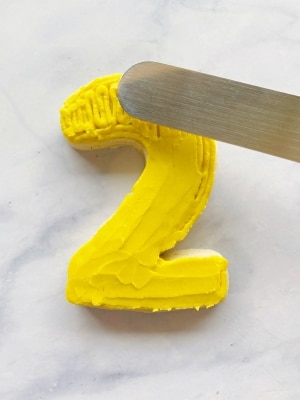
How to Decorate the Tread Sugar Cookies
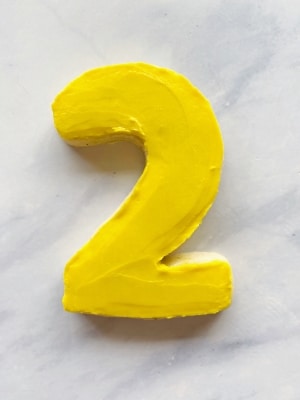
- Attach the Wilton tip #4 to the yellow frosting. Outline and fill in the whole two. Repeat this step for all of the tread sugar cookies and then place them into the freezer. If you don’t have the space to lay these flat, check out my page How to Smooth Buttercream for Cookies for other options.
- Smooth out the cookies using the angled flat spatula.
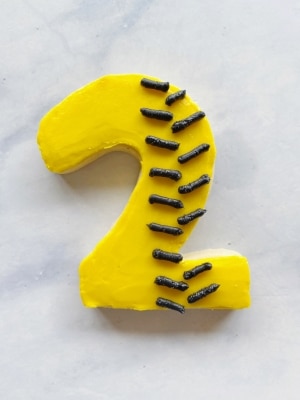
- Remove/rinse/dry the tip #4 from the yellow frosting and attach it to the black frosting. Pipe out lines to resemble the tread of a track tractor. I found the easiest way to do this was to pipe all of the left lines first, then go back and pipe all the ones on the right.
- This last step is optional depending on your preference. I decided to attach the tip #4 back onto the yellow frosting, after rinsing/drying, to outline the edges.

How to Decorate the Caution Sign Cookies
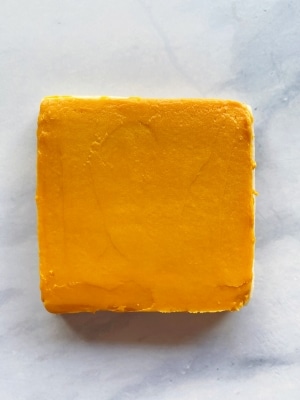
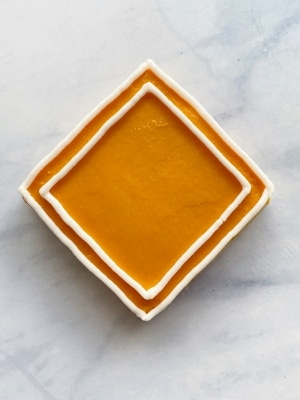
- Attach the Wilton tip #4 to the orange frosting. Outline/fill in the smaller squares and then smooth them out using your preferred method.
- Attach the Wilton tip #2 to the white frosting and outline the edge of the square. Then, create another outline on the inside of that one.
- Use the Wilton tip #2 to write the word, “CAUTION.” If you mess up while writing, use a pointed knife to pick up the mistake(s) and remove the frosting.


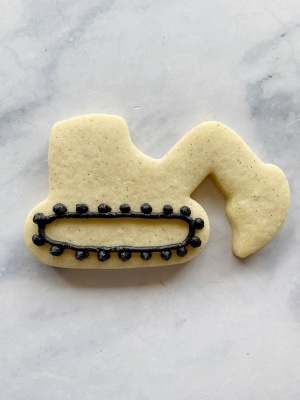
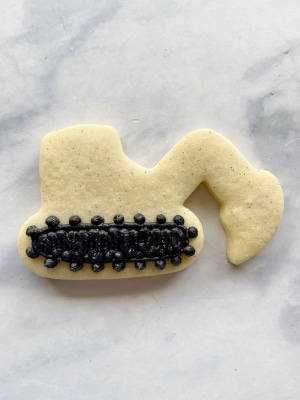
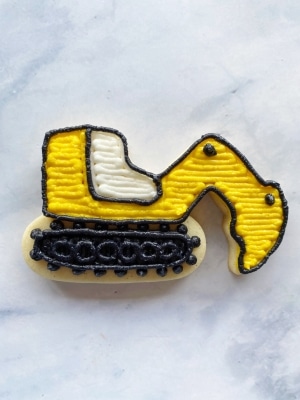
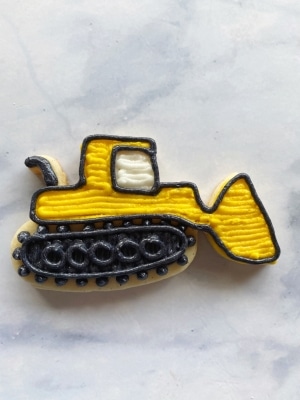
How to Decorate the Excavator Cookies
- Attach the Wilton tip #4 to the black frosting. Draw a long oval on the inside of the area where the track will be. Then, squeeze out dots along the perimeter of the oval to create the treads in the track. Last, fill in the oval.
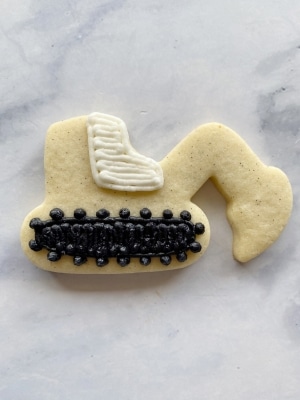
- Once you have completed step 1 on all of your digger cookies, remove/rinse/dry the tip #4 and attach it to the white frosting. Outline and fill in the window/door to the excavator/digger.
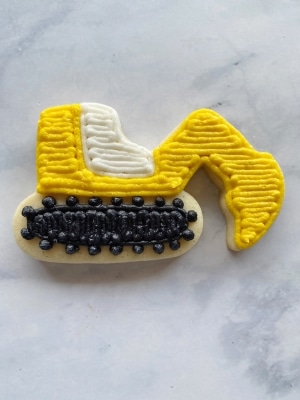
- Complete step 2 on all of your cookies. Then, remove/rinse/dry the tip #4 from the white frosting and attach it to the yellow frosting. Outline and fill in the remaining surface area of the cookie to create the tractor.
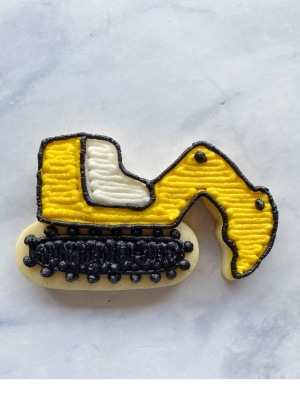
- Attach tip #2 to the black frosting and outline the edges of the excavator and window/door. Then, squeeze out two dots along the arm of the digger.
- The last step is to re-outline the oval in the track and then draw in 5-6 small circles on the inside of the track. Use the Wilton tip #2 for this step with the black frosting.
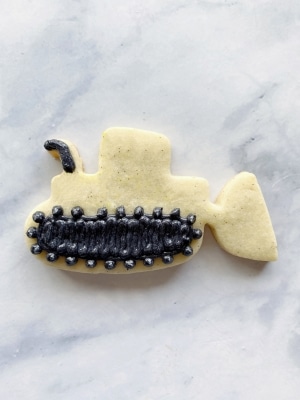
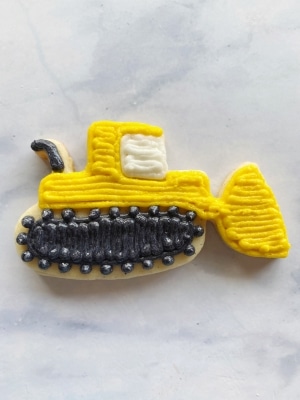
How to Decorate the Front Track Loader Cookies
- Our front track loader cookies will be similar to the digger cookies. Repeat all of step 1 on the excavator/digger cookies for these cookies as well. Then, use the same frosting to squeeze out a line for the exhaust pipe.
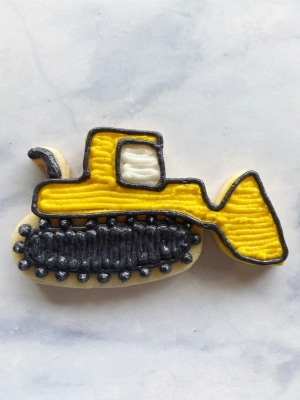
- Repeat steps 2 & 3 in the excavator cookies above for the front loader cookies. The window/door has a bit of a different shape so you can adjust that accordingly.
- Attach tip #2 to the black frosting to outline the edges of the front loader and window/door.
- Lastly, use the Wilton tip #2 to outline the oval along the track again and draw in 5-6 small circles.
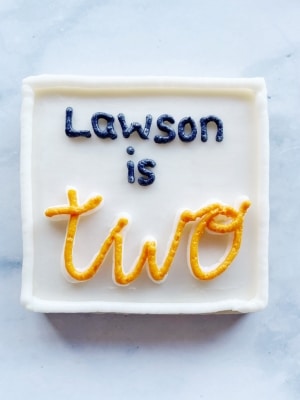
How to Decorate the Name Cookies
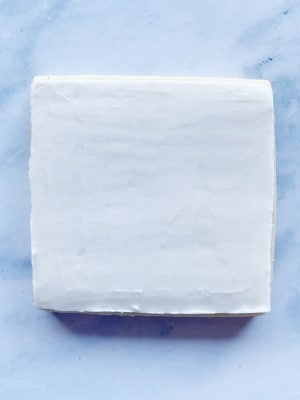
- Attach the Wilton tip #4 to the white frosting and then outline/fill in the largest square cookie(s). Smooth the cookie using your preferred method. Remember, I like the freezer method the best.
- Use the Wilton tip #4 to outline the edge of the square.
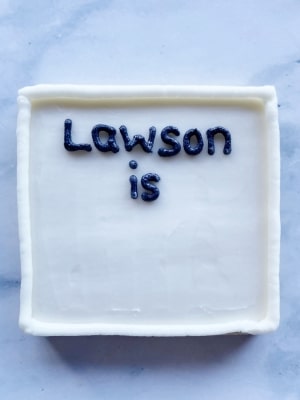
- Attach the tip #2 to the black frosting and write in “NAME OF BIRTHDAY KID is.”
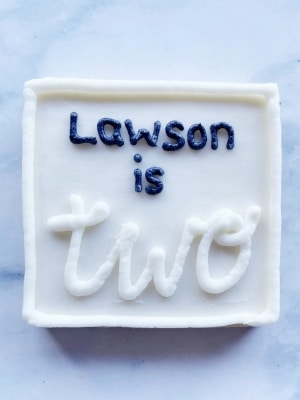
- Using the white frosting with tip #4 still attached, write the number two, or whatever the age of the child will be, in cursive.
- Remove/rinse/dry the tip #2 from the black frosting and attach it to the orange frosting. Write directly above the white frosting.
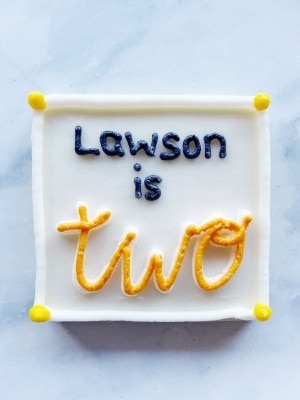
- This last step is optional, however, I like to have one cookie that has every frosting color from the set. I decided to remove/rinse/dry the tip #4 from the white frosting and attach it to the yellow. I squeezed out small yellow dots in the corners of the square.

Those are all of the cookies! I thought these ones turned out to be really fun. I definitely needed to reference the CAT website while making them to try to resemble the machines as best as possible. I also learned some new vocabulary which will be helpful for my son. At least that’s what I’m telling myself.
Part 4: How to Display Buttercream Cookies for a Party
To display these cookies at the party, allow them to sit out on the counter overnight to fully crust. This is why it is important to use a crusting buttercream recipe. You can then stack them onto a serving plate when you bring out dessert.
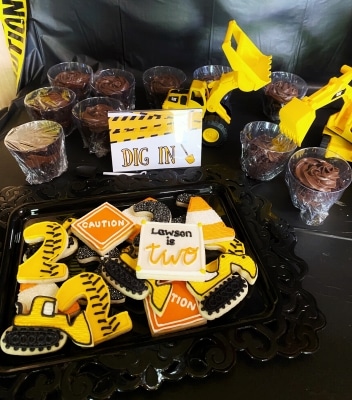
Since I made cookies, I didn’t want to make a cake. Instead, I bought boxed chocolate cake and canned chocolate frosting. To create the chocolate cake cups, I crumbled the baked cake in a large bowl. Then, I scooped some onto the bottom of the cup. I layered in chocolate icing, then added more cake, and finally topped with more chocolate frosting.
To pipe the chocolate icing from a can, I microwaved the can for about 20 seconds and then poured it into an icing bag. I had a Wilton tip #1M in the icing bag for extra fun. I used two cans of chocolate icing for one cake mix.
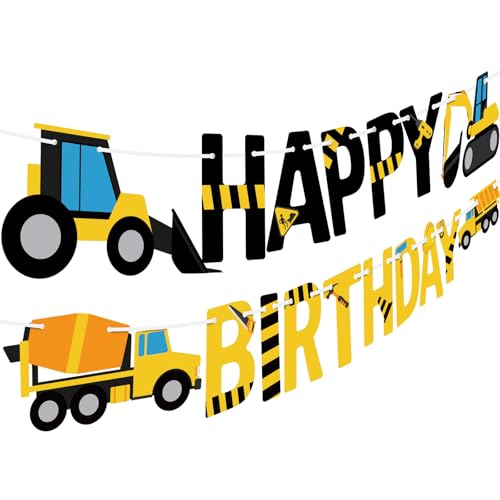
Part 5: The Construction Birthday Party Decorations
It’s so fun to decorate a construction birthday party. Grab some balloons, streamers, tabletop confetti, and a backdrop and you’re good to go!


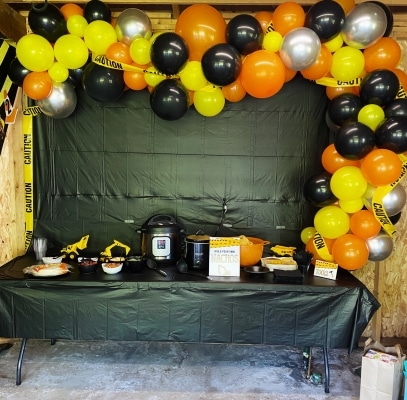
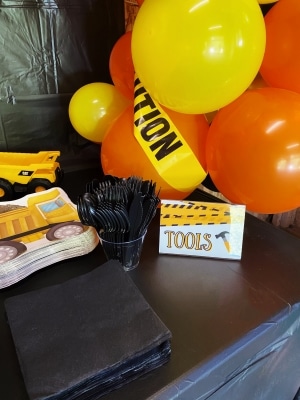
These construction themed cookies provided a bit of decoration themselves, but for more decor, I went to Amazon and the Dollar Tree. Here is all that I found at the Dollar Tree:
- black tablecloths for the table and wall
- plastic cake cups
- napkins and utensils
- orange traffic safety cones
- 8×10 and 4×6 plastic picture frames
- black and yellow streamers
My sister created a really fun banner with her Cricut machine for the party. She made two traffic safety cones and placed those at the ends of black string. She then created 12 orange traffic signs and taped 12 photos of my son, Lawson, onto the signs. It was so cute! I struggled to pick just 12 photos of him but I did it!
The rest of the items were found on Amazon. I will go ahead and link the exact items I used here. I especially love the CAT toys because they doubled as a birthday gift. I was able to purchase the plates as a stand alone item but I couldn’t find them for you, unfortunately. However, I did see them sold in a set with some added decor which would perfectly compliment the other construction birthday party decorations. I went ahead and linked those for you.


Save the Tutorial for Your DIY Construction Birthday Party
I hope you were inspired to create your own DIY construction theme party with these construction themed cookies! Make sure to save this cookie decorating tutorial for later. Use the image below to pin it to your Pinterest account. Alternatively, use the social share icons at the top of the page. Thanks for sharing!


How fun and stunning decorating work as usual! These look yummy. What a great bday party theme too.
Thank you so much, he really had a fun time!
Those cookies look so cute! I love them! A wonderful idea! Thanks for sharing!
Thank you Nora!
Beautiful! These are so adorable and my newpher would loveeee all of these. I can’t believe how simple some of these are — like the tread cookies! So creative
Really amazing and so cute! I saw this on your Instagram, what a fun way to celebrate your son’s birthday with these construction cookies.
Omg these cookies are so fun. I bet my little great nephew would live them! Amazing work, as always!
Thank you so much, Cindy! It was a fun theme!
I love these! Thanks for posting! Do you have trick or tip for getting the outline or detail work to not flake off? That part separates and breaks off even when I’m careful.
Thank you Tara! Unfortunately, I do not as this happens to me from time to time as well. I do try to make sure the background colors (such as the yellow in the tractors) don’t crust before I add the details and that seems to helps the vast majority of the time. If you find out a good trick, let me know 🙂