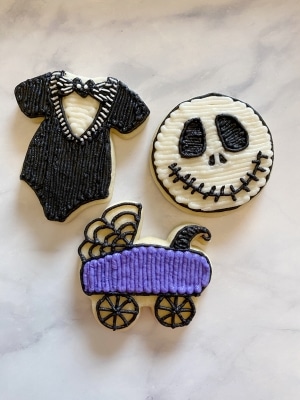
Pastel Halloween Sugar Cookies
Is it too early for decorated pastel Halloween sugar cookies? Halloween and Christmas are my two favorite holidays and I just can’t help but get a head start on Halloween cookies & party planning!
I wanted to create these cookies using the Wilton 101 Cookie Cutter Set since it is such a popular purchase for beginner “cookiers,” home bakers, or party planners.
On Pinterest, I keep seeing a fun new theme this year: pastel Halloween parties! I would have never guessed that “pastel” and “Halloween” go together but props on whoever first came up with this! So cute! A lot of these have a Monster Mash theme which is perfect for little ones.
I wanted to create these super-easy-but-cute, beginner-friendly cookies to go with your pastel Halloween party plans for this year.
Follow along for the full tutorial for how to decorate these pastel Halloween sugar cookies, including my first ever video and some decoration tips!
*This post may contain affiliate links, which means I may receive a commission, at no extra cost to you, if you make a purchase through a link. Please see my full disclosure for further information.*
Skip to
Part 1: Gathering your Supplies & Baking the Pastel Halloween Sugar Cookies

To create these cookies, you will need:
- 4 icing bags
- 4 Wilton #3 tips
- 1 Wilton #1 tip
- 1 coupler
- Wilton 101 cookie cutter set which you can get here: Wilton 101 Cookie Cutter Set
- Wilton gel coloring to obtain pastel pink, teal, pastel purple, and black buttercream frosting, here’s my crusting buttercream recipe
- Your favorite sugar cookie dough recipe – if you don’t have a favorite, here’s mine
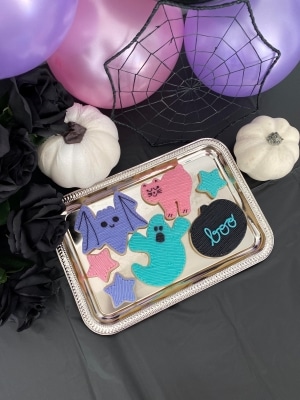
The cookie cutters you will need from your Wilton 101 set will be the bat, the pumpkin, the cat, the ghost, and the mini stars.
Roll, cut out, and bake your sugar cookies according to the cookie dough recipe linked above.
While they are cooling, whip up your frosting. To set up your frosting bags, you will place your black frosting into a bag with a coupler, attaching tip #3 to it first. For instructions on how to do this, visit my page Getting Started: Learn How to Decorate Buttercream Cookies. Place your pink, teal, and purple frostings into their own respective bags, each with a tip #3 in the bag.
Part 2: Decorating the Pastel Halloween Sugar Cookies
Let’s do the ghost first since I have a video showing how to outline, fill, and detail buttercream cookies. You will need your teal frosting & your black frosting, with tip #3 attached. First, outline and fill your ghost shape with the teal frosting. Then, take your black frosting and create two circles for the eyes and a misshaped oval to represent the open mouth.

To decorate your mini star sugar cookies, outline the star with either your pink, purple, or teal frosting and then fill it in.


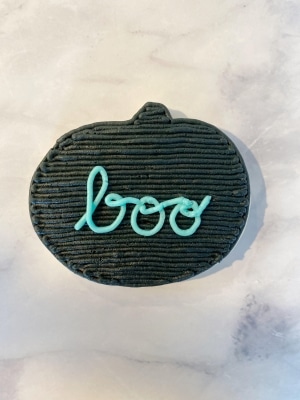
To decorate your pumpkin decorated cookies, take your black frosting with tip #3 attached and outline/fill the pumpkin.


Next, take your teal frosting and write “boo” in the center of the pumpkin. I chose to use a cursive font because I think it is more forgiving. If you mess up your letters, you can take a knife and either gently push the frosting around to fix a wonky line or pick up the frosting all together to “erase” it and restart with fresh frosting.
To decorate your cat sugar cookies, take your pink frosting and outline/fill in the cat.

Now, switch your black frosting over to a tip #1. You will be adding in the fine details on the cat so the smaller the tip, the better. Draw in two upside down “v” shapes for the ears, two half circles for the eyes, a triangle for the nose, and another half circle for the mouth. Use your knife to fix any wonky lines if needed.

Draw in three little lines to represent the whiskers on each side of the nose and some lines to represent paws on the feet. I also added some eyelashes to the eyes for an extra cuteness factor.

Lastly, to decorate the bat sugar cookies, outline and fill your bat with the purple frosting. When filling in odd shapes, try to find “blocks” of frosting to fill first. You can see the steps I took to fill in the frosting in the photo series below:


Take your black frosting, still with tip #1 attached, and draw two circles to represent the eyes. Again, if they aren’t symmetrical enough, use a knife to push the lines gently or erase and start over again. Fill in the circles and then draw a half circle with two lines coming out to represent the vampire teeth.

Don’t forget to add the wing lines to the bat as well.

And that’s it for the cookies! Feel free to play around with the colors and give them your own creative spin.

Part 3: Decorating for the Pastel Halloween Party
Hitting up the nearby Dollar Tree is always my go-to for decorating on the cheap. You can also check out Hobby Lobby, Michael’s, Party City, whatever your favorites are. Make sure to pull out decorations from previous years as well. To get my exact look, you will want to obtain:
- a black tablecloth
- black roses
- pastel balloons
- black balloons
- a black spider web
- two white pumpkins
First, find a good place to set up your table that will house your sugar cookies and other fun Halloween treats. I made sure that this table was close to a wall that didn’t have a window. When you blow up your balloons, you will be taping them onto your wall as a background – no need for an expensive helium tank over here! Lay your decorations out as you please & just have fun with it!

To save these for later, pin one of the images below. Don’t forget to comment with a picture of your pastel Halloween sugar cookies and party decor! I would love to see it. You can also tag me on Instagram @buttercreamparties! And, as always, thank you for reading my blog and happy party planning!