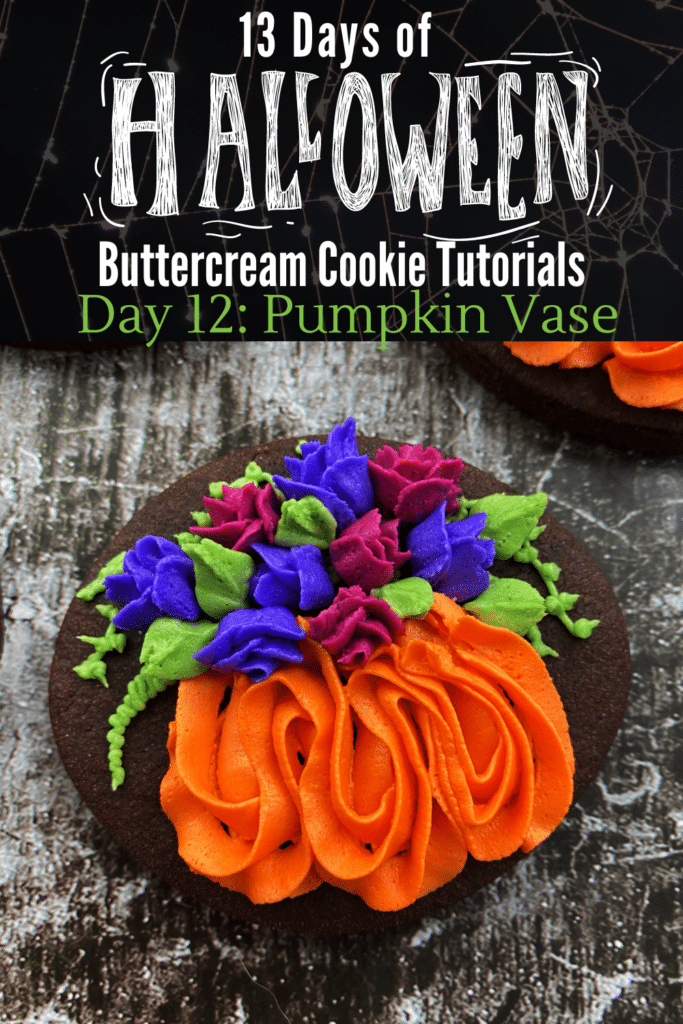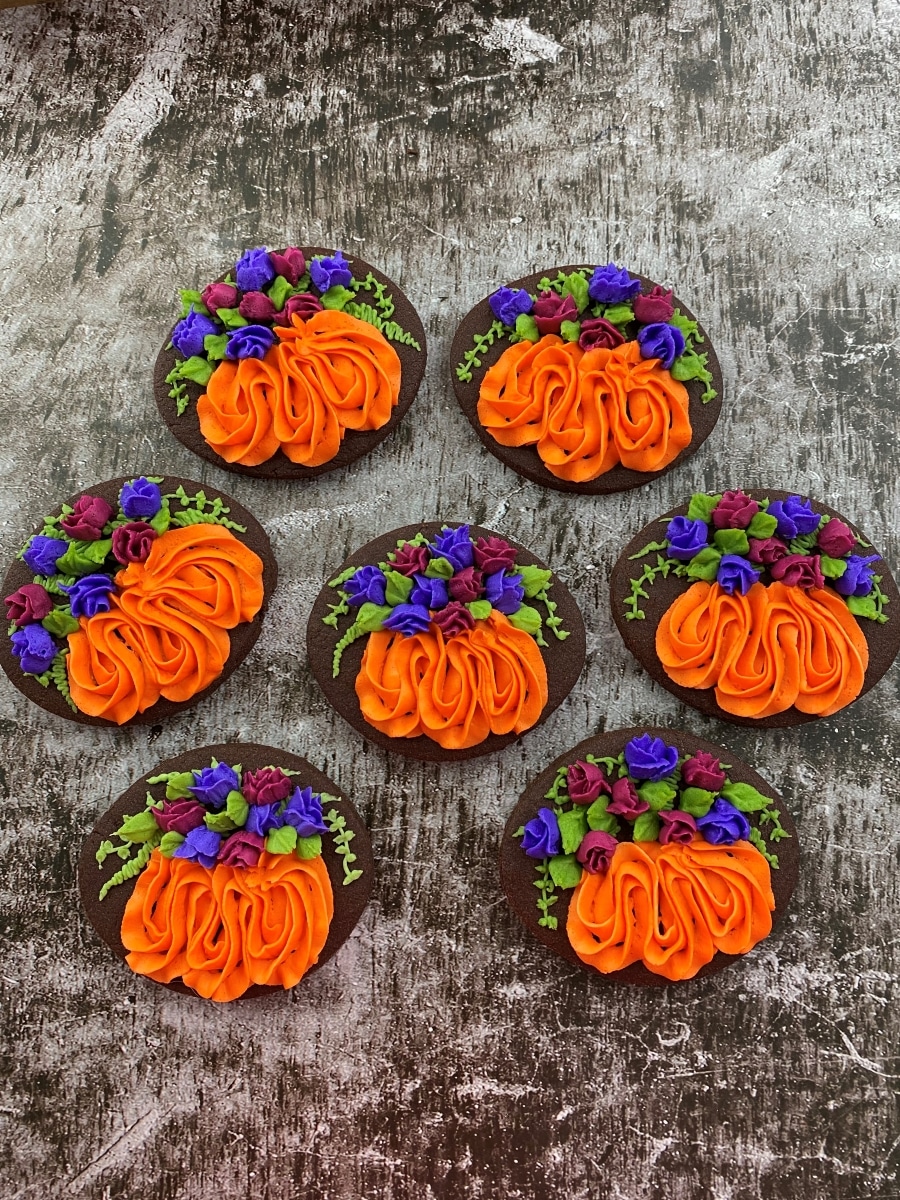
Pumpkin Vase Cookie Tutorial – 13 Days of Halloween Cookie Decorating
For Day 12 of the Halloween Cookie Decorating tutorials I decided to create this cute pumpkin vase cookie tutorial. It’s a good mix of Halloween and Thanksgiving, which is why I saved it toward the end of the countdown.
You can spook these pumpkin cookies up by placing them on a scary Halloween table scape. On the other hand, you can set these out for a classy Thanksgiving dessert.
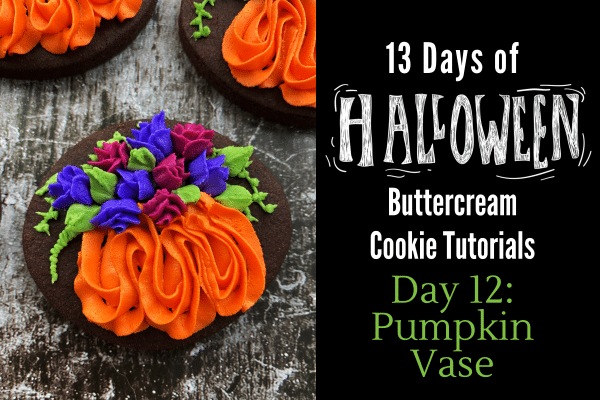
The pumpkin vase cookie tutorial is step-by-step with a video tutorial as well. I know buttercream roses can be intimidating, but I got you!
*This post may contain affiliate links, which means I may receive a commission, at no extra cost to you, if you make a purchase through a link. Please see my full disclosure for further information.*
Skip to
Part 1: Gathering the Supplies for the Pumpkin Vase Cookies
To best follow the pumpkin vase cookie tutorial, you will want to gather:
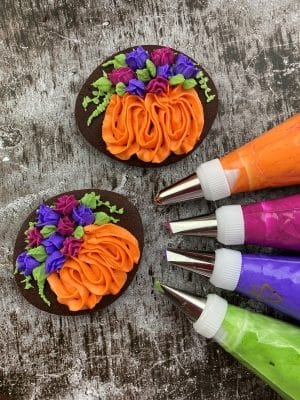
- 4 Icing bags
- 1 Coupler
- Wilton #1, #101, #102, #131, and #352 tip sizes – buy these individually at a bake supply store or purchase this kit
- Easter egg cookie cutter – I used the one in this set which includes cookie cutters used for some of my other Halloween decorating tutorials as well
- Wilton orange, burgundy, purple, and sage green gel food dyes, I’ve found the best price at Walmart
- Ingredients for a crusting buttercream, find my crusting buttercream icing recipe here
- Ingredients for sugar cookie dough, find my no spread sugar cookies recipe here
- I used my chocolate cookie recipe, coming to you soon!
Part 2: Baking the Cookies and Setting up The Icing Bags
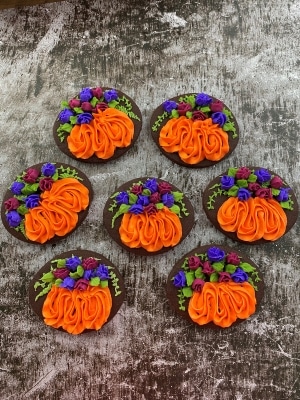
- Roll, cut out, and bake your sugar cookies according to the recipe. You will be able to make about 18 sugar cookies with the cookie cutter & recipes linked above.
- Make your buttercream icing and take out one cup of frosting and mix in the purple food dye. Then, add that to an icing bag with the tip #102 in it.
- Remove another cup of frosting from the mixer and mix in the burgundy gel food dye. Add that frosting to an icing bag with the tip #101 in it.
- Remove another cup of frosting from the mixer and mix in the sage green gel food dye. Add that frosting to an icing bag with a coupler in it.
- Color the remaining frosting orange. Add that frosting to an icing bag with a tip #131 in it until the frosting is to the max fill line.
- If you don’t know how to set up icing bags, just hop over to my Getting Started: Learn How to Decorate Buttercream Cookies page for a detailed explanation.
Part 3: The Pumpkin Vase Cookie Tutorial
Check out the video here to see the pumpkin vase cookie tutorial. Then, check out the breakdown step-by-step photo series tutorial below.
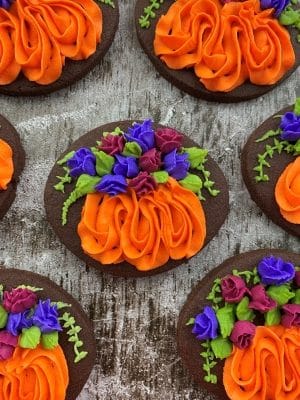
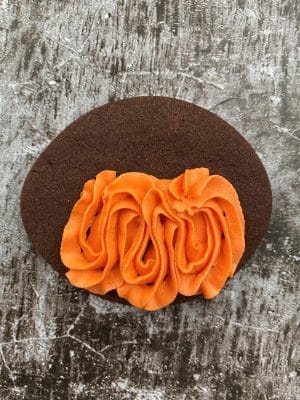
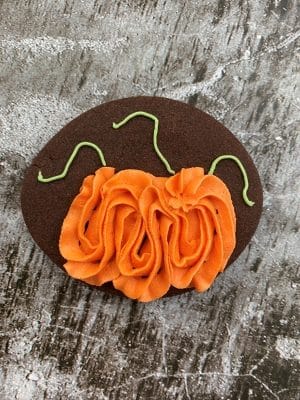
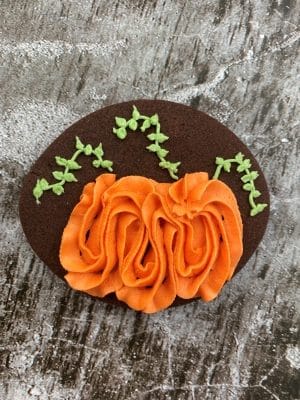
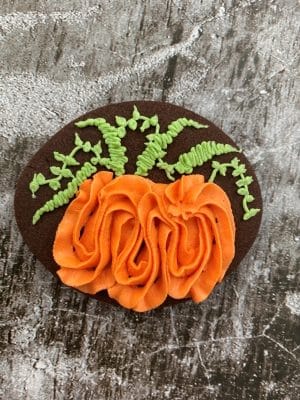
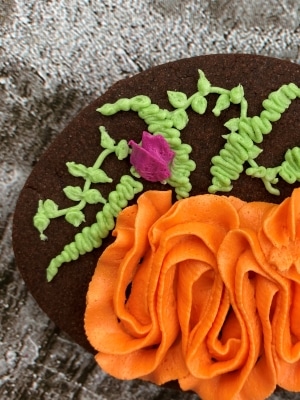
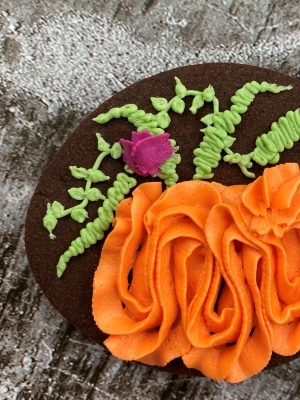
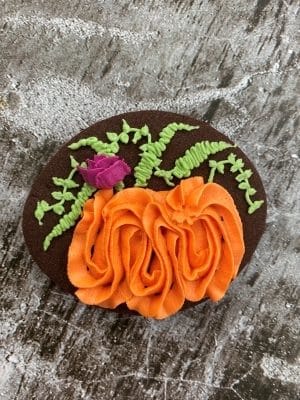
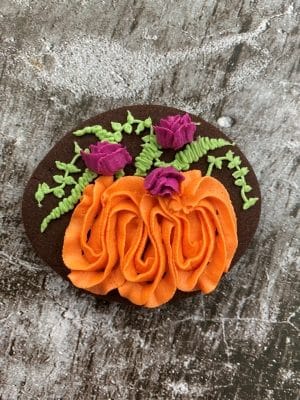
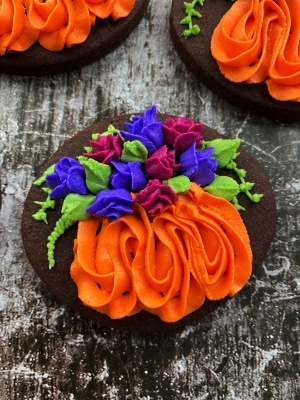
- Using the orange frosting, pipe out the pumpkin. To do this, you will start at the top left side of the to-be-pumpkin and draw a curvy “wv” shape. If you are left handed, start on the top right side. Remember, you can watch the video above for a visual.

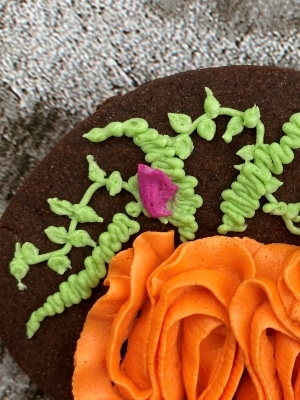
- Attach the tip #1 to the sage green frosting and pipe out the greenery. I did a few vines with mini leaves and some ferns. The mini leaves are just dots pulled out from curved lines and the ferns are just back and forth lines.
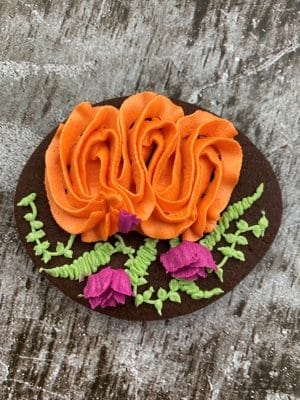
- To pipe the roses, choose either the burgundy or the purple icing bag. The rose will be formed by having the skinny side up and the fat side down.
- Pipe the rose bud by placing the tip onto the cookie sideways so that the skinny side is up and the fat side is down. Squeeze out frosting as you pick up the icing, move it to the right, and place it back down where the line started. Basically, draw a line to the right but pick it up & place it back down where it started.
- Create the petals by doing the same motion, just with a line that doesn’t connect in the middle. The tip will also be angled more up toward you so that the petals come outward.
- I did 2-3 layers of petals on each rose. Just make sure to alternate the “seams” of the petals with each row you do.
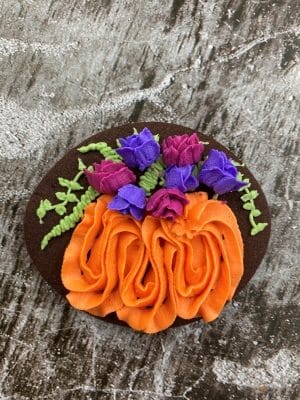
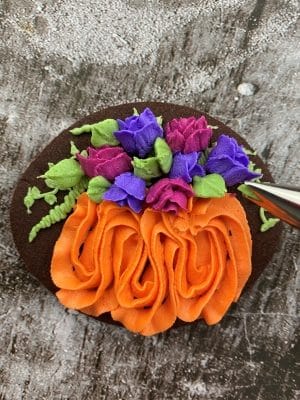
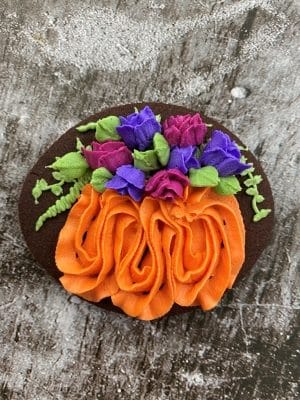
To create roses in another direction, rotate the cookie so that you are making the same movements. In this case, I wanted the rose to appear to lean out the front of the pumpkin. Turning the cookie 180 degrees made this much simpler.
- Pipe the rose bud by placing the tip onto the cookie sideways so that the skinny side is up and the fat side is down. Squeeze out frosting as you pick up the icing, move it to the right, and place it back down where the line started. Basically, draw a line to the right but pick it up & place it back down where it started.
- Once you are happy with the first color of roses, repeat step 3 with the next color.
- To fill in the spaces, pipe some leaves out with the sage green frosting. To do this, remove the tip #1 from the frosting and replace it with the #352 tip. Pipe the leaf by holding it so that you see a “^” shape as you look down onto it.
The pumpkin vase cookie tutorial may sound overwhelming, but once you do your first rose, you’ve got it.
Don’t be intimidated by the steps, you can do it! And remember, you can always send me an email at [email protected] with any questions.
Save the Pumpkin Vase Cookie Tutorial for Later
Use the image below to pin this Halloween cookie decorating tutorial to your Halloween party board on Pinterest. Alternatively, use any of the social share icons on the top of the page to share it to your favorite social media site.