How to Decorate Dinosaur Cookies with Buttercream Frosting
677 - 677Shares
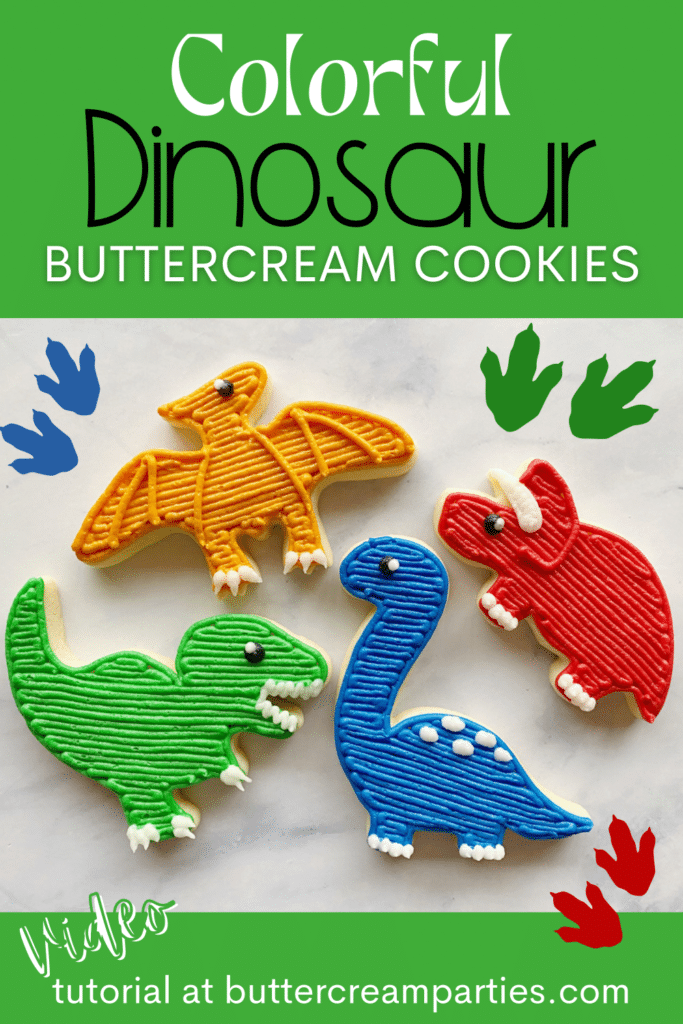
Today I have a fun and colorful tutorial for decorating dinosaur cookies! These buttercream cookies are perfect for dinosaur baby showers or dinosaur birthday parties.
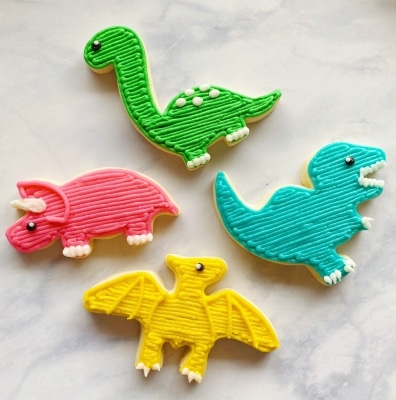
Included in the cookie decorating tutorial are brontosaurus cookies, t rex cookies, triceratops cookies, and pterodactyl cookies.
Have fun picking your own color palette for these ones, as they can easily be for both girl or boy party themes.
*This post may contain affiliate links, which means I may receive a commission, at no extra cost to you, if you make a purchase through a link. Please see my full disclosure for further information.*
Skip to
Part 1: Gathering your Supplies for the Buttercream Dinosaur Cookies
To create these dinosaur sugar cookies, you will want to gather:
- 6 Icing bags
- 6 Couplers
- One Wilton tip #2 and one tip #4 – buy these individually at a craft store or purchase this kit that I use
- Dinosaur cookie cutters
- Buttercream frosting in black, white, and four of your preferred colors – find my crusting buttercream icing recipe here
- No spread sugar cookie dough – find my no spread sugar cookies recipe here
You may be asking, “What are couplers?” Couplers allow you to change your tips on your icing bags. Check out my page, Getting Started: Learn How to Decorate Buttercream Cookies, to learn how to do this. Essentially, you will attach a coupler to each icing bag. When you need to attach a tip, just make sure to rinse out the previous color from the tip with hot water. Purchasing a set of couplers is pretty affordable on Amazon: 4 Count Wilton Coupler Set.
Part 2: Baking the Cookies and Setting up Your Icing Bags
- Roll, cut out, and bake your sugar cookies according to the recipe. I like to do 3 of each dinosaur cookie for a total of 12 cookies.
- Make your buttercream icing and separate it into six bowls. Two of the bowls do not need much icing at all, these will be the black and white icing colors. The black is only used for the dinosaur’s eyes and the white is for a few details on each cookie. Divvy up the four other bowls as equal to each other as you can. Pick your four dinosaur shades and mix those colors. Remember that the color will deepen as it sets. I prefer to use the Wilton gel food dye since gel is more vibrant (i.e. more cost effective because you use less) than liquid and doesn’t change the consistency of your frosting.
- Set up your icing bags as follows: Place each of your frosting colors into their own icing bags set up with couplers. If you don’t know how to do this, just hop over to my Getting Started: Learn How to Decorate Buttercream Cookies page. You don’t need to attach any tips to the bags yet.
Part 3: The Tutorial for Decorating Dinosaur Cookies with Buttercream
Check out the video here to see how to make dinosaur cookies using buttercream frosting. Then, check out the step-by-step photo series tutorials for each dinosaur below.
How to Decorate the Brontosaurus Cookies
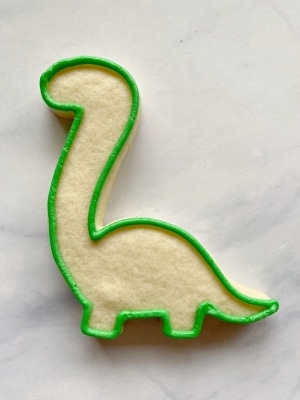
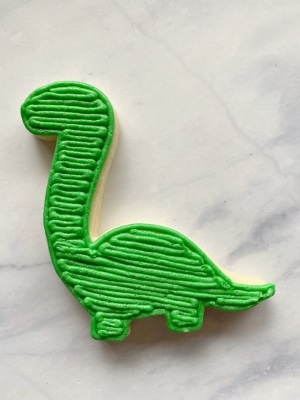
- First, does anyone else think of Littlefoot when they see brontosaurus dinosaurs? Where are my 90’s babies at? Anyway, back to the tutorial, attach tip #4 to your preferred icing bag. Outline and fill in the whole brontosaurus cookie.
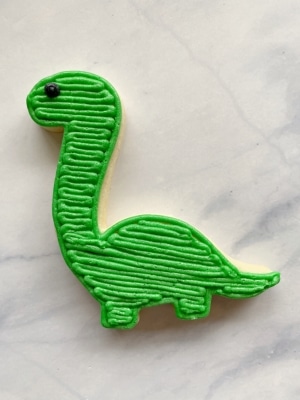
- Attach the tip #2 to the black frosting and squeeze out a dot for the eye. I made my eyes larger than a “2” sized tip would be by just holding the icing bag still for a bit while squeezing out frosting. Make sure to do this step on all of your brontosaurus cookies before going to step 3.
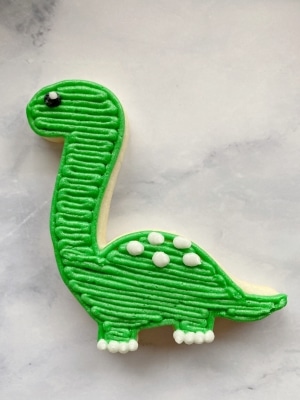
- Remove/rinse/dry the tip #2 from the black frosting and attach it to the white frosting. Squeeze out a small dot for a reflection in the eye. While this isn’t necessary, I like the character it gives each dinosaur. Then, squeeze out dots on each foot and some oval dots onto the brontosaurus’ back.
How to Decorate the Triceratops Cookies
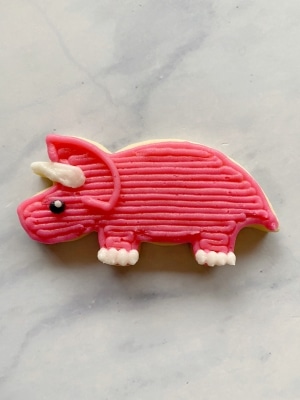
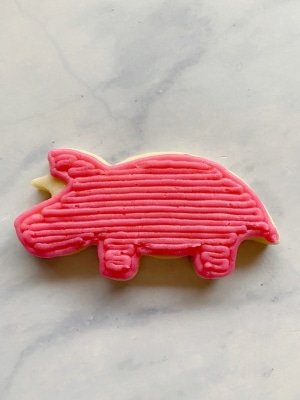
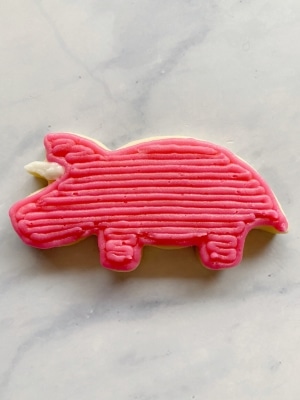
- For our Cera cookies, okay just kidding, our triceratops cookies, attach tip #4 to your preferred icing color. Remember to remove/rinse/dry the tip from the color you used for the brontosaurus cookies. Outline and fill in the whole cookie except for a spot for the horn.
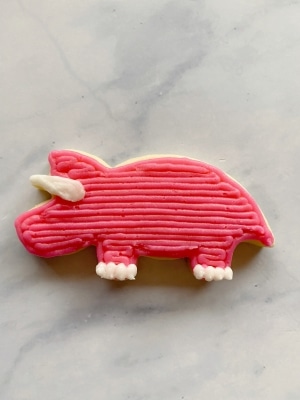
- Attach tip #2 to the white frosting and fill in the horn area. Then, redraw the horn so that it extends into the triceratops a bit. Add some dots on the feet as well.
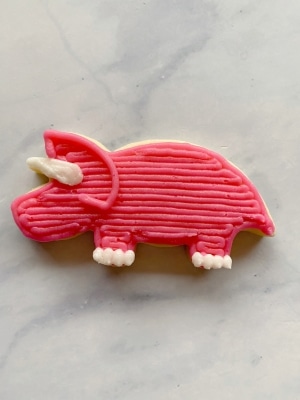
- Use the colored frosting with the tip #4 attached to draw the “3 horns” on the triceratops head. I just did a curved line but you can get fancy with adding points to represent horns. You can see that I drew over part of the cookie outline and extended it out so that the whole horn area was the same height.
4. Once you’ve completed steps 2 & 3 on all of your triceratops cookies, remove/rinse/dry the tip #2 from the white frosting and add it to the black. Squeeze out a dot for the eye. Do that for all of the triceratops cookies. Then, remove/rinse/dry the tip #2 and place it back onto the white frosting if you want to add a nice reflective spot to the eye. Again, I like the added character this gives the dinosaur cookies.
How to Decorate the T Rex Cookies
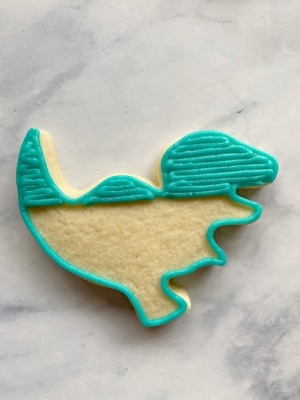
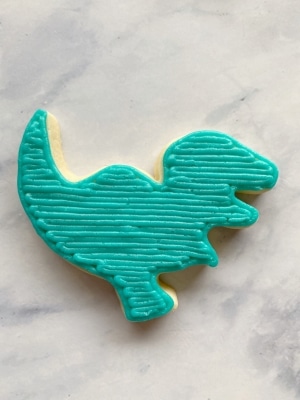
- Outline and fill in the whole cookie using a tip #4 with your preferred shade of frosting. A tip when filling in irregular shapes is to work in small sections instead of trying to fill in the cookie all in one go. In the photo below these were 3 different sections of linework.
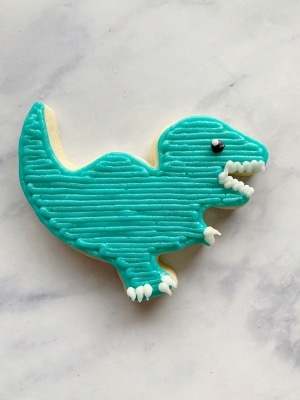
- Attach the tip #2 to the black frosting if it isn’t already attached and squeeze out a dot for the eye. Do this step for all of your t rex cookies. Then, remove/rinse/dry the tip #2 and attach it to the white frosting. Add the reflection in the eye, the teeth, and the sharp claws. To achieve the teeth, just make zig-zag lines. To achieve the claws, squeeze out a dot and then pull the frosting away from the cookie until it comes to a point.
How to Decorate the Pterodactyl Cookies
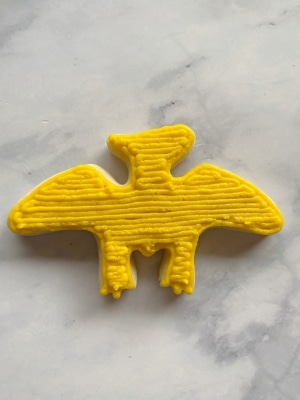
- Use the tip #4 on your preferred icing color and outline/fill in the whole cookie.
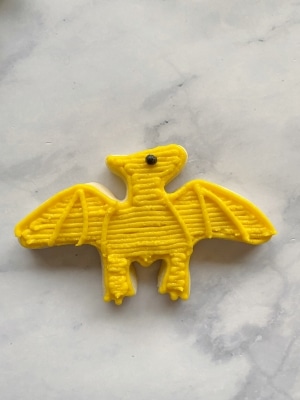
- Re-outline part of the pterodactyl wings and draw in two lines coming off of the tip of the wing. Do this for both wings. Then, attach tip #2 to the black icing bag and squeeze out an eye.
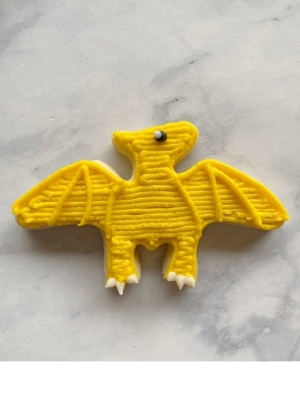
- Once you’ve completed step 2 on all of you pterodactyl cookies, remove/rinse/dry the tip #2 and add it to the white frosting. Add in the reflective dot on the eye and then create 3 claws on the bottom of each foot. Use the same method for the claws as you did the t rex cookies.
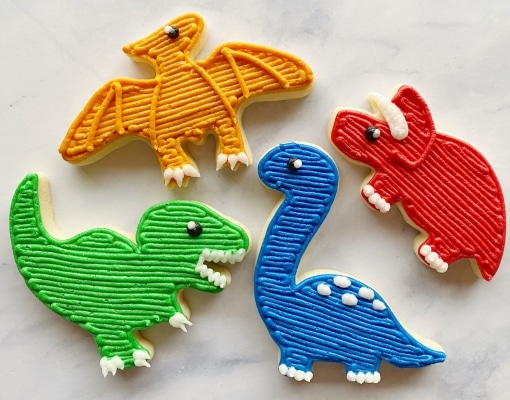
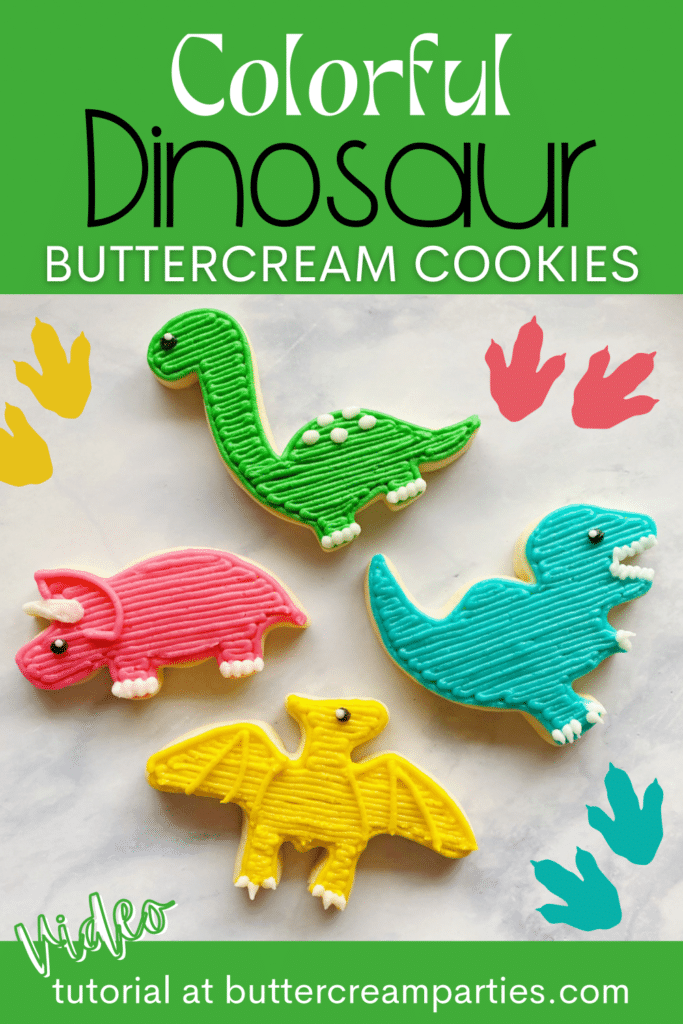
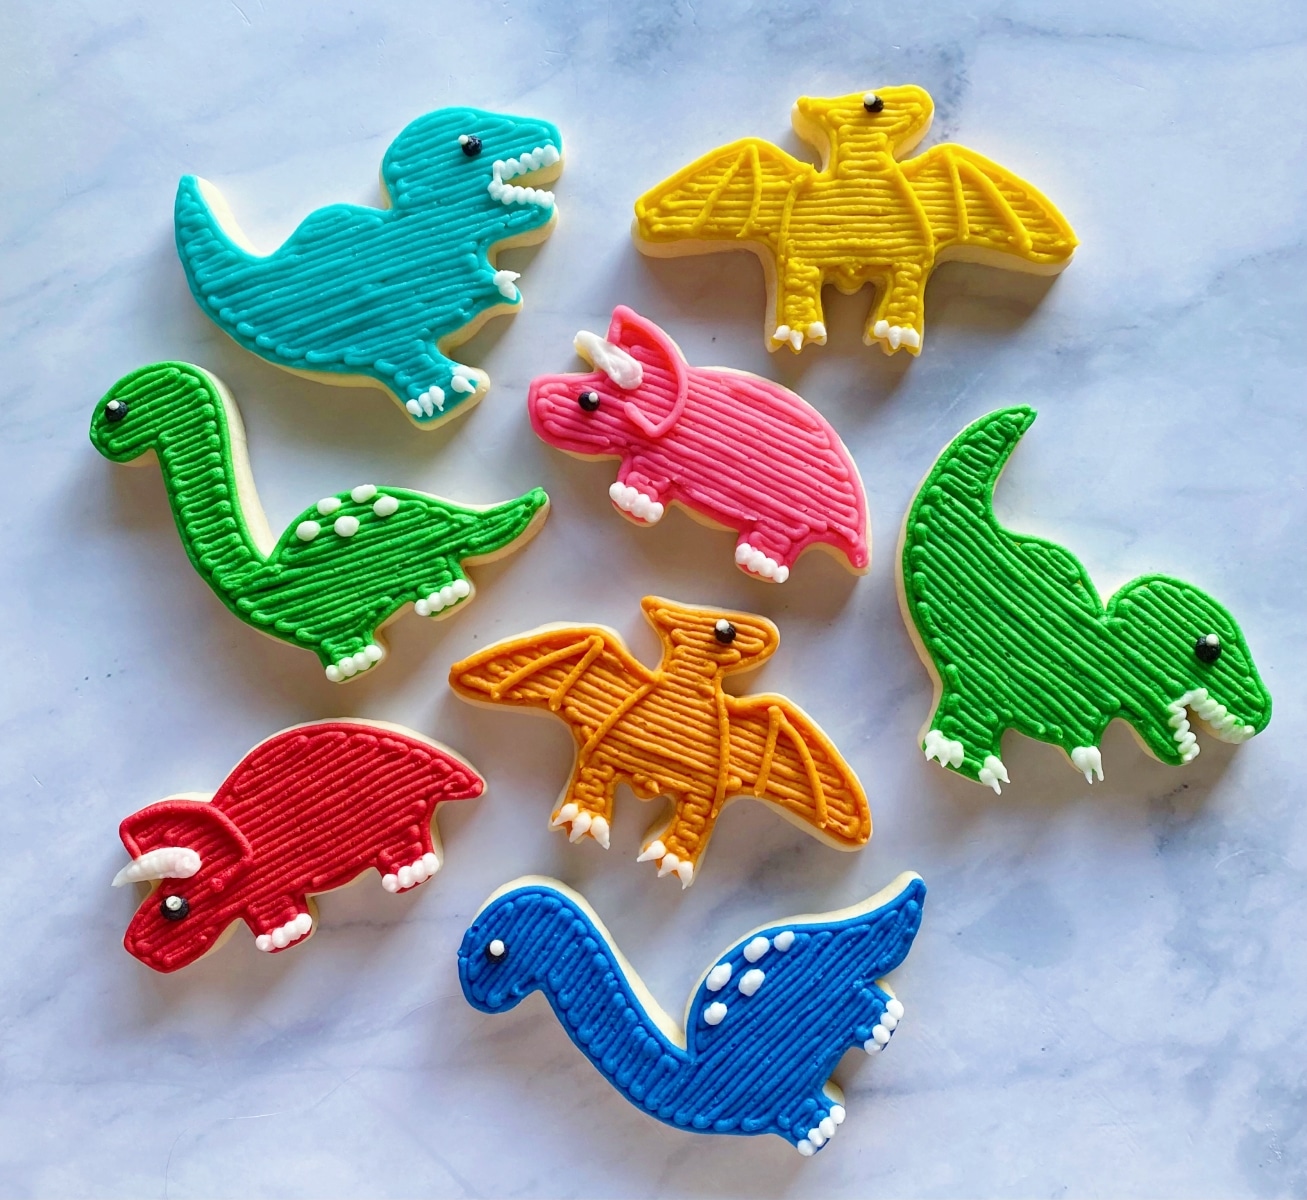
Aren’t these dinosaur cookies so fun? I love how colorful they are and how you can customize them to fit any dinosaur birthday party or baby shower color scheme. Here are the same cookies done in red, blue, orange, and green:
Do you need to package your cookies to make dinosaur party favors? Check out my post here, How to Package Buttercream Sugar Cookies.
Part 4: Decorating the Dinosaur Birthday Party
It’s so fun to decorate a dinosaur birthday party. Grab some balloons, streamers, tabletop confetti, and a backdrop and you’re good to go!
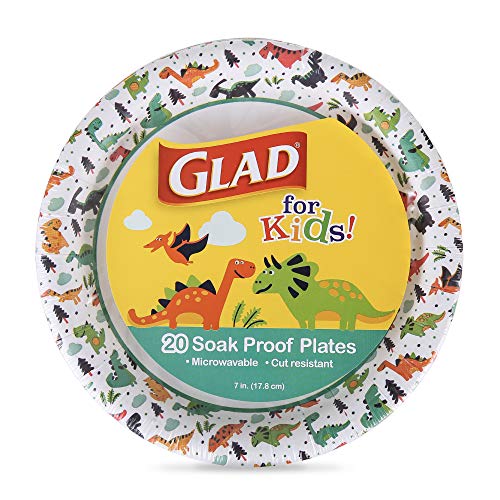
- Cute Dinosaur Design - The Glad for Kids 7-Inch Paper Plates feature a fun and adorable dinosaur design that will surely delight children and add a festive touch to any occasion.
- Heavy Duty and Soak Proof - These plates are made to withstand a good amount of food without getting soggy. Perfect for serving all kinds of dishes, from birthday cake to party snacks.
- Microwavable - These paper plates are not just disposable and soak proof, but also microwavable. You can conveniently heat up food directly on these plates, making meal prep easier.
- Perfect for All Occasions - Whether it's a birthday party, a dinosaur-themed party, or just a regular day at home, these paper plates are perfect. They add color and fun to any meal.
- Package Includes 20 Plates - Each pack comes with 20 pieces of 7-inch paper plates. This is enough for a small party or multiple meals, offering value for your money.
- REALISTIC DESIGN: Best Cool and Realistic 30” tall Inflatable Tyrannosaurus for Dinosaur Decorations, Birthday Party Decorations and Gifts
- HIGH-QUALITY: Thick vinyl material provide durable use
- INFLATABLE DINOSAUR: Inflate T-Rex with a pump to get the best result. It stands with its own legs, does not need any support
- WIDE APPLICATION: Great for gifts, party, home or birthday decorations. Best gigantic inflatable blow up dinosaur
- CHILD SAFE: Non-Toxic material. Meet US Toy Standard. ASTM Safety Test Approved
- SUPER VALUE PACK. Our 24 Serves Dinosaur Birthday Party Supplies Set includes 24 pcs 9" Paper Plates, 24 pcs 9 oz Paper Cups, 24 pcs 6.5" x 6.5" Napkins, 24 pcs plastic forks, 24 pcs plastic knives, 24 pcs plastic spoons, 1 pc 6ft long T-REX design Happy birthday banner, Total 145 pcs, with Cool Dinosaur Designs.
- QUICK & EASY CLEAN. Our disposable tableware set makes the clean up after party so much easier, simply dispose of them after use, saving more time to enjoy your party!
- PREMIUM QUALITY. Our napkins are made of soft and effective paper, the cups and plates are made of durable thick 350gsm paper which will be sturdy to hold drinks and food. There is no need to worry about the tears and flimsy folds.
- FUN DESIGN BANNER. The cute realistic T-rex design “ HAPPY BIRTHDAY” banner featured a movable jaw, hands, and leg which will make your birthday party fun.
- CUSTOMER SATISFACTION. Providing a great shopping experience is our main priority to our customers. Feel free to message us through “contact sellers” if products don't meet your expectations. The celebrations start at JOYIN!
- Package includes 24 cards with 24 colorful eggs. Dino toys let kids get more than a card.
- Dinosaur eggs favors are sure to be hit at your kids birthday party!
- Each card saying "Thanks for stomping by!" and include an egg for each child to hatch themselves.
- Simply place the egg in a small cup of water for 24-72 hours. It will hatch and grow into a small rubber dinosaur. The longer it's left in water, the larger it will grow!
- Made of plastic material. Each package includes: (1) dinosaur picture – 18 in by 21 ½ in. (1) blindfold mask. (12) numbered tails
- Super Valued Dinosaur Party Favors for kids: 12PCS Dinosaur Masks, 12PCS Slap Bracelets, 12PCS Dinosaur Stamps, 12PCS Dinosaur Key Chains, 50PCS Random Dinosaur Stickers, 12PCS Dinosaur Make a Dinosaur Face Stickers, 12PCS Dinosaur Rings, 12PCS Little Dinosaurs Figures, 12PCS Dinosaur Tattoo Stickers, 12PCS Dinosaur Paper Gifts Bags, 12PCS Dinosaur Gifts Bag Round Stickers, 12PCS Random Dinosaur Stress Relief Toys, 12PCS Dinosaur Eggs Toys, 12PCS Dinosaur Scracth Paper Bookmark set.
- Non Toxic and safe Dino party favors. Meet Toy Standard. Make a dinosaur themed party more fun and interesting with this dinosaur themed birthday party supplies.
- Perfect Dinosaur Party Decorations: Ideal presents and perfect party favors gifts for kids in celebrations with Dinosaur theme. This dinosaur toys, great for boys and girls, is a great goodie bag fillers with cute dinosaur gift bags. It can also used as treasure box prizes, student classroom rewards, carnival prizes, dinosaur pinata fillers, party giveaway items, Easter egg fillers, Easter basket stuffers and Easter day eggs hunt.
- A valued Kids' Multi-Item Party Favour Packs. What you kids can get from this gifts? Fun, Happy and multi accessories for dinosaurs. They can share happy and build friendship with cute dinosaur bags, dinosaur eggs, dinosaur scratch paper bookmark, dinosaur slap bracelets and dinosaur key chains. They can play games wearing colorful dinosaur masks. They can also play the dinosaur stickers and tattoo stickers to strengthen the dinosaur party experience.
- Endless Fun for Dinosaur Theme Party Celebrations. You can put all dinosaur accessories and toys in the dinosaur goodie bags for kids birthday as great return gifts for dinosaur theme birthday party. With this bright color, various little dinosaur themed party toys, your kids will definitely love dinosaur birthday theme party!
- MATERIAL - Our party balloons are made of Aluminium Foil. NOT-EASY BURST. Safe to use. Can be filled with air or helium
- PACKAGE INCLUDED - 4Pcs Dinosaur foil balloons, Green Yellow Blue and deep orange dinosaur balloons.
- Easy to use - Easy to inflate and deflate these foil balloons, the inflation port is flattened and the air outlet will be automatically sealed after being inflated
- PERFECT FOR DINOSAUR PARTY DECORATIONS - Ideal for Dinosaur Birthday Party Decorations.
- SIZE - Blue dinosaur balloon size 26 x 19 inch, Green dinosaur size 36 x 22 inch, yellow dinosaur balloon size 23 x 12 inch and deep orange dinosaur balloon size 36 x 21 inch.
- Dinosaur Birthday Party Supplies : Our dinosaur-themed party set includes everything you need to throw an unforgettable themed birthday party. You'll receive a vibrant dinosaur birthday banner, 24 x 9-inch plates, 24 x 7-inch plates, 24 napkins, 24 forks, 24 cups, 24 knives, and 24 scoops.
- Dinosaur Design : The unique watercolor style of our dinosaur party supplies, featured on our dinosaur plates and napkins, adds a touch of whimsy and fantasy to your party decor. Decorating your party with watercolor dinosaur party supplies will be a great choice.
- Wide Application : These dinosaur decorations for a birthday party can be used not only for a dinosaur-themed party but also for girl dinosaur party supplies and baby shower-themed parties. They can also be paired with your all-in-one dinosaur-themed birthday party decorations, dinosaur party decorations, and more celebration events for dinosaur fans.
- Enjoy the Party : You will be able to throw a dinosaur-themed party that impresses your guests. This disposable tableware and T-Rex birthday party decorations can help you clean up easily after an event or party. Save time and effort, and spend more time with family or friends enjoying the party.
- Complete Satisfaction : Our dinosaur birthday party supplies include a complete set of tableware that can serve up to 24 guests at once. If you encounter any issues with the dinosaur party tableware set or have any concerns about the product you received, please don't hesitate to contact us. We will promptly address and resolve any problems to ensure your satisfaction.
- LFVIK Dinosaur party set include-80pcs High quality balloons(Gold,Dark green, Light green, Fruit green,red),4 Pcs large sized dinosaur balloons,2 Pcs small dinosaur balloons,1 Pcs large sized coconut tree,16 Inch Birthday Sign Banner Balloons,2 Pcs Green party rain curtains,5 Pcs Gold paper tassel,Balloon decorating Strip;Glue Point(100Dots);Silver ribbons;3pcs balloons flower clips,1pcs Paper instruction!
- Easy to Use-The balloon decorating strip can make various types of balloon arches and garland, bring you a gorgeous party decorations.Use the glue points inside the set to stick the balloon where you want it;Use ribbon to hang the balloon looks more gorgeous.It contains the necessary supplies for the celebration party.
- Thickening Material-Balloons are crafted of aluminum foil or strong latex,,Every balloons have been rigorously tested and selected manually. EXTRA THICK, unlike ordinary balloons, the color is more full and not explosive,can support all-day parties.
- Exciting Decoration-Your friends and relatives will be in love with these beautiful jurassic styles party.We have put all dinosaur,Jurrasic,jungle animal decorations together to save you time.Create a prehistoric backdrop with the items and you will have the ideal Dinosaur Party!
- LFVIK Brand Services-If you have any dissatisfaction with our product, please feel free to contact us and we will do our best to quickly and efficiently solve your problem.
- Save Your Time: Why spend your precious time and money shopping around for different birthday party decorations, a separate plate set and other birthday party supplies? This dinosaur theme birthday supplies kit is All-in-One Pack, includes paper dinner Plates, dessert plates, Cups, Napkins, Cutlery, straws balloons and all kinds of dino party decorations.Total 210 Pieces, serves up to 20 guests.
- Dinosaur Party Supplies For Boys: Paper plates, cups and napkins feature a colorful design of bright dinosaurs; create a perfectly coordinated dinosaur theme for boys' birthday, science parties, baby showers, family events, and classroom parties
- High-Quality Material: Plates, Cups, Napkins, and Garlands are made of food grade paper. The plate is made of 350 gram paper, so they are very thick and won't fold while carrying food, they can hold up to the weight of the food. Flatware set is 100% Food Grade and Durable, No smell.
- Quick and Easy Clean Up: The dino party supplies are very complete, which include everything you need for kids birthday. An ideal alternative to traditional plastic party plates, simply dispose of paper plates set after use; no need to stop the fun to clean up.
- The best product and service for you: This would be the perfect dinosaur party favors. You can get the refund for any reasons unpleasant. And we will be glad to receive Suggestions from you too.
Save the Tutorial for Decorating Dinosaur Cookies
I hope you were inspired to create your own dinosaur birthday cookies or baby shower cookies with this tutorial! Use one of the images below to pin the tutorial to your Pinterest account for later. Alternatively, use the social share icons at the top of the page. Thanks for sharing!
If you’ve ever had a dinosaur themed party, I’d love to know in the comments below! As always, thank you for reading and being a part of the Buttercream Parties family. Make sure to check back every Friday for a new cookie decorating tutorial – always with tasty buttercream!

 4. Once you’ve completed steps 2 & 3 on all of your triceratops cookies, remove/rinse/dry the tip #2 from the white frosting and add it to the black. Squeeze out a dot for the eye. Do that for all of the triceratops cookies. Then, remove/rinse/dry the tip #2 and place it back onto the white frosting if you want to add a nice reflective spot to the eye. Again, I like the added character this gives the dinosaur cookies.