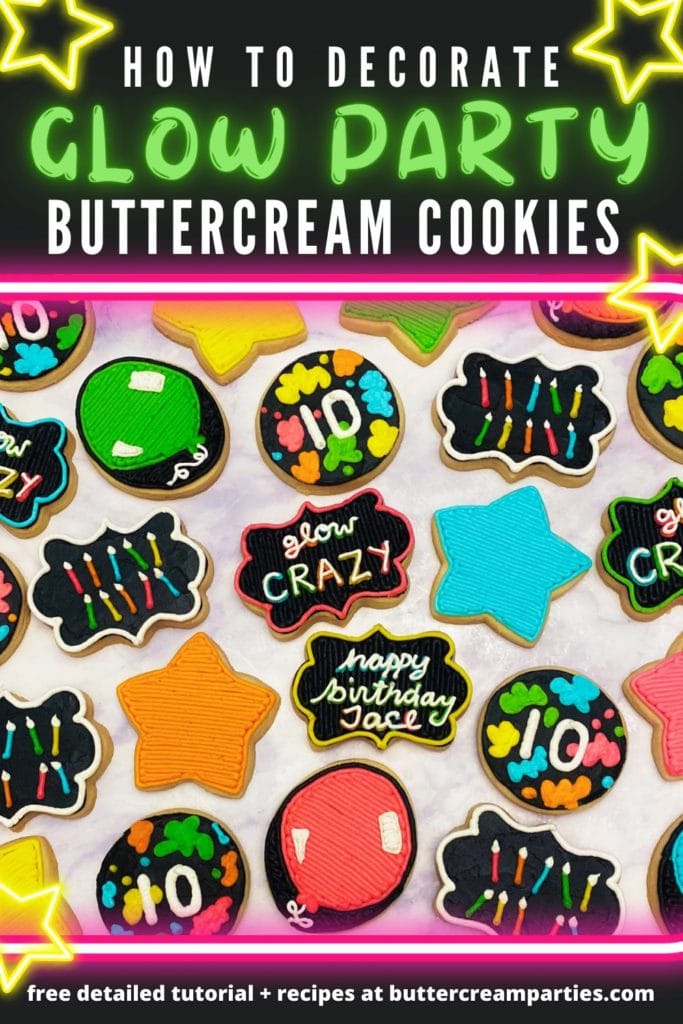
How to Make Fun Glow Party Cookies with Buttercream Icing
Black light birthday parties are still all the rage these days. I had the pleasure of making these fun glow party cookies for my best friend’s son’s 10th birthday. So, as usual, I decided to create a tutorial for anyone who wanted to create these buttercream sugar cookies too.
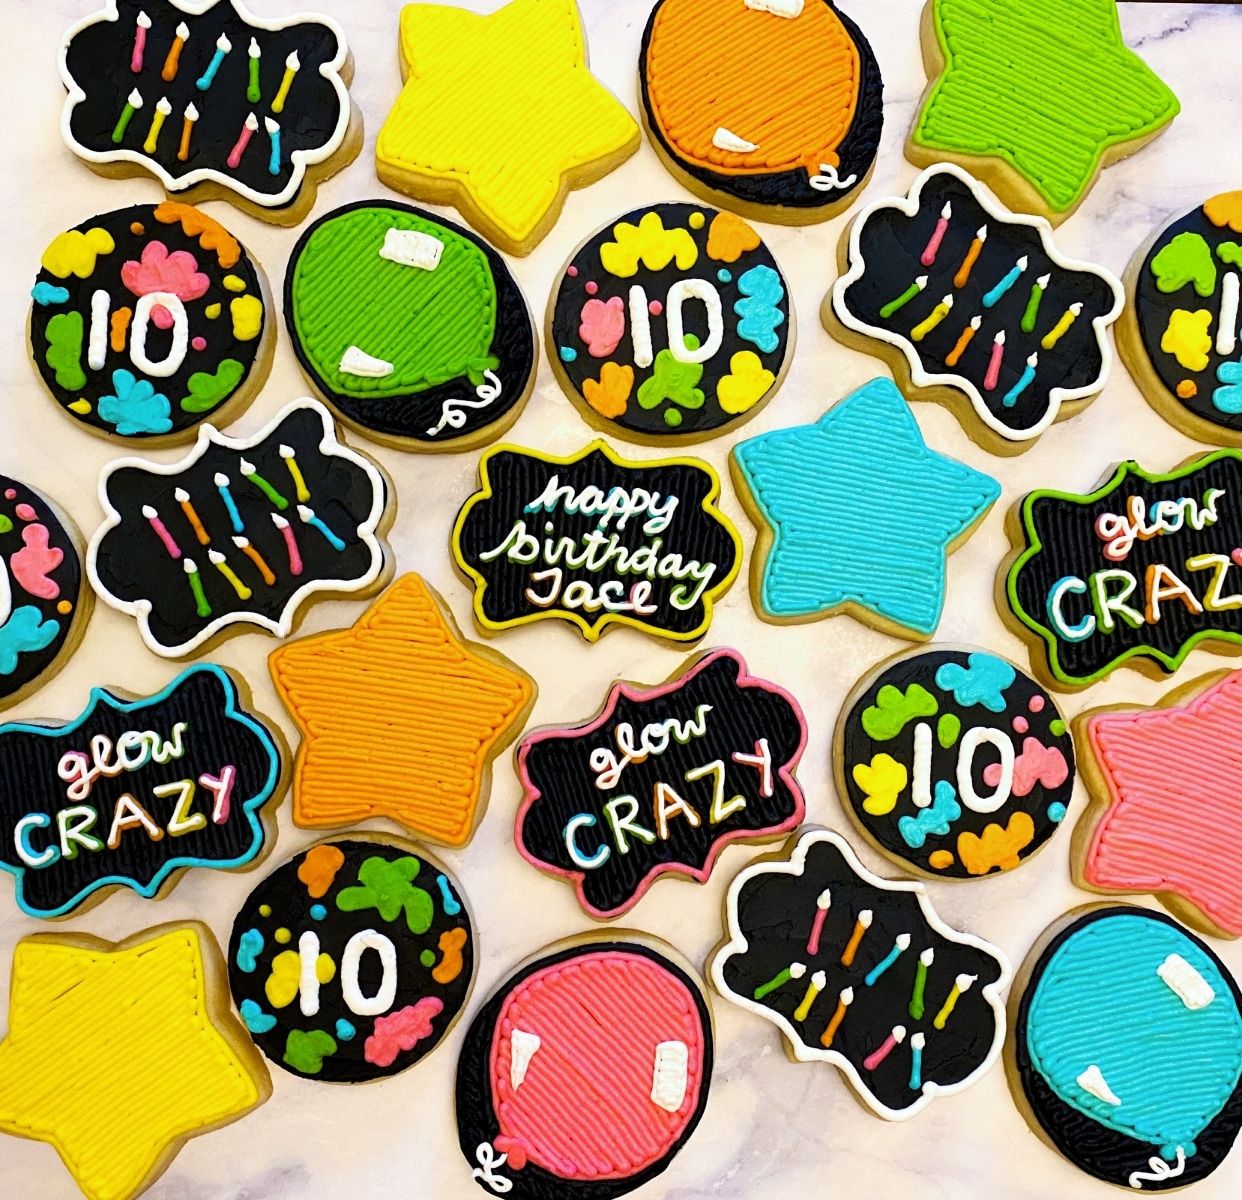
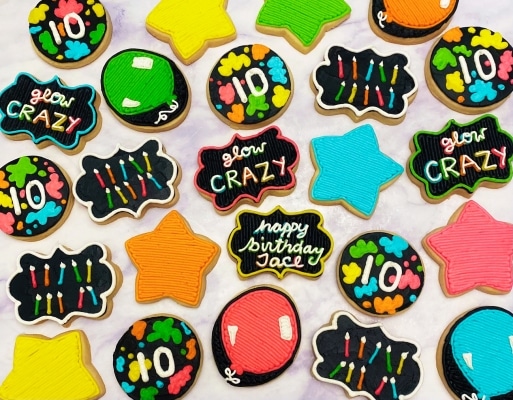
I designed a wide range of cookies in this set. You can, of course, choose to do all of them or just some of them. Either way, the set will be really fun.
Follow the beginner-friendly tutorial with step-by-step photos plus a video on how to make glow party cookies.
*This post may contain affiliate links, which means I may receive a commission, at no extra cost to you, if you make a purchase through a link. Please see my full disclosure for further information.*
Skip to
Part 1: Gathering the Supplies for the Glow Party Cookies
To make these glow party cookies for a fun black light party dessert, you will want to gather:
- 7 Icing bags
- 7 Couplers
- Wilton #1, #2, #3, and #4 tip sizes – buy these individually at a bake supply store or purchase this kit
- Various cookie cutter shapes – I went with a circle, star, plaque, and Easter egg/oval cookie cutter
- Wilton black, teal, pink, orange, green, and yellow gel food dyes; I’ve found the best price at Walmart
- recommended but not completely necessary – Wilton white liquid food dye, this can help prevent bleed from the black & white touching
- Palette knife – this is my favorite one
- Ingredients for a crusting buttercream, find my crusting buttercream icing recipe here
- Ingredients for sugar cookie dough, find my no spread sugar cookies recipe here
Part 2: Baking the Cookies and Setting up the Icing Bags

- Roll, cut out, and bake your sugar cookies according to the recipe. When making multiple designs in a set, cut out more of the easier designs (such as the oval balloons and the stars) and less of the more detailed designs (such as the plaques).
- Make your buttercream icing and take out one cup of frosting for the white frosting. Mixing in the white liquid food dye will result in a brighter white that also helps prevent color bleed. Add the white frosting to an icing bag with a coupler.
- Separate the remaining frosting into six bowls. One of the bowls should have at least a cup and a half of frosting in it for the black frosting. Mix up all of your colors. Remember, the color will deepen as it sets. If you are having trouble, allow the color to deepen for 8 hours on the counter with plastic wrap on the top.
- Once the desired shades are achieved, add each of them into their own icing bags with couplers.
- If you don’t know how to set up icing bags, just hop over to my Getting Started: Learn How to Decorate Buttercream Cookies page for a detailed explanation.
Part 3: The Tutorial for How to Make Glow Party Cookies
Check out the video here to see how to decorate all of the glow party cookie designs I did. Then, check out the breakdown step-by-step photo series tutorial for each cookie below.
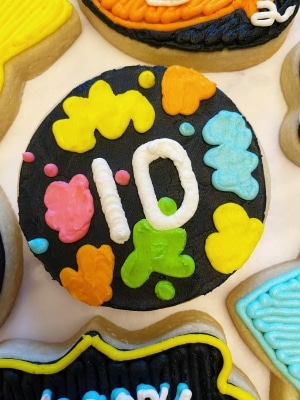
How to Make the Glow Party Birthday Number Cookies
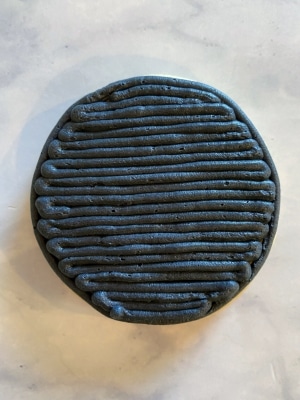
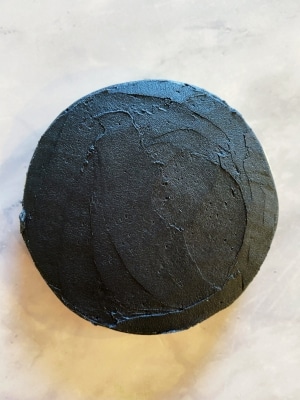
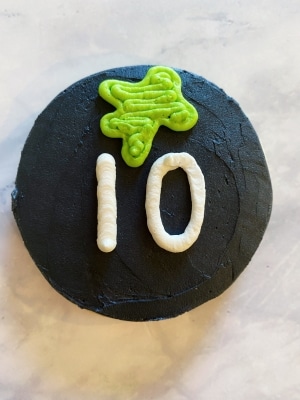
- Attach the tip #4 to the black frosting to outline and fill in the circle cookie. Then, smooth out the buttercream with the palette knife. Do this step for all of the cookies that will be the birthday number before moving to step 2.

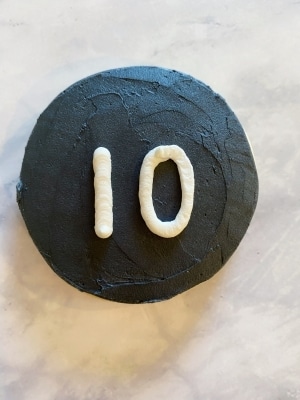
- Remove/rinse/dry the tip #4 from the black frosting and add it to the white frosting. Draw the birthday number(s) onto the cookie into the center. Complete this step before moving onto step 3 for all of the numbered cookies.
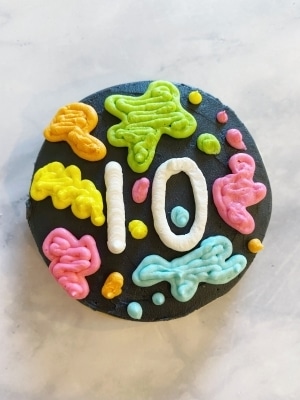
- Attach to the tip #2 to one of the neon colors. Outline and fill in splatters of neon buttercream onto the cookie. You will be making splatters using the tip #2 for each color. To save time, do all of one splatter cookie on each numbered cookie before removing/rinsing/drying the #2 tip and moving onto the next color.
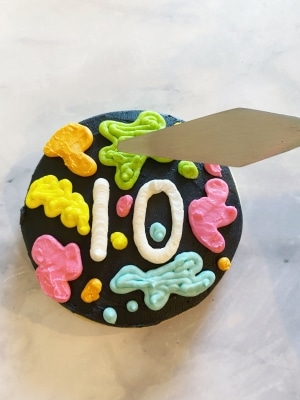
- Use the palette knife to smooth out the splatters.
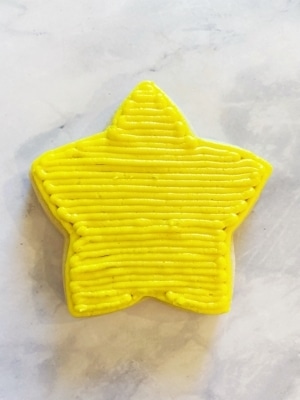
How to Make the Star Cookies
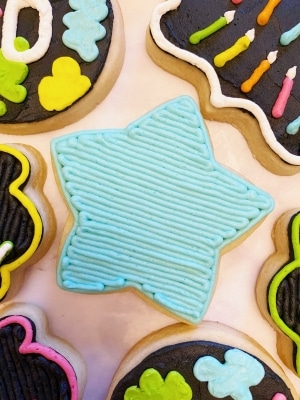
- Attach the tip #4 to any of the neon icing bags. Outline and fill in the star cookie. Repeat this step with various colors onto the star cookies.
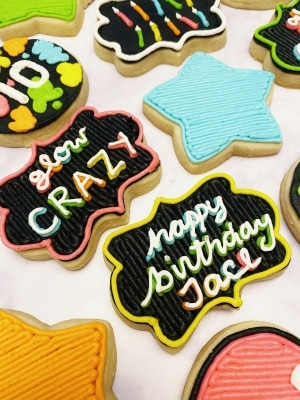
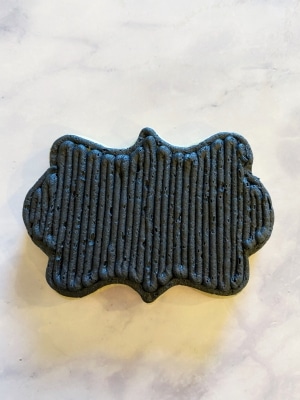
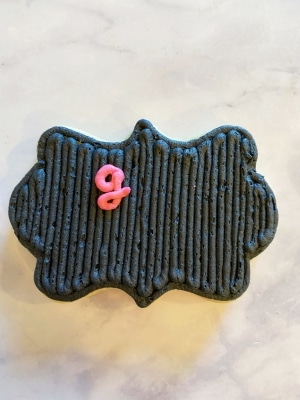
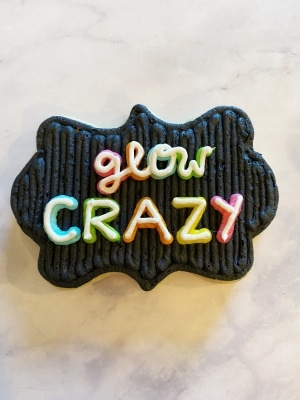
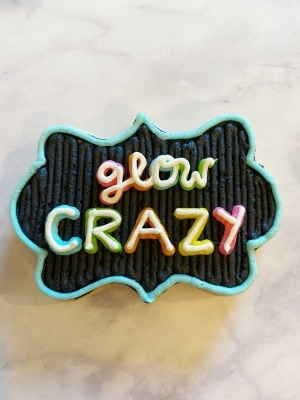
How to Make the Glow CRAZY Cookies
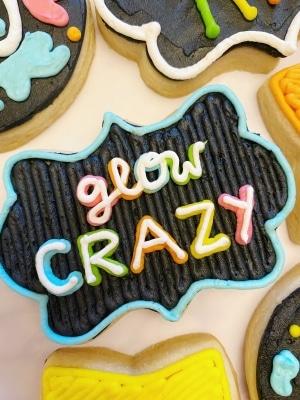
- Attach the tip #4 to the black icing bag and outline/fill in a couple of the plaque cookies. Remember to leave some plaques for the candle cookies.
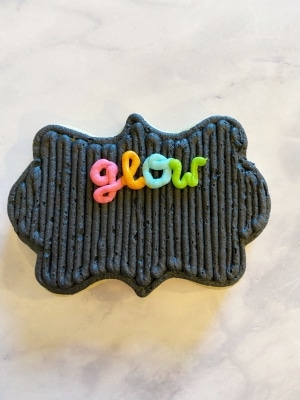
- Attach the tip #2 to the pink frosting and pipe a letter “g”. I typically do cursive when piping letters because there is more forgiveness. Repeat this step on all of your “glow crazy” cookies. Then, do the letter “l” in the orange icing with tip #2 for all the cookies. Continue doing this with all the letters of “glow” in various colors.
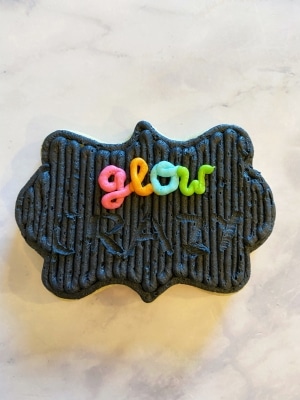
- To write “CRAZY,” use tip #4 on the neon colors and do the same technique that was used in step 2. Pro tip – to write on cookies, first write using your palette knife into the buttercream. Doing this is much more natural to us then writing with an icing bag. Then, trace over with the buttercream.
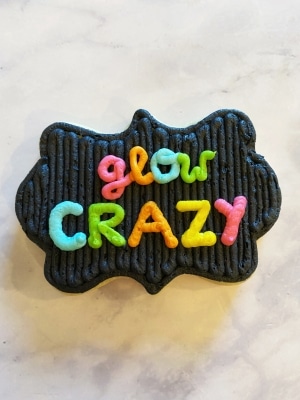
- Attach the tip #1 to the white icing and trace over all of the letters. This creates the neon glow coming off of the words.
- Lastly, attach the tip #4 onto a neon color and outline the edge of the cookie.
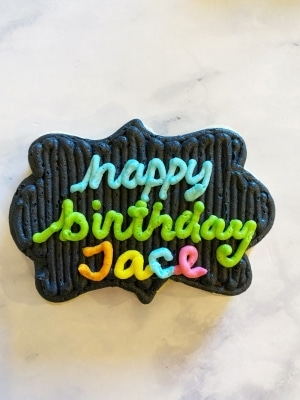
- To create the “Happy Birthday NAME” cookies, use the same technique in steps 1-5. I did all one glow color for “happy,” all one for “birthday,” and then alternated colors for the name.

How to Make the Neon Balloon Cookies
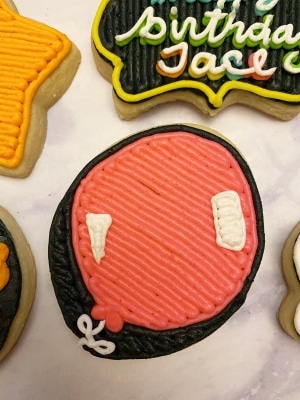
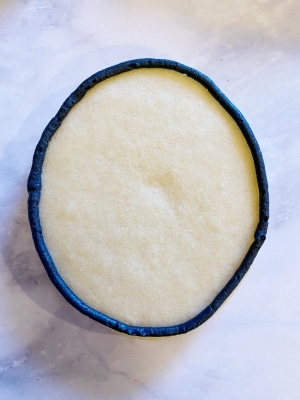
- Use the tip #4 with the black icing to outline the oval/Easter egg cookie. Don’t fill it in yet.
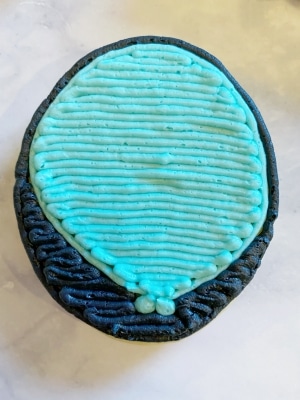
- Use the tip #3 on one of the neon colors to draw a curved line along the lower portion of the cookie. This will be the bottom of the balloon. Then, pipe the upper half of the balloon on the inside edge of the black frosting. Fill in the balloon & “tie” it by squeezing out two small dots and pulling them up. Fill in the rest of the cookie with the black #4.
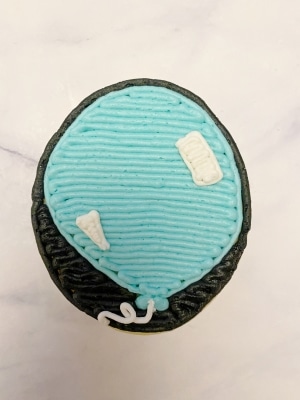
- Attach the tip #2 to the white frosting and pipe out the balloon string as well as the reflection in the balloon.
How to Make the Birthday Candle Cookies
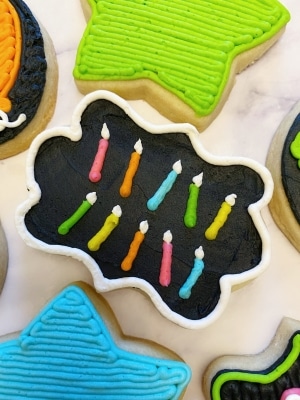
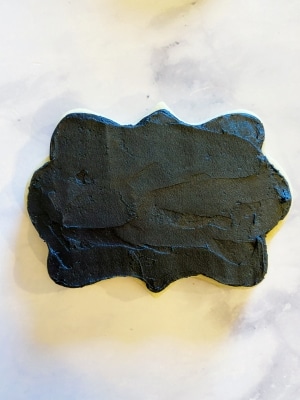
- Attach the tip #4 to the black frosting and outline/fill in the remaining plaque cookies. Then, smooth the frosting with the palette knife.
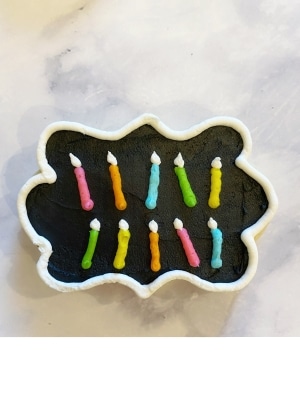
- Use the tip #4 with the various neon icing bags to pipe out lines. There is no need to make these perfectly straight. I think they look better drawn at an angle. Use the same technique as above: pipe all of one color onto all the cookies before rinsing/drying the tip and placing it onto the next color.
- Use the white frosting with tip #2 to pipe out small dots for the flame. As you pipe the dot, pull away to create a small point to the flame.
- Attach the tip #4 to the white frosting (always remember to rinse the previous color) to outline the plaque again.
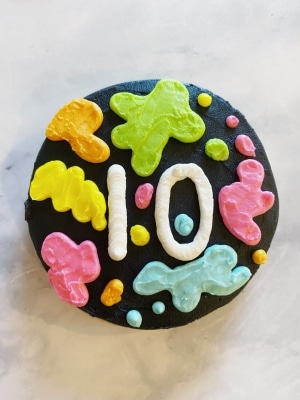
These cookies were really fun. I love how they “glow” using the various neon icing colors.
Remember, choose just one or two designs, or create all of them if you’re up for it!
I hope you enjoyed the tutorial and as always, thank you for supporting my blog by reading these tutorials. If you decide to make these glow party cookies, let me know in the comments below!
You can also tag me, @buttercreamparties, on Instagram so I can see how awesome yours turned out!
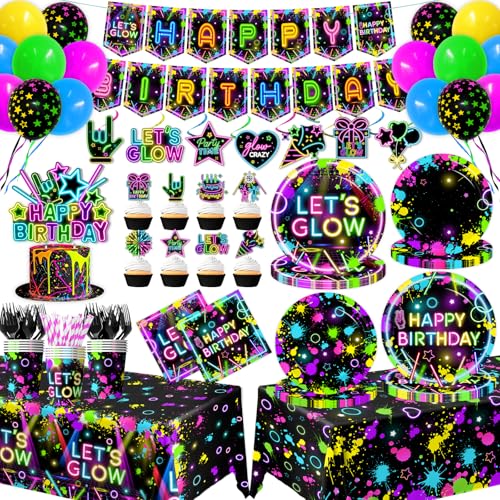
Part 4: Decorating the Neon Glow Birthday Party
It’s so fun to decorate a neon birthday party. Grab some balloons, streamers, tabletop confetti, and a backdrop and you’re good to go!


Save the Tutorial for How to Glow Party Cookies
Use the image below to pin this black light glow party decorating tutorial to your birthday party board on Pinterest. Alternatively, use any of the social share icons on the top of the page to share it to your favorite social media site.