Fun Revealing DIY Harry Potter Sorting Hat Party Cookies
162 - 162Shares
It’s almost time to board the Hogwarts Express and head back to another year of school, which means it’s the perfect time for a Sorting Hat party!
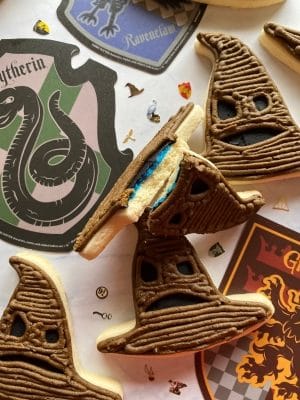
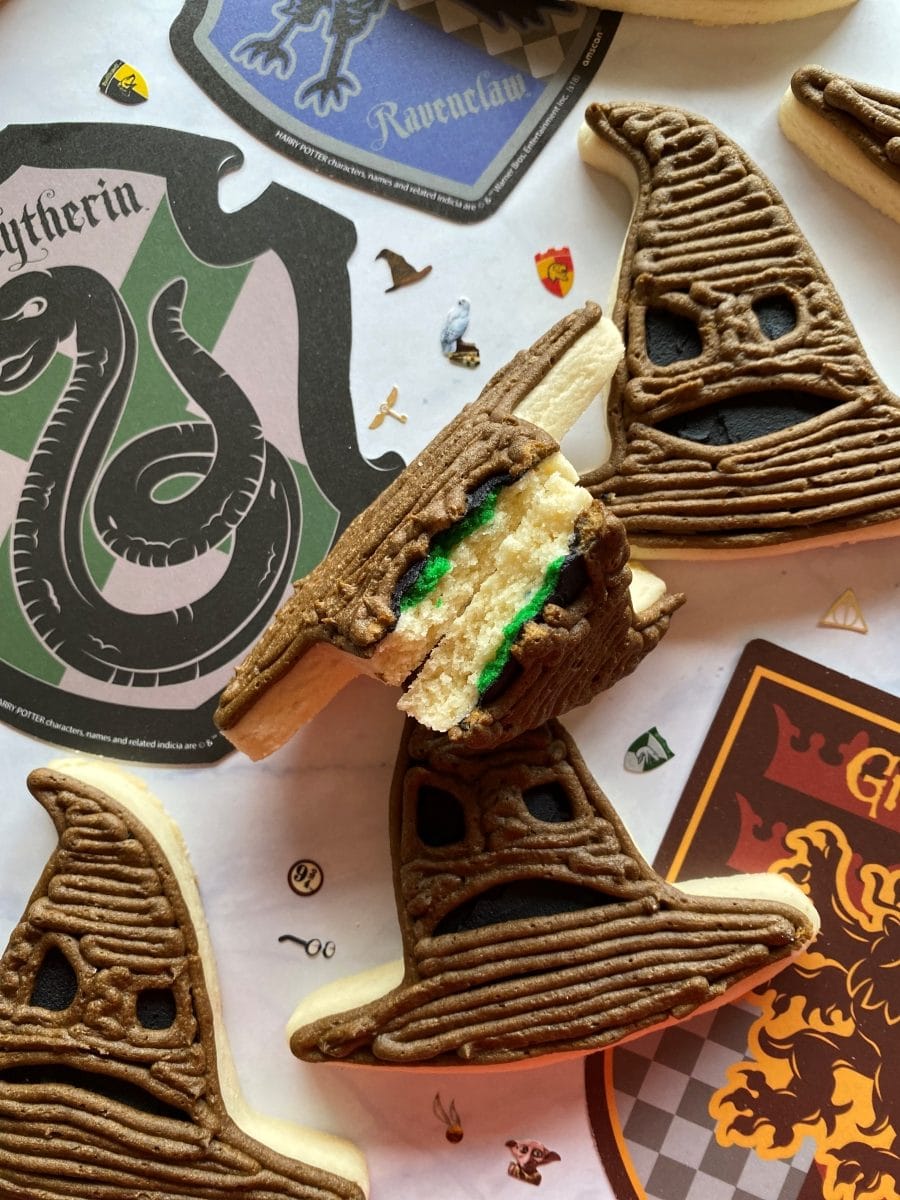
These DIY Harry Potter Sorting Hat party cookies are the perfect way for your guests to be placed into their house. Simply have them take a bite of these delicious buttercream decorated sugar cookies for the reveal.

Follow along for the easy, step-by-step photo series and video tutorials.
*This post may contain affiliate links, which means I may receive a commission, at no extra cost to you, if you make a purchase through a link. Please see my full disclosure for further information.*
Skip to
- Part 1: Gathering the Supplies for the Harry Potter Sorting Hat Party Cookies
- Part 2: Baking the Cookies and Setting up Your Icing Bags
- Part 3: Decorating the Harry Potter Sorting Hat Party Cookies
- Don’t Forget Your Harry Potter House Party Decorations!
- Save The Tutorial for These Harry Potter House Party Cookies for Later
Part 1: Gathering the Supplies for the Harry Potter Sorting Hat Party Cookies
To create these buttercream sugar cookies for your sorting hat party, you will want to gather:
- 2 Icing bags
- A Wilton tip #2 and a Wilton tip #4
- Sorting Hat cookie cutter
- Brown, black, blue, green, burgundy, and yellow Wilton gel color
- 9″ Angled flat spatula and/or a butter knife
- Pizza cutter or sharp knife
- No chill, no spread sugar cookie dough recipe
- Crusting buttercream recipe
Part 2: Baking the Cookies and Setting up Your Icing Bags
How to Make Sorting Hat Reveal Cookies
If you checked out my Harry Potter Gender Reveal cookies, you will see that this is the same exact technique. The only difference is that there will need to be four different internal dough colors: blue, burgundy, green, and yellow.
Here is the video from the gender reveal cookies to reference.
Here are all of the steps below.
- Using the recipe linked above, follow the instructions through step 5. Once you have your ball of dough formed, pull out about 1/4 of a cup of the dough and set it aside.
- On a floured surface, roll out the larger ball of dough to about 1/4″ thick and cut out your cookies. Place these cookies onto a lined baking sheet. I like to use this silicone mat. Don’t bake them yet!
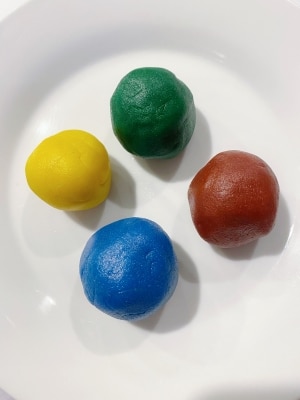
- Separate the reserved dough into four balls. Color one ball blue, one green, one yellow, and one burgundy. You can either place these into the mixer individually or just knead the color into the dough with a fork.
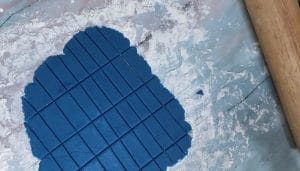
- On a floured surface, roll out each of the colored dough to about an 1/8th of an inch thick. Using the cookie cutter as a guide, cut strips of the colored dough such that they will fit onto the cookie without getting near the edges.
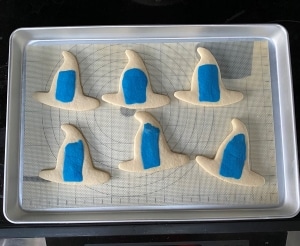
The blue dough will represent Ravenclaw, of course! - Place the strips onto the prepared sorting hat cookies. If they don’t want to stick, you can slightly wet the colored dough with water or just place the non floured side down onto the Sorting Hats. Then, press the colored dough further into the Sorting Hat cookies using a spoon or your fingers.
- Bake for about 10 minutes or until the edges are slightly golden. Since you pushed the colored dough into the cookies, you shouldn’t need to adjust your cooking time by more than a minute or so.
Here they are baked and ready to decorate!
How to Set up the Buttercream Icing Bags
- Make your buttercream icing using the recipe below and separate it into two bowls. You will only need about 1 cup for the black buttercream so your amounts in each bowl will be different. Mix in your black and brown gel colors. To create a deep shade, mix in just enough to get about 3/4 of the way to your desired shade. Then, place a piece of plastic wrap over the frosting and allow it to sit on the counter for a few hours to deepen. If you don’t have the time to do this, then just add more gel color. Remember that the color will still deepen as it sets.
- Set up your icing bags as follows: Place the black frosting into an icing bag with the Wilton tip #2 in it. Place the brown frosting into an icing bag with the Wilton tip #4 in it. If you don’t know how to do this, just hop over to my Getting Started: Learn How to Decorate Buttercream Cookies page.
Part 3: Decorating the Harry Potter Sorting Hat Party Cookies
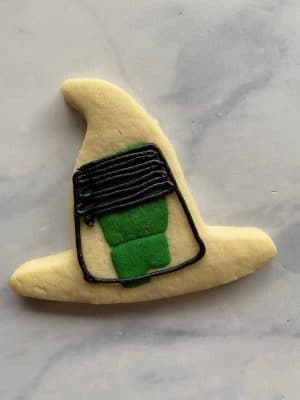
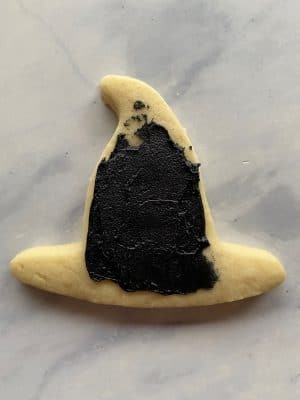
- The first step is to use the black frosting with tip #2 to cover part of the cookie area. This will become the Sorting Hat’s eyes and mouth.
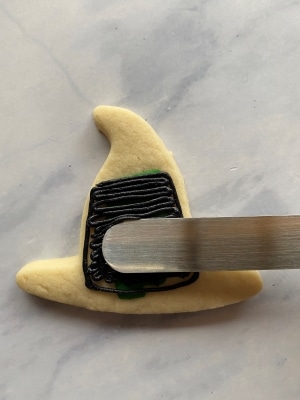
- Once you’ve filled in the whole rectangle of black frosting, smooth it with the flat spatula. The frosting does not need to be thick, it just needs to cover up the House color.
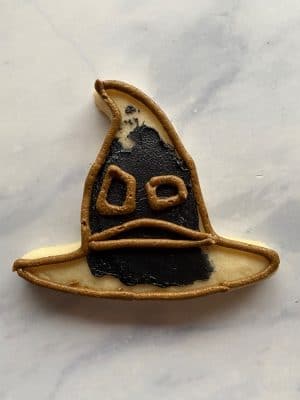
- Now, use the brown buttercream icing to outline the edge of the Sorting Hat, as well as the eyes and mouth. Make sure the sorting hat has an inquisitive looking mouth and eyes for that added touch.
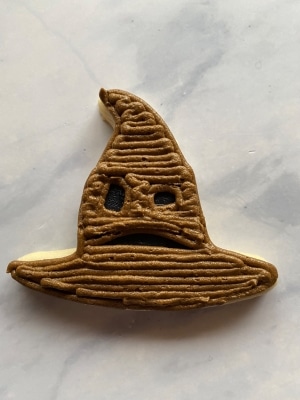
- Fill in the Sorting Hat with the brown icing.
Slytherin!
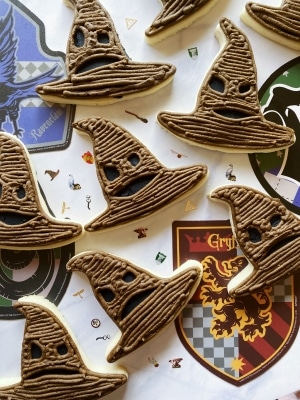
You should now have Sorting Hat cookies for each of the four houses: Slytherin, Ravenclaw, Hufflepuff, and Gryffindor! I’d love to know in the comments below what house you are!

Don’t Forget Your Harry Potter House Party Decorations!
If you have the chance, definitely check out Toynk Toys for the best Harry Potter House decorations. I was able to find some House paper plates, napkins, and a plastic table cover that would all be perfect for the party. Remember, the cookies are decorations themselves, but sitting on a made up tablespace can really set the scene.
Toynk also has great party games I haven’t seen anywhere else like these playing cards and puzzles. You can have people win some fun but inexpensive prizes too, like these House pencils.
My favorite items at the site include House Goblets though. They have Gryffindor, Ravenclaw, Hufflepuff, and Slytherin goblets. If you were to buy one thing for the party, I could see these making a big impact on the table near the cookies.
Save The Tutorial for These Harry Potter House Party Cookies for Later
To save the tutorial for these Harry Potter House reveal cookies for later, simply click on any of the social share icons on the top of this page. Alternatively, hover over the image below to pin the image to your Pinterest page!








These are so much fun and quite straightforward to follow!
Thank you, I am glad the tutorial is easy to follow!
I love these so much! My kids are asking when I’m going to make them!!
They would be perfect on September 1st for the first day of Hogwarts 😉
Hi, I’m wondering for how long the cookies can be kept before eating? I want to make them ahead of time but don’t want them to get soggy. tia 🙂
Hi Jane. You can keep the cookies out on the counter for about a week in an airtight container. If you want to prepare them sooner, you can keep them in the freezer in an airtight container for about three months. They will not get soggy.