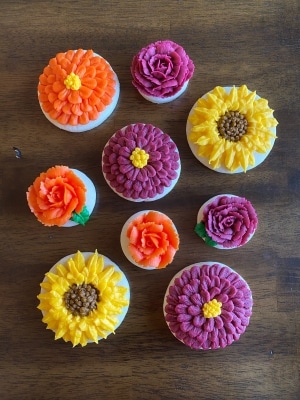
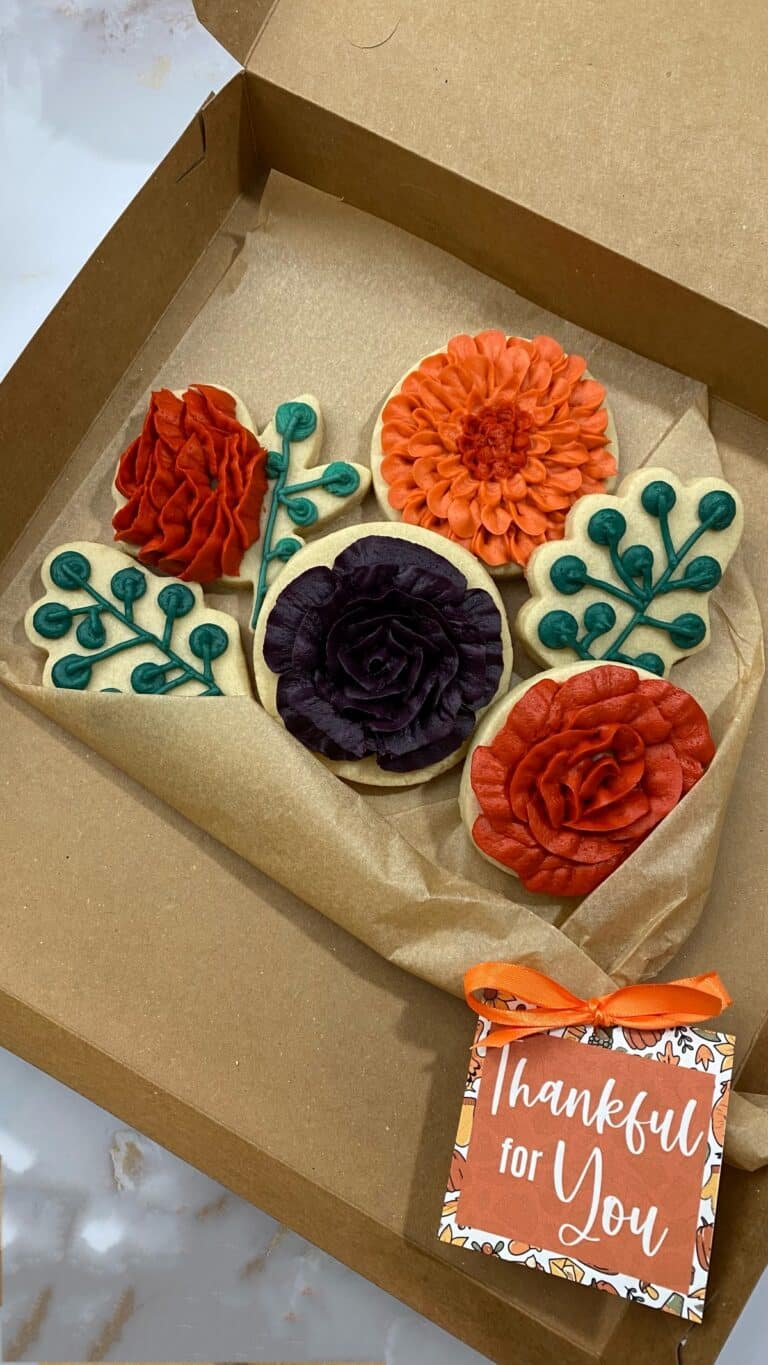
Easy Fall Flower Bouquet Cookies
You can never go wrong with flowers, right? These easy fall flower bouquet cookies can be used for weddings, bridal showers, Thanksgiving, a backyard fall dinner party, or whatever you want them for! I have included step-by-step instructions with both photos and videos to help you learn how to create these beautiful buttercream sugar cookies yourself.
*This post may contain affiliate links, which means I may receive a commission, at no extra cost to you, if you make a purchase through a link. Please see my full disclosure for further information.*

Skip to
Part 1: Preparing – Gathering your Supplies, Baking the Cookies, & Setting up your Frosting
To decorate these easy fall flower bouquet cookies, you will want:
- 5 icing bags
- 2 Wilton #5 tips, 2 Wilton #66 tips, and 2 Wilton “petal” tips: #102, #103, and/or #104. I used a 103 for the burgundy roses & zinnias and a 104 for the orange roses & zinnias
- 1 coupler – if you don’t have a coupler, simply put about a 1/4 of your yellow frosting into one bag and 3/4 of it into another icing bag (you will need an additional icing bag)
- Small and medium sized circle cookie cutters
- Wilton gel coloring to obtain brown, yellow, green, orange, and burgundy buttercream frosting, here’s my crusting buttercream recipe
- Your favorite sugar cookie dough recipe – if you don’t have a favorite, here’s mine
- Pointed knife to fix any errors and a paper towel to wipe excess frosting off of the petal tips
- Optional: 1 Wilton flower nail, if you don’t know what this is or where to get one, you can purchase one here: Wilton Flower Nail
Roll, cut out, and bake your sugar cookies according to your cookie dough recipe.
While they are cooling, whip up your frosting.
To set up your frosting bags, you will place your burgundy frosting and orange frosting each into their own bags, each with a petal tip attached. Set up your green frosting in a bag with a tip #66 attached. Put your brown frosting into a bag with a tip #5 in it. Place your yellow frosting into a bag with a coupler, attaching tip #5 to it first. For instructions on how to do this, visit my page Getting Started: Learn How to Decorate Buttercream Cookies.
Part 2: Creating the Buttercream Rose Cookies!
Let’s do our roses first. I suggest having everything ready before you start piping – all of your small circle cookies, a paper towel nearby to wipe off the excess frosting from the tip between rose petals, your frosting, and a flower nail if you so choose. I recommend flower nails for a beginner because it is easier to rotate than a sugar cookie. If you are comfortable going straight to the cookie, that’s okay too! Remember, you can always “erase” your cookies and start over again if the rose turns out a bit too funny looking.
I suggest watching the video above first so that you can get an overall idea of what is about to happen! You can reference the photo series as a slowed down version. The biggest thing to remember is to take your time. If it makes you feel any better, this video is sped up to be twice as fast so that you didn’t have to watch a long video, you’re welcome!
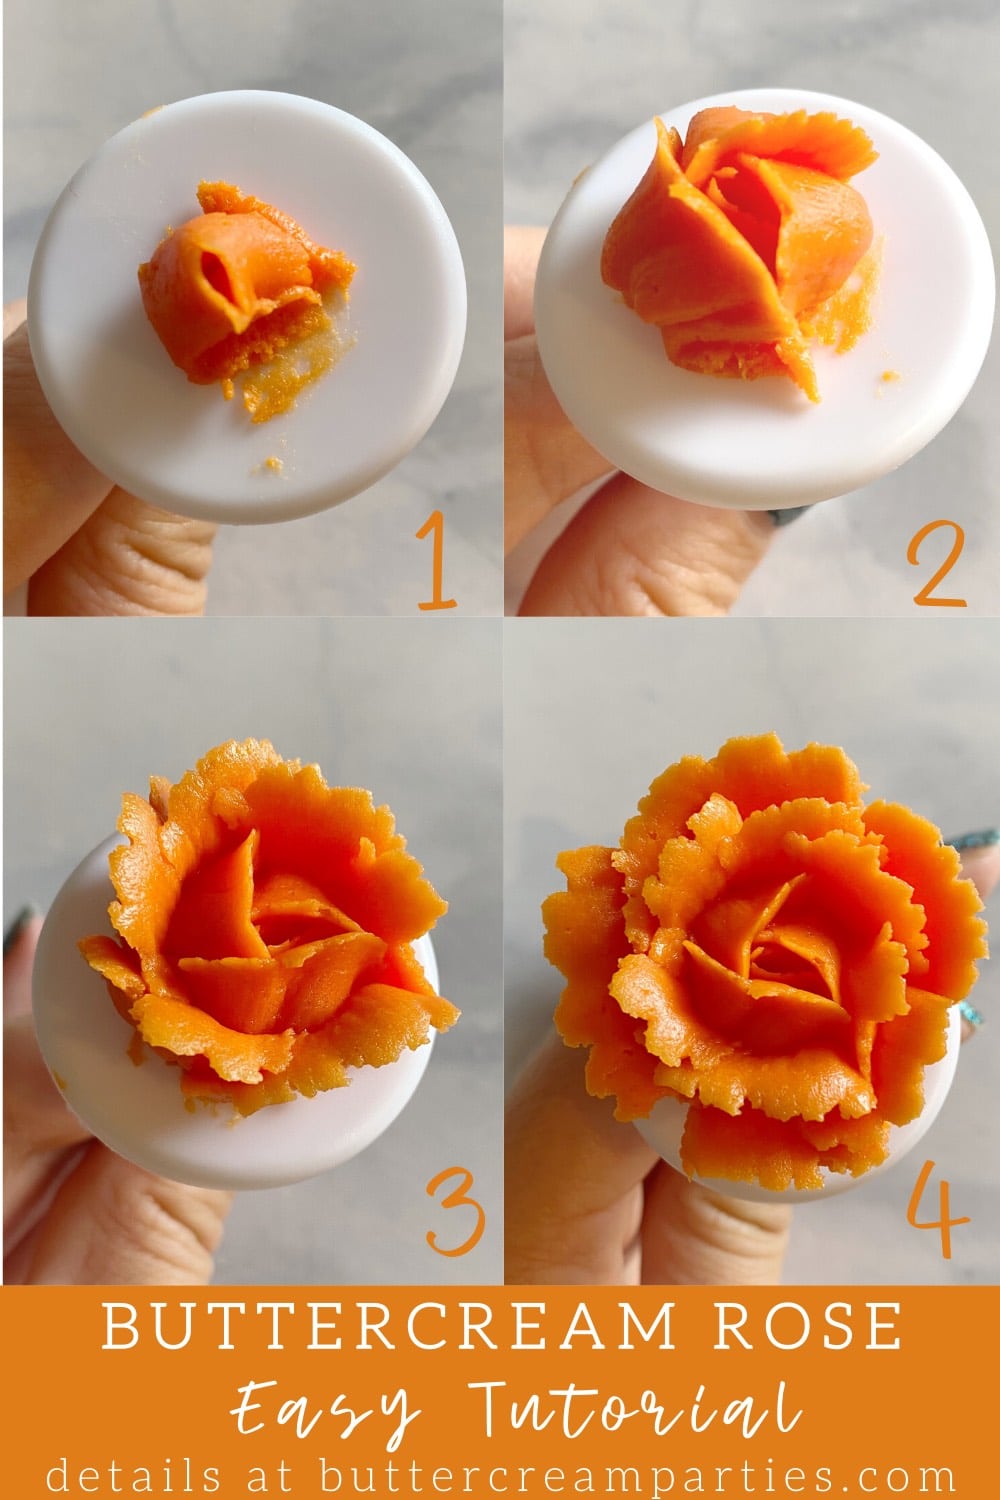
First, squeeze out a thin line of frosting onto your flower nail or your cookie. This helps the rose to not fall off or slide around when you’re creating the layers. Then, hold your tip perpendicular to the flower nail or cookie, with the fat side of the tip down on the nail/cookie and the skinny side up towards you. Squeeze the frosting out while turning the flower nail/cookie with your fingers that are holding the nail/cookie. The shape you create should look like this:


Next, we will be building the bud part of the rose. For all of these steps, you will hold the fat side of the tip down toward the flower nail/cookie and the skinny side up. Holding it this way allows for the wispy edges of a real rose. To build the bud, start at the bottom of one side of the rose and, while squeezing, draw a curved upside down “U” shape over the top of the shape you first created. You will create three or four of these layers. It’s probably easier to see in the photo below than for me to explain it:

Continue building the layers in this same fashion, making it so that the petals spread out & “open up” more. This is done by first creating fairly vertical upside down “U” curved shapes, then making them more and more horizontal with each layer. Make sure to wipe off the tip with a paper towel every so often so that the buildup doesn’t add unwanted texture to your rose.


See that in the last photo, the curved upside down “U” is peeling out a bit at the top. This is due to holding the tip slightly less vertical with each new layer of rose petals.

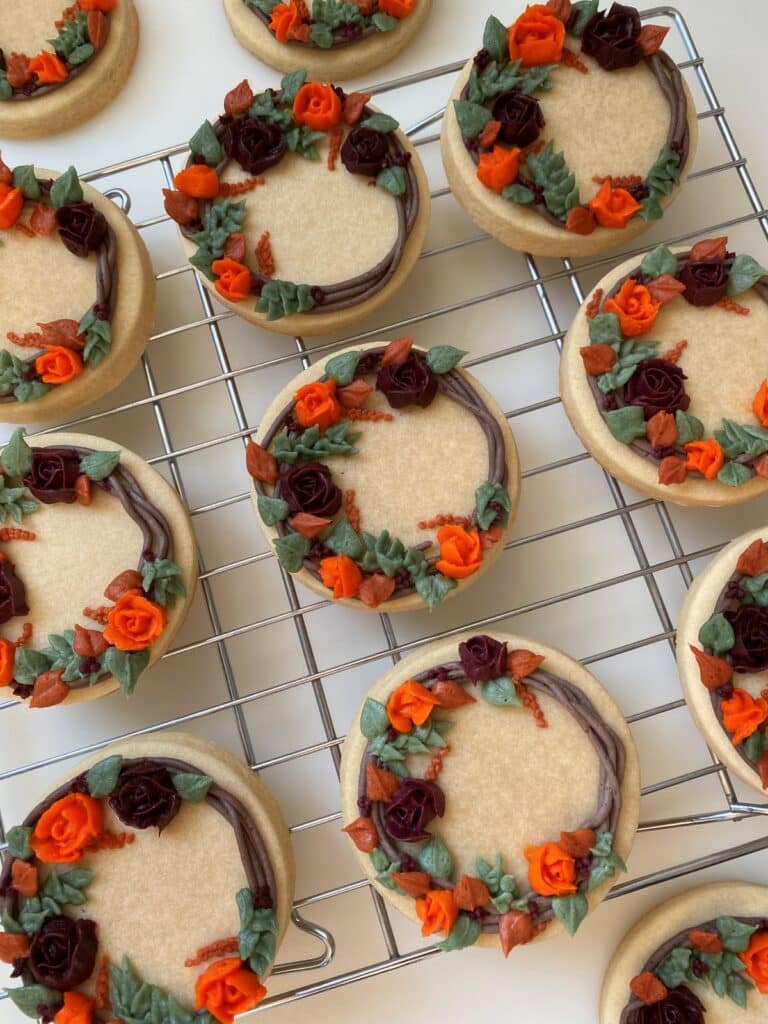
When you are happy with the size of your rose, carefully move it from the flower nail to your sugar cookie if you chose to use the nail. You may want to squeeze a bit of frosting onto the center of the cookie so that the rose sticks onto it better.

Now is when you will want to add some leaves to some (or all, if you want!) of your rose cookies. Take your green frosting with tip #66. You will be holding this tip so that the wider part of the tip is facing up toward you:

Squeeze out the frosting while pulling the tip out, away from the rose. Sometimes the frosting will want to stay attached to your tip and won’t let your leaf “go.” Just use your fingers and pinch off the end.

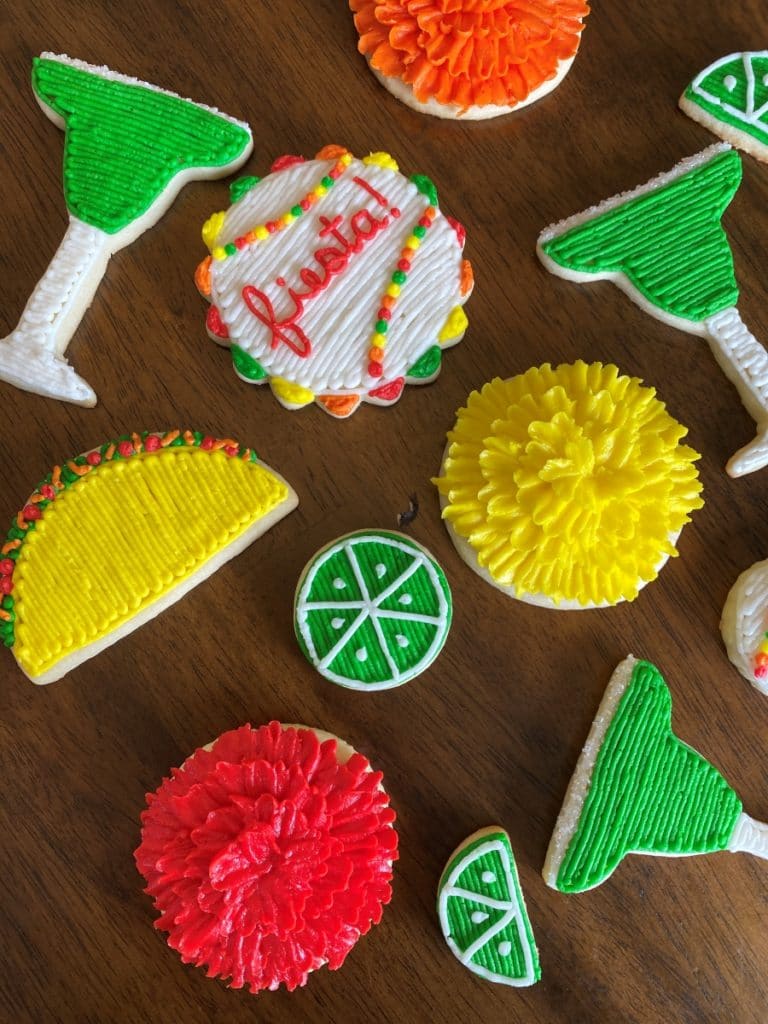
Part 2: Creating the Buttercream Zinnia Cookies!
For our zinnias, you will learn how to you use the same petal tip to create a different looking petal. This time, we will be holding our petal tip so that tip is more horizontal to our cookie. You will still have the skinny side of the tip toward you and the fatter side of the tip away from you. For these cookies, use half of your medium sized sugar cookies. The other half will be for the sunflowers. Again, I’d recommend checking out the video first so you can see what to expect.

Create the same shape going all along the outer edges of the cookie.

Add two more layers, stacked onto each other.


Now, grab your yellow icing with the tip #5 attached. Squeeze out small dots to create the pistil. Do a couple layers of these dots to create a 3D effect.


Part 3: Creating the Buttercream Sunflower Cookies!
A little fun fact about me: I hate sunflowers. Like, they really scare me. If they didn’t grow to be so tall with these huge “faces” I don’t think I’d be as bothered by them. But, anyway, these sunflower cookies are totally different because they are small & cute and don’t contain any hidden spiders!
To create our sunflowers, you will first take your brown frosting and outline/fill a circle in the center of the cookie.

Next, squeeze out little dots of the brown icing over the circle. This will be the same technique that you used for the zinnias.

Now for the petals! Switch your yellow frosting over to a tip #66. You will be creating the same shape as you did for the leaves on your roses. Only, this time, you will be making them longer to fill out the width of the cookie. I created a bit of a wavy effect by squeezing out some, stopping (but not lifting the frosting away), and then squeezing out a bit more in a slight backward to forward motion. Remember, if it looks weird (or I explained it poorly), just erase and start over. You may want to pinch the ends of the petals to create a more pointed tip.

Continue creating petals until you have the whole cookie covered with the first layer

Create a second layer, making it so that they are laying just to the side of the first set of petals.

And there you have it! Create these easy fall flower bouquet cookies for bridal showers, weddings, Thanksgiving, Halloween, or whatever else you may want some fall sweets for! If you liked these cookies and want to save them for later, pin this photo here:

As always, thank you so much for reading my blog. If you created these yourself, I would love to see how they turned out! Tag me on instagram @buttercream parties, add a picture comment to the Pinterest pin, or leave a comment below! I wish you all the fun this fall!
Great Cookies! The texture, depth and colors makes them look like real flowers. Looks tasty 🙂
Thank you so much! They are pretty tasty!
Looks easy enough!
They are great for beginners and a good way to impress your friends!
Although you’re not a fan of sunflowers, I adore them! Your sunflower cookies are so detailed and gorgeous. Would love to try making these one of these days.
Thank you so much! I do think that sunflowers are pretty, just from a distance 🙂
Hi dear.. great tutorial… I have a doubt.. am a newbie to floral cookieS.. when using buttercream how would u store them?? Can we make a bouquet like??? Will the butter cream stick to each other??
Sry if I sound silly …
Hi Devi! That is a great question; you don’t sound silly! I personally use a “crusting buttercream” which means that if you let the cookies sit out (preferably overnight) the top layer of the buttercream will harden just enough so that you can stack cookies. I recommend the Jenny Cookies buttercream frosting recipe if you don’t have your own recipe. You can find a link to that in my post underneath the list of materials needed. The cookies are still safe to eat leaving them out on the counter at room temp overnight! To transport, I place the cookies into a shirt gift box. If I need another layer, place a piece of parchment paper over the first layer and then add the second layer. If creating a wreath, you can definitely stack them without the parchment paper and they shouldn’t stick! I only recommend the parchment paper if you need to travel with them before arranging your wreath. I hope that helps!
Leah, I love your cake decorating tutorials, I really want to start practicing these skills and your blog really helps!
Yay! I’m coming out with a free mini course soon that should be even more helpful 🙂