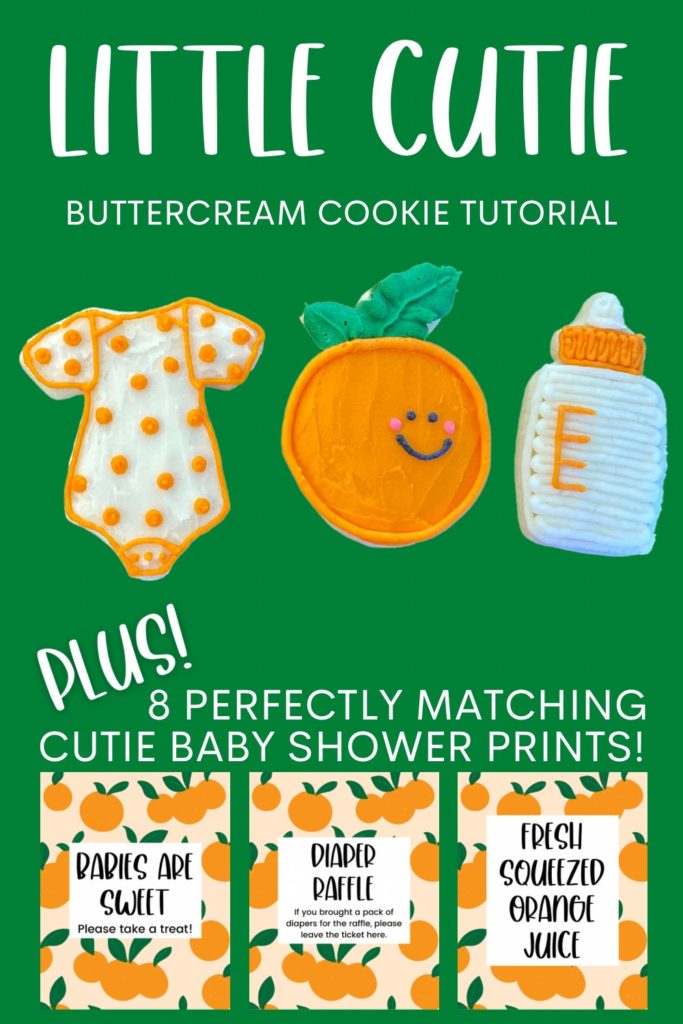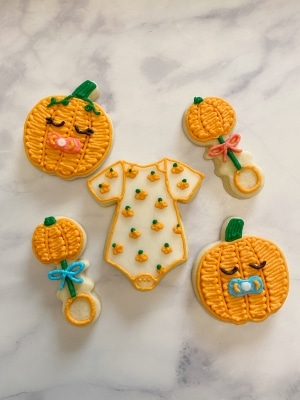
Adorable A Little Cutie Baby Shower Cookies

I am loving all of the fruit themed baby showers I have seen popping up on Instagram and Pinterest. They are so cute and perfect for spring. I decided to create a few cookie decorating tutorials for girl baby shower cookies on the blog. Here is a simple buttercream sugar cookie set to compliment a Little Cutie is on The Way theme!
These buttercream sugar cookies are easy and are very attainable for the beginner. Follow along for the step-by-step photo series tutorial. I have also included recipes for a crusting buttercream frosting and a sugar cookie recipe if you don’t already have your favorite!
*This post may contain affiliate links, which means I may receive a commission, at no extra cost to you, if you make a purchase through a link. Please see my full disclosure for further information.*
Skip to
- Part 1: Gathering the Supplies for Your Little Cutie Baby Shower Cookies
- Part 2: Baking the Buttercream Sugar Cookies and Setting up Your Icing Bags
- Part 3: The Sugar Cookie Tutorial for Achieving A Little Cutie Baby Shower Cookies!
- Save the Sugar Cookie Tutorial for These A Little Cutie Baby Shower Cookies for Later
Part 1: Gathering the Supplies for Your Little Cutie Baby Shower Cookies
You will need:
- 5 icing bags
- 2 Wilton #2 tips, 3 Wilton #5 tips, and 1 Wilton #69 tip
- 1 coupler
- bottle cookie cutter
- onesie cookie cutter (I purchased this set from Amazon that includes the bottle and onesie: https://amzn.to/2IPzFkW)
- orange cookie cutter (I purchased this set from Amazon that includes some fun fruits: https://amzn.to/2TVDUSI I chopped off the bottom of the peach cut outs before baking them)
- Wilton gel coloring to obtain green, orange, pink, black, and white buttercream frosting, here’s my crusting buttercream recipe
- Angled flat spatula or butter knife
- Your favorite sugar cookie dough recipe – if you don’t have a favorite, here’s mine
- parchment paper
If you don’t want to make buttercream frosting yourself, just buy a tub of already made buttercream frosting. I prefer to use the Wilton gel food dye since gel is more vibrant (i.e. more cost effective because you use less) than liquid and doesn’t change the consistency of your frosting. You can get that here: Wilton Gel Coloring 12 Count.
Part 2: Baking the Buttercream Sugar Cookies and Setting up Your Icing Bags
Roll out, cut, and bake your cookies and allow them to cool. While they are cooling, whip up your frosting. To set up your icing bags, place your white frosting and pink frosting into their own bags, each with a tip #5 in it. Place your green frosting into a bag with the tip #69 in it. Place your black frosting into a bag with a tip #2 in it. Place your orange frosting into a bag with a coupler and attach tip #5 to it first. If you aren’t sure how to set up icing bags, no worries, I have a full tutorial here: Getting Started: Learn How to Decorate Buttercream Cookies
Part 3: The Sugar Cookie Tutorial for Achieving A Little Cutie Baby Shower Cookies!
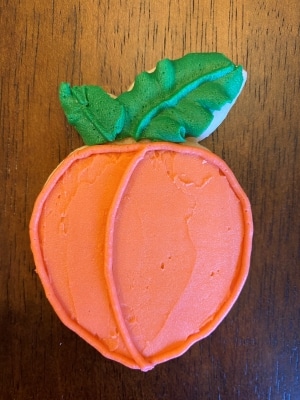
To create your cuties, outline the edges of the circle and fill it in with the orange frosting.


Take a piece of parchment paper and lay it over the top of the orange frosting. Press gently with your finger and move your finger around to flatten out the lines.

Take your butter knife or flat spatula and smooth out the surface even more. Some people skip the parchment step, but I have found that if I go straight in with the flat spatula or knife, the frosting wants to lift off of the cookie. Pressing onto the frosting with the parchment helps it to stick.

Take your green frosting and create the larger leaf. Reference the photo so you can see the angle I hold the tip at for the correct shape. Most of the time, your frosting will want to stick to your tip instead of your cookie. Use your fingers, you can wear gloves if you’d like, to pinch the frosting off of the tip. This will also help create the point at the tip of the leaf that you want.


Use the same technique for the smaller leaf.

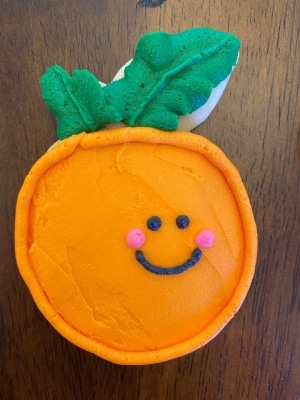
Take your black frosting and draw in the cutie’s face.

Then, take your pink frosting and place two small dots for the cutie’s cheeks.
 To create your bottles, outline and fill in the shape of the bottle with your white frosting. Do the same for the nipple.

Switch your orange frosting to a tip #2 and draw in the measuring guide and outline/fill in the bottle cap. I used vertical lines to fill the bottle cap so that it mimics the cap’s texture.

To create the onesies, outline the edges of the onesie with your white frosting and fill it in.


Use the same flattening technique that you used for the cuties to flatten out the onesie.


Take your orange frosting, with tip #2 still attached, and outline the edges of the onesie.

Draw in the details.

Then, create small dots with the orange frosting for a pattern on the onesie.

That’s it! These buttercream sugar cookies are so perfect for spring/summer girl baby shower themes. If you need other ideas for baby shower themes, check out all of my tutorials for baby shower cookies here. As always, thank you so much for reading my blog and I wish you the best celebration for the little one-to-be!
Save the Sugar Cookie Tutorial for These A Little Cutie Baby Shower Cookies for Later