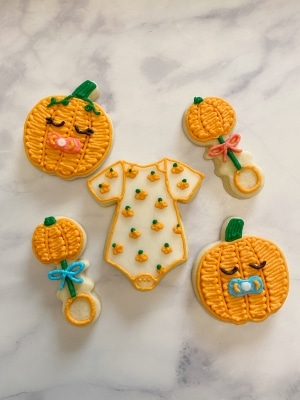
The Cutest A Little Pumpkin is on The Way Sugar Cookies
“A Little Pumpkin is on The Way” is the cutest fall baby shower theme I’ve seen!
When I was announcing my pregnancy with my son to my parents, we did a mini photo shoot of me holding a pumpkin. We then mailed one of the photos over to them since they live three hours away.
It was a fun little way to announce to family who don’t live near you.
If I was further along, I would have had the “A Little Pumpkin is on The Way” baby shower, too!
Follow along for the cutest fall baby shower cookies that also double as a great pregnancy announcement gift!
*This post may contain affiliate links, which means I may receive a commission, at no extra cost to you, if you make a purchase through a link. Please see my full disclosure for further information.*

Part 1: Gathering your Supplies
To create these “A Little Pumpkin is on The Way” cookies, you will want to gather:
- 5 Icing bags
- 2 Wilton #3 tips
- 3 Wilton #2 tips
- Pumpkin cookie cutter – I used the round squash cutter in this set: 12Pcs Vegetables Cookie Cutter Set
- Rattle cookie cutter – I used this set ANPOPO Baby Shower Cookie Cutter Set for both the rattle & the onesie
- Onesie cookie cutter
- White (undyed), black, green, orange, and blue (or pink if baby is a girl) buttercream frosting*
- Your favorite sugar cookie dough recipe
- Flat spatula or butter knife
- Parchment paper
- Scissors
*I prefer to use the Wilton gel food dye since gel is more vibrant (i.e. more cost effective because you use less) than liquid and doesn’t change the consistency of your frosting. You can get that here: Wilton Gel Coloring 12 Count.
Part 2: Baking the Cookies and Setting up Your Icing Bags
- Roll, cut out, and bake your sugar cookies according to your cookie dough recipe. You can probably make 3-4 of each design from these “A Little Pumpkin is on The Way” cookies with your cookie dough.
- Set up your icing bags as follows: place your green, pink or blue, and black frosting each into their own bags, each with a Wilton #2 in it. Place your orange and white frosting each into their own bags, each with a Wilton #3 tip in it. If you aren’t sure how to do this, no worries, just hop over to my Getting Started: Learn How to Decorate Buttercream Cookies page.
Part 3: Decorating Your “A Little Pumpkin is on The Way” Cookies
I. Little Pumpkin Babies
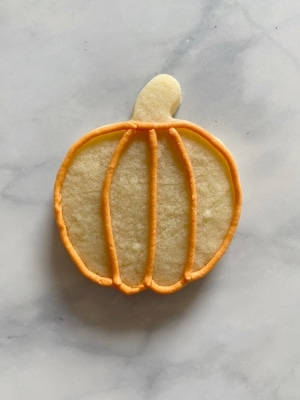
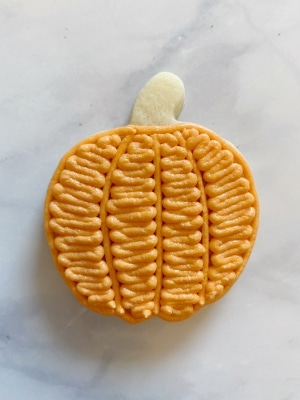
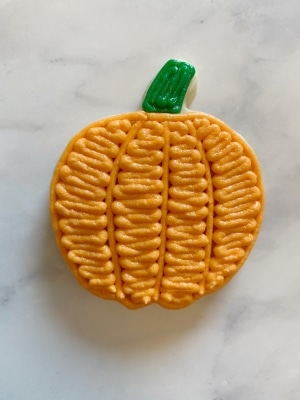
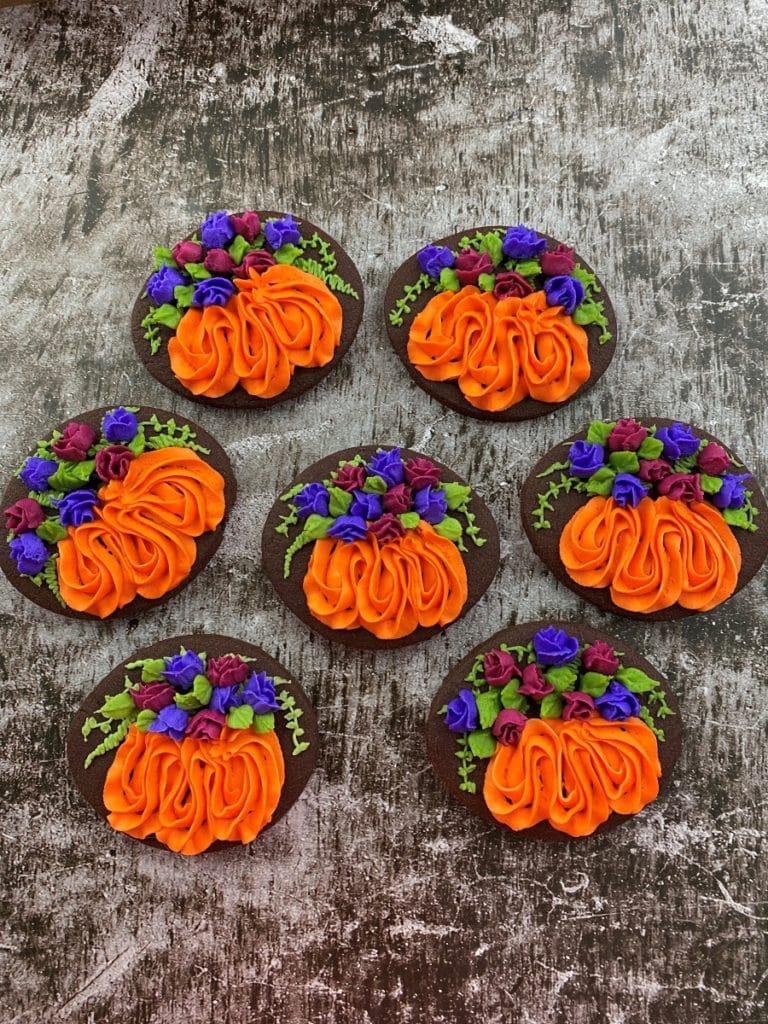
- Take your orange bag of frosting and outline the edges of your pumpkin cookie, minus the stem, but including the ridges in the pumpkin.

- Fill in the ridges.
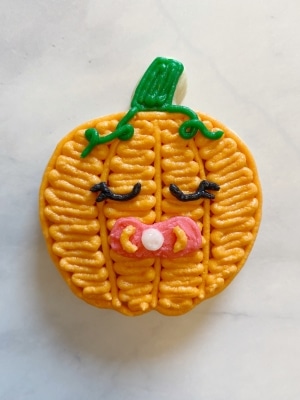
- Outline and fill in the stem with your green frosting. You can also create little vines coming off of the stem. I decided to do this for the girl pumpkins because I thought it resembled hair pretty well!
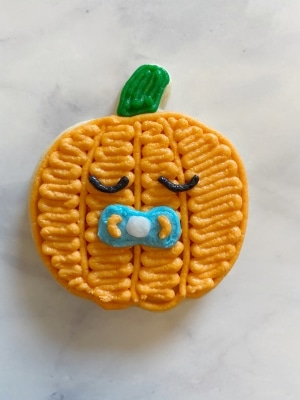
- We will be drawing our pacifier next. Grab your pink or blue frosting and outline the shape of the pacifier. Then, fill it in with the same frosting.
- Take your pointed knife and smooth out the ridges in the pacifier. It doesn’t need to be perfectly smooth, but less lines won’t be as distracting since this is such a tiny detail on our pumpkin babies.
- Now, grab your white icing and pipe a small dot in the center of your pacifier.
- This part is kind of fun to me because it creates a bit of an optical illusion. Take your orange frosting again, but this time, draw two little curved lines next to the white dot. It will end up looking like the little holes they put in pacifiers in which you can see your baby’s skin showing through. In this case, it will be our little pumpkin baby’s face.
- Lastly, we will be creating the eyes. Use your black frosting to draw two little curved lines to represent a sleeping baby pumpkin. For the girl pumpkins, I decided to add some eyelashes by squeezing out just a bit of icing along the “lash line.” If it comes out too clunky, you can use your pointed knife to clean it up a bit.
II. Pumpkin Rattles
1. Using your orange frosting, outline and fill in the shape of a pumpkin at the top of your rattle. You will be doing the same exact steps that you did for your larger pumpkins. I was only able to fit in three ridges instead of four, though. Once you have drawn your pumpkin at the top of the cookie, draw a circle at the bottom of the rattle.
2. Take your green frosting and draw a stem at the top of your pumpkin and a vertical line in between the pumpkin and circle. 3. Now, take either your blue or pink frosting and draw a bow onto your rattle. Check out the photo below for the first step. 4. See how I didn’t draw over the green line yet? Now, what you want to do is draw right over your bow again, creating a second layer. You will now be able to connect your bow as you draw it. The reason we did it this way is so that the height wouldn’t be wonky. III. Baby Onesie
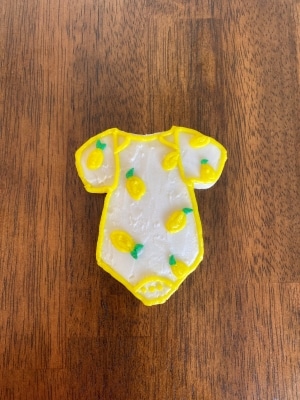
1. For the onesie, you will want to use your white frosting to outline and fill in the whole shape of the cookie.
2. You will then want to flatten out your frosting. Cut a piece of parchment paper that is slightly larger than the size of your cookie and gently lay it over the cookie. Now, using the warmth of your fingers, try to press out any lines on the cookie by pressing onto the parchment paper. Peel off the parchment paper CAREFULLY (think of those temporary tattoos!) and then, using a knife or a flat spatula, begin smoothing the lines even further. You will likely want to repeat the parchment paper/knife steps several times until you are happy with the smoothness. 3. Once you are happy with the level of smoothness you created, take your orange frosting and outline the outside edges of your cookie. Then, draw in the details of the onesie, which includes the sleeves, neck, and bottom button closure. 4. Now you will be creating the fun pumpkin print! These look harder to create than they are, but if you’re nervous, either pop the cookie into the freezer for 5 min to allow the white frosting to crust first OR practice the design on parchment paper. Essentially what you will be doing is squeezing out three little raindrop shapes next to each other. Take a look at the photo below. 5. I do this in one motion, rather than try to draw three raindrops next to each other. Once you are happy with your mini pumpkin, use your green frosting to squeeze out a small dot for a stem. Repeat this process to fill up your whole onesie.


 2. Take your green frosting and draw a stem at the top of your pumpkin and a vertical line in between the pumpkin and circle.
  3. Now, take either your blue or pink frosting and draw a bow onto your rattle. Check out the photo below for the first step.
  4. See how I didn’t draw over the green line yet? Now, what you want to do is draw right over your bow again, creating a second layer. You will now be able to connect your bow as you draw it. The reason we did it this way is so that the height wouldn’t be wonky.
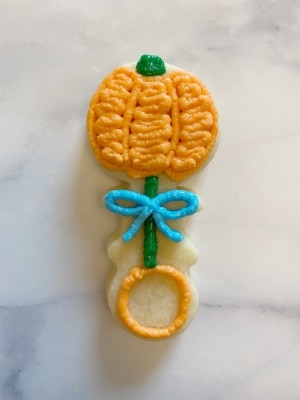
 2. You will then want to flatten out your frosting. Cut a piece of parchment paper that is slightly larger than the size of your cookie and gently lay it over the cookie. Now, using the warmth of your fingers, try to press out any lines on the cookie by pressing onto the parchment paper. Peel off the parchment paper CAREFULLY (think of those temporary tattoos!) and then, using a knife or a flat spatula, begin smoothing the lines even further. You will likely want to repeat the parchment paper/knife steps several times until you are happy with the smoothness.
  3. Once you are happy with the level of smoothness you created, take your orange frosting and outline the outside edges of your cookie. Then, draw in the details of the onesie, which includes the sleeves, neck, and bottom button closure.
  4. Now you will be creating the fun pumpkin print! These look harder to create than they are, but if you’re nervous, either pop the cookie into the freezer for 5 min to allow the white frosting to crust first OR practice the design on parchment paper. Essentially what you will be doing is squeezing out three little raindrop shapes next to each other. Take a look at the photo below.
  5. I do this in one motion, rather than try to draw three raindrops next to each other. Once you are happy with your mini pumpkin, use your green frosting to squeeze out a small dot for a stem. Repeat this process to fill up your whole onesie.
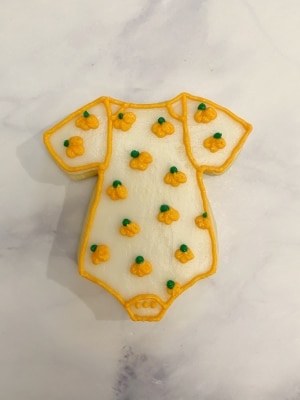
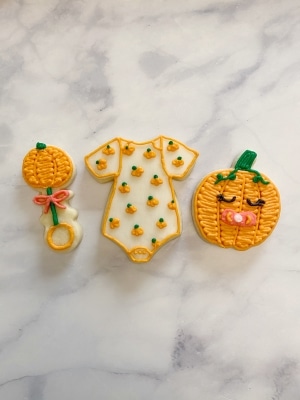
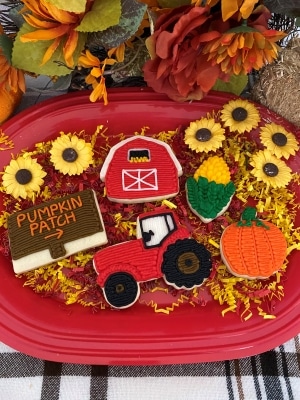
And now you should have the cutest set of “A Little Pumpkin is on The Way” sugar cookies in front of you! Make sure to plate them in a pretty way for your guests. You don’t have to do much, though, these cookies will speak for themselves and draw a lot of attention! I usually hit up the dollar store anytime I want to decorate for a party but Amazon, Party City, Michaels, Hobby Lobby, and more are great places to find stuff. Plus, don’t forget the thrift stores!
Here are some great finds from Amazon:
Make sure to save these cookies for later! Pin one of the images below and then come back to it to comment a photo of your cookies! I would love to see them. You can also tag me on Instagram @buttercreamparties! Thank you so much for reading my blog and I hope you are learning lots to grow your confidence in decorating sugar cookies. I believe in you!


These are so cute!! And I love your step by step icing instructions!!
Thank you so much! I try to be as detailed as possible in my tutorials.