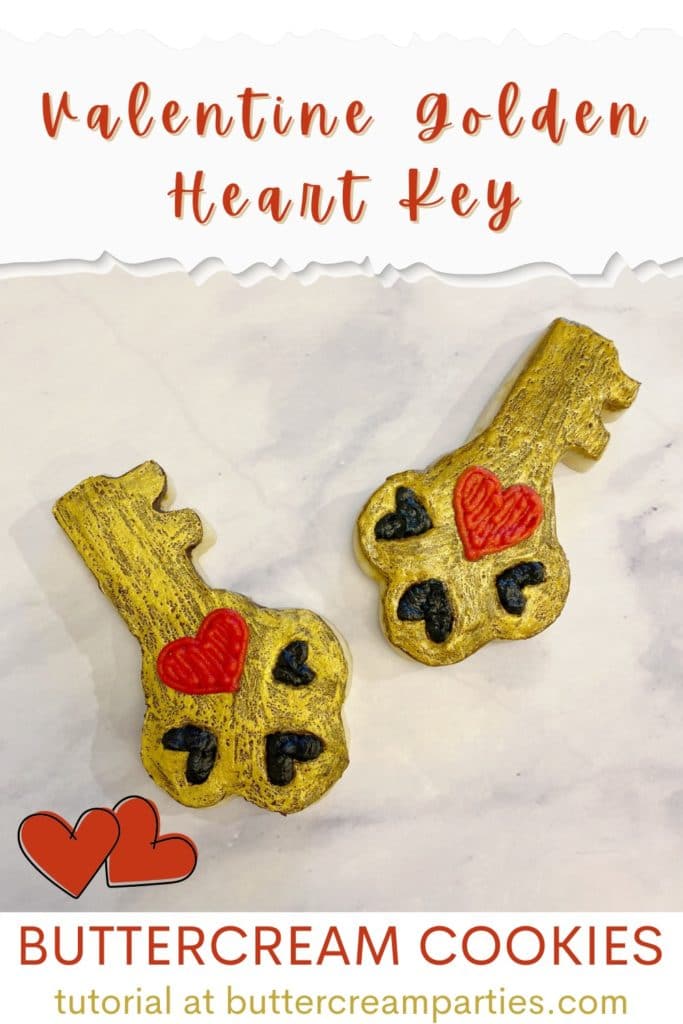
How to Decorate Gold Key Shaped Buttercream Cookies for Valentine’s Day
Remember how I dropped a pretty big hint about what cookies would be shared this week? I’m sure you guessed we would need key shaped buttercream cookies to go with our padlock cookies!
These key shaped buttercream cookies are also painted gold and feature cute hearts. If you were able to get a hang of the padlock cookies, these key shaped buttercream cookies will be a breeze for you! More time to spend with your loved ones sharing delicious cookies and less time in the kitchen!
Follow along for the step-by-step tutorial. Make sure to check out the video tutorial, too!
Skip to
Part 1: Gathering your Supplies for your Gold Key Shaped Buttercream Cookies
To create these key shaped buttercream cookies, perfect for Valentine’s Day, you will want to gather:- 3 Icing bags
- Wilton tip #s 5 and 2
- 2 Couplers
- Key shaped cookie cutter – Get the exact one I used here: Ann Clark Key Shaped Cookie Cutter
- Brown, red, and black gel food dye
- Luster Powder in Gold
- Small paint brush – I always use the smallest in this Wilton Cake Decorating Tools – 5 Pc Brush Set & I love it!
- Small dish to mix your luster powder paint
- A splash of vodka (not to drink, unless it’s that kind of cookie decorating party, in which case you’d probably want more than a splash!)
- Angled flat spatula and a pointed knife
- Ingredients for a crusting buttercream, find my crusting buttercream icing recipe here
- Ingredients for sugar cookie dough, find my no spread sugar cookies recipe here
Part 2: Baking the Cookies, Setting up Your Icing Bags, & Preparing Your Gold Paint
- Roll, cut out, and bake your key shaped sugar cookies according to your cookie dough recipe. You will be able to bake a lot of these cookies so feel free to create other designs too! My suggestion would be the padlock cookies I shared last week, check those out here: How to Decorate Gold Padlock Cookies for Valentine’s Day. I also have some other great suggestions for Valentine’s Day cookies here: Valentine’s Day Tutorials
- While your cookies are cooling, make your buttercream frosting. Separate the frosting into 3 different bowls and add in the gel food dye to obtain your brown, red, and black frosting. You only need a small amount of red frosting compared to the brown and black, so adjust accordingly. Remember when creating red and black frosting, get your shades about 3/4 of the way to where you want them. Then, let them sit out with plastic wrap over them for a few hours (if you have the time) and they will deepen in color!
- Set up your icing bags as follows: Place the tip #5 into a bag with your brown frosting. Next, place couplers into the other two icing bags. You will put your red icing and your black icing into each of these bags, not together, of course. If you aren’t sure how to do this, no worries, just hop over to my Getting Started: Learn How to Decorate Buttercream Cookies page. You don’t need to add the tips yet.
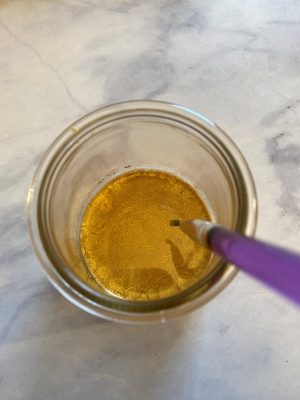
- Prepare your gold paint. To do this, pour about two teaspoons of vodka into a small dish. Now, dump some of the gold luster powder into the dish. You will probably add about two teaspoons as well to start. Give it a mix with your small paint brush and see how it feels. It should be runny like paint, but not so watery that it is like painting with water colors your kids mixed up. It’s probably best described like an acrylic paint. Play with the amounts of vodka and luster powder until it feels right. If you think you poured too much vodka, let it sit out for a bit so some evaporates, rather than pouring tons of luster powder in right away.

Part 3: The Fun Part! Frosting Your Key Shaped Buttercream Cookies
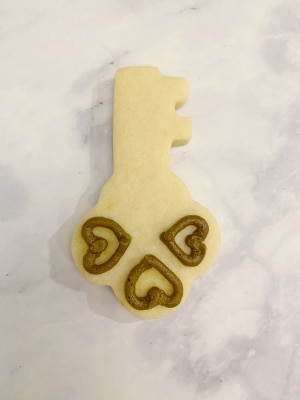
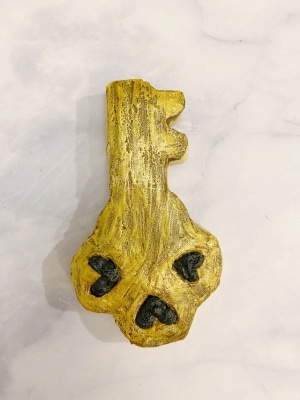
- Your first step will be to outline three small hearts at the bottom of your key. Use the brown frosting to do this. It is more important that the hearts look good on the inside of the heart, as opposed to the outside of the heart. You will have time to get these right still in later steps, but might as well start off with as nice of a base as possible.
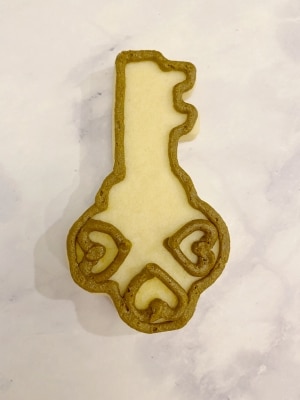
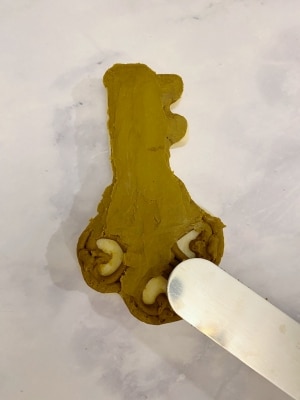
- Now, outline the outer edges of the key and fill it in with the same brown frosting. Don’t put all your effort in at this step, as we will be smoothing out the frosting.
- Once you’ve completed steps 1 & 2 on all of your key shaped buttercream cookies, pop them in the freezer for about ten minutes if you have the time/space. Putting them in the freezer will make it easier to smooth out your frosting without messing up the hearts we have formed. Alternatively, you can place a piece of parchment paper over the top of the frosting and press down with your fingers. This helps smooth out the lines and adhere the frosting to the cookie. Use a flat spatula to smooth the frosting out. Don’t worry if it looks messy, we will fix it in the next step!
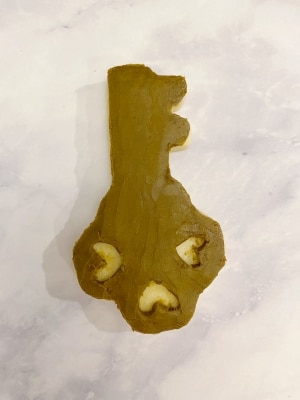
- Use your pointed knife (or a toothpick if you don’t have a safe knife to work with) and carve out the inside of your hearts so they are nice and pretty.
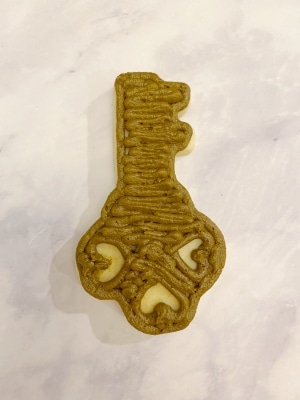
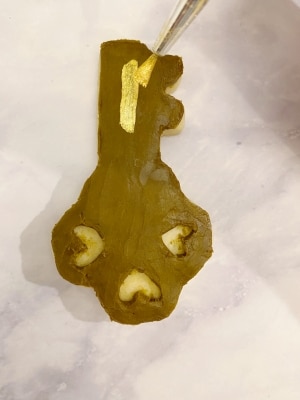
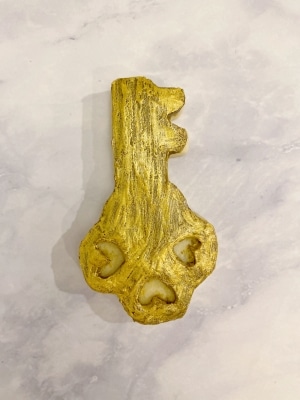
- Once you’ve completed steps 3 & 4 on all of your cookies, now is the time to paint! I really do just love this part. Make sure to press lightly so that you don’t push around the frosting below the paint.
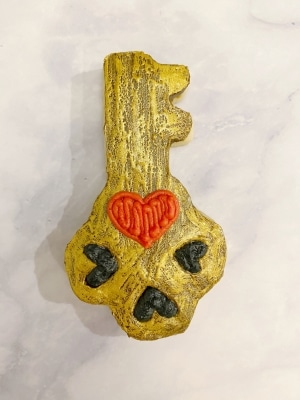
- I could look at that gold paint all day. But okay, the next step is to attach tip #2 to your black frosting. It’s best to start on a cookie that you painted first or toward the beginning, as it will be more dry than the last few you painted. Squeeze out frosting to fill in the heart shapes. You can use the pointed knife/toothpick/tip of the icing bag to carefully move the frosting around so the heart remains a nice shape.
- Once you’ve completed step 6 on all of your cookies, remove the tip #2 from the black frosting and rinse/dry it. Then, attach it to your red frosting. Outline and fill in a heart toward the center of the key.
So beautiful, right? I love these gold key shaped buttercream cookies. Look how well they pair with last week’s tutorial for the gold padlocks! 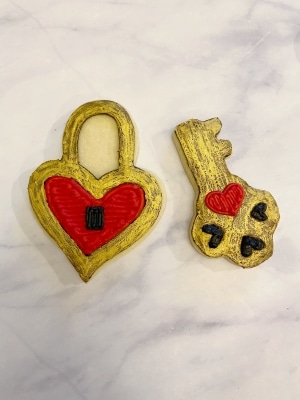 You can find the tutorial for those padlocks by clicking on that photo above! Alternatively, easily find them by looking at all of the Valentine’s Day Tutorials I have for you on the blog.
 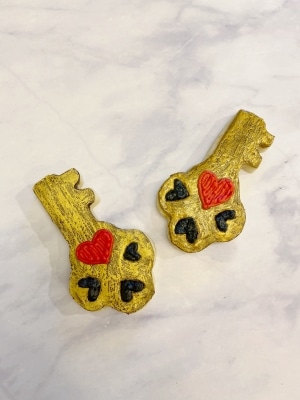 To save this tutorial for later, use any of the social share icons on this page to save it to your favorite social media site. You can also hover over the image below and pin it to your Pinterest account! Happy Valentine’s Day!

I adore these! That gold luster is amazing!
Yes, I loooove the gold paint on these cookies! Thank you!
Another super cute cookie that pairs perfectly with the locks you previously made.
Thank you so much! I think the pair would be a great gift.
SO cute to get the key for the padlock!:) And looks so good in gold!!
It just seems necessary! Thank you!
These are so cute, I love the lock and key, so clever! I need to get some of that gold paint ASAP!!
Yes, it’s so fun! You don’t even need to mix it with vodka to get a shimmery effect, it will just be more sheer. Plus, the little pot of gold dust lasts so long, you are definitely getting your money’s worth.
This is so beautiful and so well done. I admire how detailed you were able to frost the key. And definetly so romantic.
I agree that these are romantic cookies, something I wouldn’t ever think existed before! The key and padlock cookies would be the perfect Valentine’s Day gift. Thank you!
These are just too cool! Beautiful work!
Thank you so much!
OMG these are so adorable! I need to decorate my biscuits more!
Katie | katieemmabeauty.com
Yes, I agree – you can always find an occasion for decorated cookies!