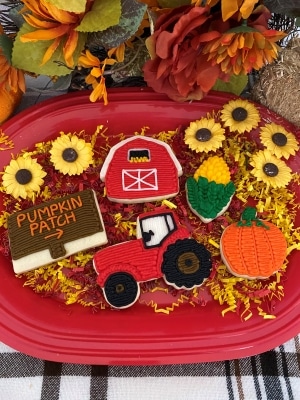
Beginner Friendly Pumpkin Patch Cookies!
Who else loves trips to the pumpkin patch every fall? Here in Washington state, we have lots of agricultural attractions year round and I am all about them. Something about pumpkin patches are especially fun, though.
Whether you are hosting a backyard fall party or need an activity to entertain yourselves this “quarantined” fall season, these beginner friendly pumpkin patch cookies are perfect for you!
You could also steal some of the designs for a fall pumpkin patch themed baby shower, bridal shower, or barnyard birthday party. Stick around for the full tutorial, including photos!
*This post may contain affiliate links, which means I may receive a commission, at no extra cost to you, if you make a purchase through a link. Please see my full disclosure for further information.*

Part 1: Preparing – Gathering your Supplies, Baking the Cookies, & Setting up your Frosting
To decorate these beginner friendly pumpkin patch cookies, you will want:
- 6 Icing bags
- 2 Wilton #4 tips, 1 Wilton #104 tip, 5 Wilton #2 tips, and 1 Wilton #66 tip
- 2 Couplers
- Rectangle cookie cutter
- Corn and pumpkin cookie cutters – I purchased the corn & pumpkin cutters here: 12Pcs Vegetables Cookie Cutter Set
- Tractor and barn cookie cutters – I purchased the tractor & barn cutters here: Ann Clark Cookie Cutters 3-Piece Country Farm
- Wilton gel coloring to obtain brown, yellow, green, orange, red, and white buttercream frosting, here’s my crusting buttercream recipe
- Your favorite sugar cookie dough recipe – if you don’t have a favorite, here’s mine
- Pointed knife to fix any errors
Roll, cut out, and bake your sugar cookies according to your cookie dough recipe.
While they are cooling, whip up your frosting.
To set up your frosting bags, you will place your black frosting into a bag with a tip #2, your white into a bag with a tip #2, and your orange in a bag with a tip #2. Place your brown frosting and your red frosting each into their own bags, each with a tip #4 in it. Place your yellow frosting into a bag with a coupler, attaching tip #104 to it first. Place your green frosting into a bag with a coupler, attaching tip #66 to it first. For instructions on how to do this, visit my page Getting Started: Learn How to Decorate Buttercream Cookies.
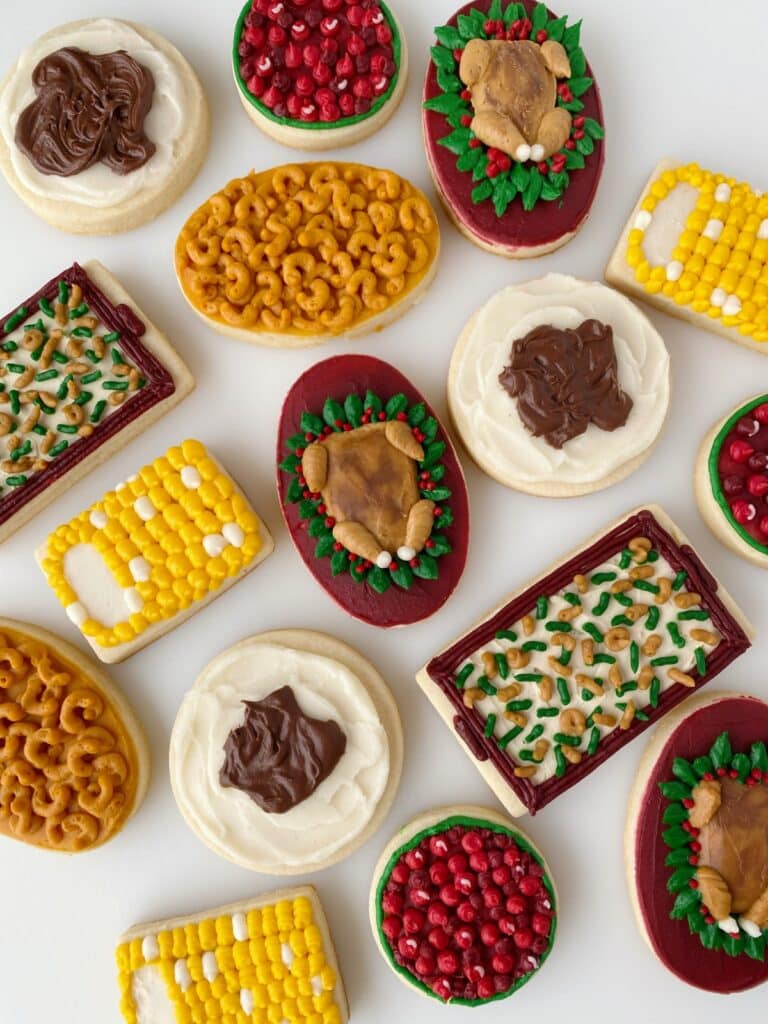
Part 2: Decorating Your Beginner Friendly Pumpkin Patch Cookies!
Let’s start off with our corn cookies, as they use some fun tips. First, get your yellow bag of frosting with your tip #104 attached. Hold the tip so that the fat part of the cookie is facing away from you and the skinny side to you. You will create your corn kernels by holding the tip just above the cookie and squeezing some frosting out while you pull the icing toward you and down. It should look like this:

Continue to layer the kernels to resemble corn on the cob.


Now, take your green frosting with tip #66 attached, and, starting at the bottom of the cookie & moving up toward the corn, squeeze out the corn husks. I chose to do a wavy effect but they look good with just squeezing it straight out of the bag from the bottom of the cookie & moving up toward the corn as well! You may need to pinch the top of the leaves to get a cleaner point to your leaves.

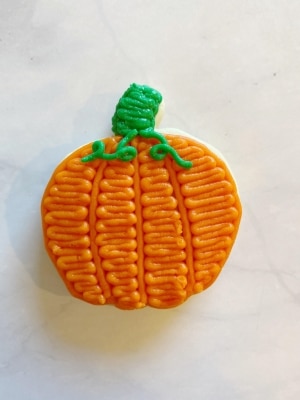
Let’s do our pumpkin decorated cookie next. I have now noticed that I actually used the squash cookie cutter from the set, but, either one works right? I mean, a pumpkin is a type of squash!
Take your orange frosting and first outline the edges and the inner ridges of the pumpkin.

Next, fill in your pumpkin with the orange frosting.


Now, switch your green frosting out for a tip #2. You will be outlining/filling in the shape of the stem first. Then, create little vines coming off of the pumpkin.
For our pumpkin patch sign, all you need to do is outline/fill the shape of the sign with your brown frosting and then write “pumpkin patch” with an arrow in the orange frosting. I chose to write in all capital letters, as it is easier for me to pipe letters that way. If you struggle with writing with buttercream, one, you’re not alone because I do too, but two, I have some tips for you. Do your brown sign first. Let it sit out while you do all of your other cookies. Come back to the signs at the end and begin writing with the orange frosting. Now, if you mess up writing, you can easily “erase” your orange frosting by taking a pointed knife and picking up the frosting. This is much easier to do when the brown frosting has had a chance to crust/harden.


My favorite cookies are the barn and the tractor, so I’ve saved them for last! Does anyone else do that with the food on their plate? The last bite always needs to be the best bite!
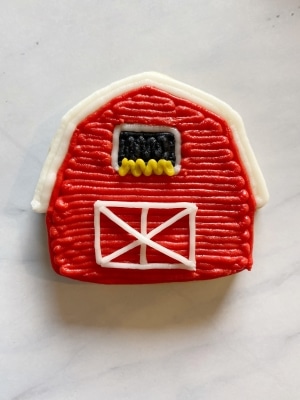
For our barn cookies, we will first be taking our white frosting and outlining/filling in our roof. I only needed to “outline” the roof, as it only took two lines to fill the space. If your barn is a bit of a different shape, you may need to outline/fill. Then, take your black frosting and outline/fill in your window. Draw a white border around the window.

Next, take your red frosting and outline the shape of the barn, including under the roofline. Fill in the rest of the cookie with the red frosting.

Now, take your white frosting and draw the barn doors.

And for a nice little detail, switch your yellow frosting out for a tip #2 and draw in a zig-zag line to represent some hay in the window.
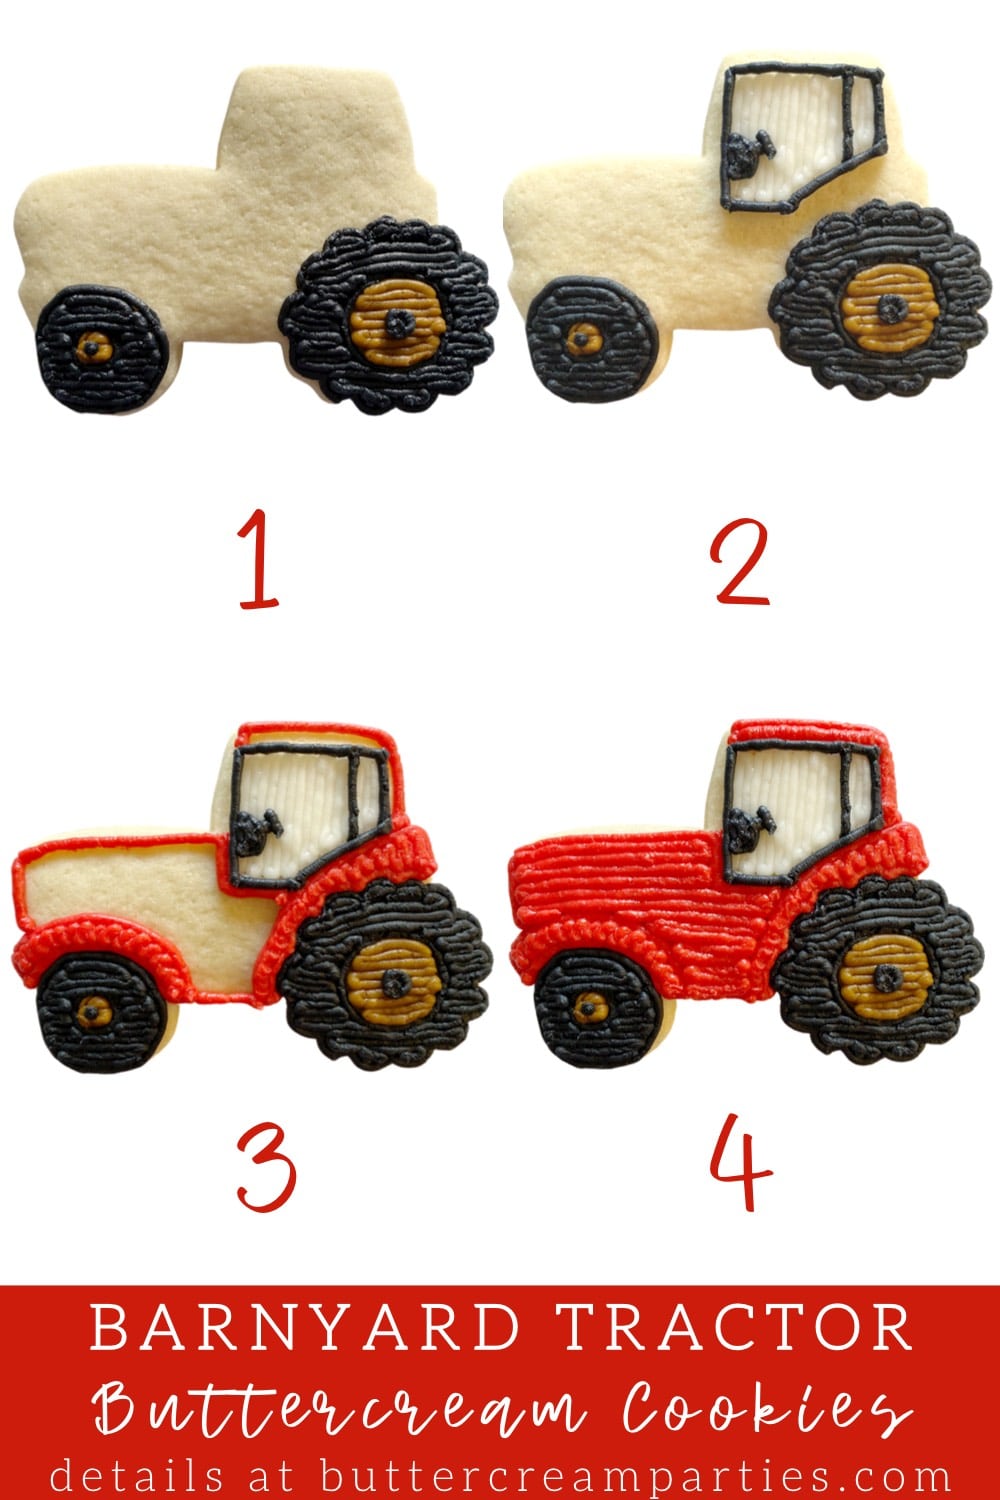
Our tractors are the most detailed but every step is worth it for how cute they are! First, outline your tires with the black frosting. If you mess up the shape (because it’s hard to draw a perfect circle!) use a pointed knife to either erase the wonky part or push the frosting a bit to adjust the shape. Draw a mini circle in the middle to represent what will be the wheel. Now, fill in the space between the tire outline & the wheel with your black frosting.

Take your brown frosting and fill in the space of the wheel.

And take your black frosting again to create small circles/dots in the middle of the brown to finish the wheel.

Now, grab your white frosting and outline/fill in the window.

Take your black frosting again and draw over the white border of your window (like, literally draw the black on top of the white) and then draw in the steering wheel. I also added in a partitioned area of the window because it seemed more realistic. Just draw a vertical line near the back of the window with the black frosting.

Everything else is going to be filled in red, but we want to do it in a specific order to show contrast/depth. First, we will be outlining the tire covers & filling them in. Notice the direction I used to fill in this area.

Now, outline the whole tractor except for right in front of the window.

Finally, fill in the rest of the cookie using horizontal lines.

And there you have it! The cutest little beginner friendly pumpkin patch cookies for this fall season! Just because we are all in the midst of COVID-19 doesn’t mean we can’t have a bit of fun decorating and eating sugar cookies! 
Thank you so much for reading my blog. If you end up making these cookies, let me know! Tag me on Instagram @buttercreamparties, leave a comment below, or post a photo under my pins on Pinterest. To save these for later, use this pin below:

I’ll take a buttercream corn cookie over the veggie any day!
I’m with you there! Thank you for stopping by the blog and leaving a comment!
These are so pretty!
Thank you! I had fun making them.
These are so cute!!! I’m going to try them! 😊
Thank you, I’d love to see how they turn out!
Great directions, thank you!
You’re welcome!
Love the pumpkin decoration and it looks easy too.
Thank you! Yes, they are perfect for beginners!