How to Decorate White and Gold Baby Shower Cookies
20 - 20Shares
Recently I’ve noticed this fun gender neutral baby shower theme – all white baby showers! This theme is so cute and classy. I imagine it is perfect for a spring, summer, fall, or winter celebration. I love how it is perfect for both girl baby showers and boy baby showers, too. I went gender neutral for my son’s baby registry and his nursery theme. I’m glad that I did because my next baby was a girl!
For a gender neutral baby shower, I decided to put together a tutorial for white and gold baby shower cookies. This tutorial is beginner friendly and barely needs any supplies. I personally love that these cookies only use one icing bag, one shade of buttercream, and one piping tip size. So easy! Plus, you get to paint on buttercream which is one of my favorite mindful activities. It’s a nice break before the craziness of a baby shower.
Of course, you can skip the painting if you want to have a purely white baby shower theme.
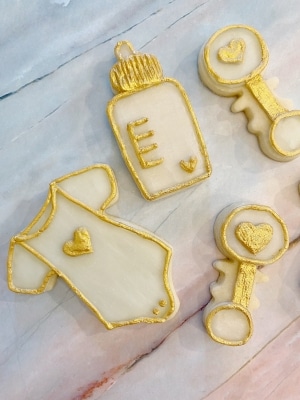
I’ve definitely included baby onesie cookies since those are always so cute. I have also included a baby bottle cookie and a baby rattle cookie. You can use all of them or just pick one. Decorated cookies are the best baby shower favors so it would be easy to make just one design as a thank you gift for the guests.
Also included in the tutorial is how to smooth buttercream and a tip on how to make white buttercream using an all butter buttercream recipe. I will also be teaching you how to make gold paint for your gold baby shower cookies.
Make sure to check out the video and then follow along for the step-by-step photo series tutorial.
*This post may contain affiliate links, which means I may receive a commission, at no extra cost to you, if you make a purchase through a link. Please see my full disclosure for further information.*
Skip to
- Part 1: Gathering your Supplies for your White and Gold Baby Shower Cookies
- Part 2: Baking the Cookies and Setting Up the Icing Bag & Gold Paint
- Part 3: How to Decorate the Gold and White Baby Shower Cookies
- Packaging Buttercream Sugar Cookies
- Don’t forget to grab your baby shower decorations!
- Save The Tutorial for These Decorated Baby Shower Cookies for Later
Part 1: Gathering your Supplies for your White and Gold Baby Shower Cookies
To create these gender neutral baby shower sugar cookies, you will want to gather:
- 1 Icing bag
- 1 Wilton #5 tip
- Baby shower cookie cutters – I used the the onesie, rattle, and baby bottle in this set
- Gold luster powder – I use the Fancy Sprinkles brand and love it!
- Vodka
- Small decorating paintbrush and a lid or small bowl
- 9″ Angled flat spatula, the perfect size for cookies
- White buttercream frosting*
- Your favorite sugar cookie dough recipe – if you don’t have a favorite, I recommend Katrina’s Best Sugar Cookie Recipe
Part 2: Baking the Cookies and Setting Up the Icing Bag & Gold Paint
- Roll, cut out, and bake your sugar cookies according to your cookie dough recipe.
- Make your buttercream icing. For this set of cookies, I simply added a bit of violet gel to the buttercream. For tips and more ways to obtain a pure white buttercream, check out my post, How to Make White Buttercream Frosting.
- Set up your icing bag as follows: Set up the Wilton tip #5 into your icing bag and cut the bag to the appropriate size. Add in the white frosting. If you are unsure how to set up icing bags, check out my tutorial here.
- Prepare your gold paint for the gold buttercream: Mix together 2 parts luster dust to 1 part vodka. I did 1/2 tsp of luster powder to 1/4 tsp of vodka to start. If you need more for your amount of cookies, make more as you go using the same ratio.
Part 3: How to Decorate the Gold and White Baby Shower Cookies
Baby Bottle, Rattle, and Onesie Cookie Video Tutorial
Make sure to check out the full tutorial in the video and then check out the step-by-step photo series tutorial below.
How to Decorate the Baby Onesie Cookies
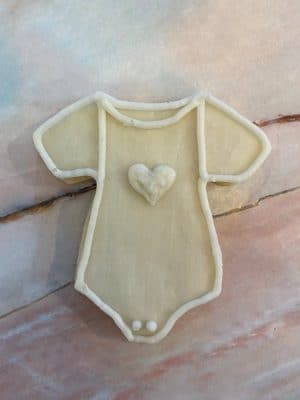
- Outline the edge of the onesie and then fill it in – you can do this roughly. Do this for all of your onesie cookies and then place them all into the freezer. It’s best to place them on a flat surface, such as a cookie sheet if you can fit it. Make sure not to stack them.
- After your cookies have been in the freezer for at least ten minutes, use the angled flat spatula to smooth the cookies.
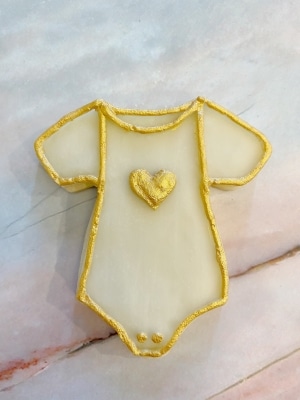
- Outline the edge of the onesie again and then add in the details. Use a pointed knife to fix any errors or shaky lines.
- Now it’s time to paint! Gently paint over the outer edge and all of the details. Make sure to paint the top and sides.
How to Decorate the Baby Bottle Cookies
- Outline the edge of the bottle and then roughly fill in the cookie. Do this for all of the cookies and then place them into the freezer using the same tips outlined in step 1 of the baby onesie cookies.
- Use an angled flat spatula to smooth the cookies after they have been in the freezer for at least ten minutes. *It isn’t a problem if you have your cookies in the freezer for hours if you forget about them or get sidetracked.
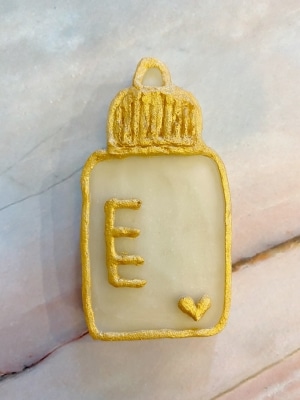
- Outline the edge of the bottle and then fill in the cap with the traditional buttercream piping lines. Make sure to fill them in vertically as most, if not all, baby bottle caps are designed with threading in that direction. Draw in the measuring guide and heart as well.
- Time to paint! Gently paint over the outer edges as well as all of the details. For the cap, you can use the paintbrush to carve out the vertical lines a bit if they start to get swallowed by the paint. It’s not necessary, though.
How to Decorate the Baby Rattle Cookies
- Outline/fill the top and bottom circles of the rattle and then a middle handle. Make sure to do this for all of the rattle cookies and place them in the freezer for at least ten minutes.
- Smooth out the circles and handle with the angled flat spatula.
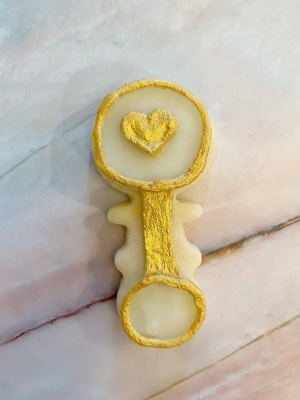
- Outline the two circles again and then pipe a heart in the middle of the top circle.
*forgot to take a photo after the heart, oops* - Paint the gold luster dust onto the edges of the circles, the heart, and the handle.
I just love these baby shower decorated cookies so much! I think there is a misconception out there that you cannot get smooth buttercream for cookies, that you need to resort to royal icing. This is not true. These cookies are sure to amaze your guests and taste delicious. Who doesn’t like buttercream frosting?
Packaging Buttercream Sugar Cookies
If you go the route of using these cookies as baby shower favors, check out my post, My 3 Easy Tips for How to Package Buttercream Sugar Cookies. This is a complete guide for how to ensure your buttercream cookies keep their shape for to-go treats.
Don’t forget to grab your baby shower decorations!
Etsy has some amazing all white baby shower invitations and decorations, so make sure to check there! You can also check out Amazon for decorations. Here are some things I found while looking that I love!
Save The Tutorial for These Decorated Baby Shower Cookies for Later
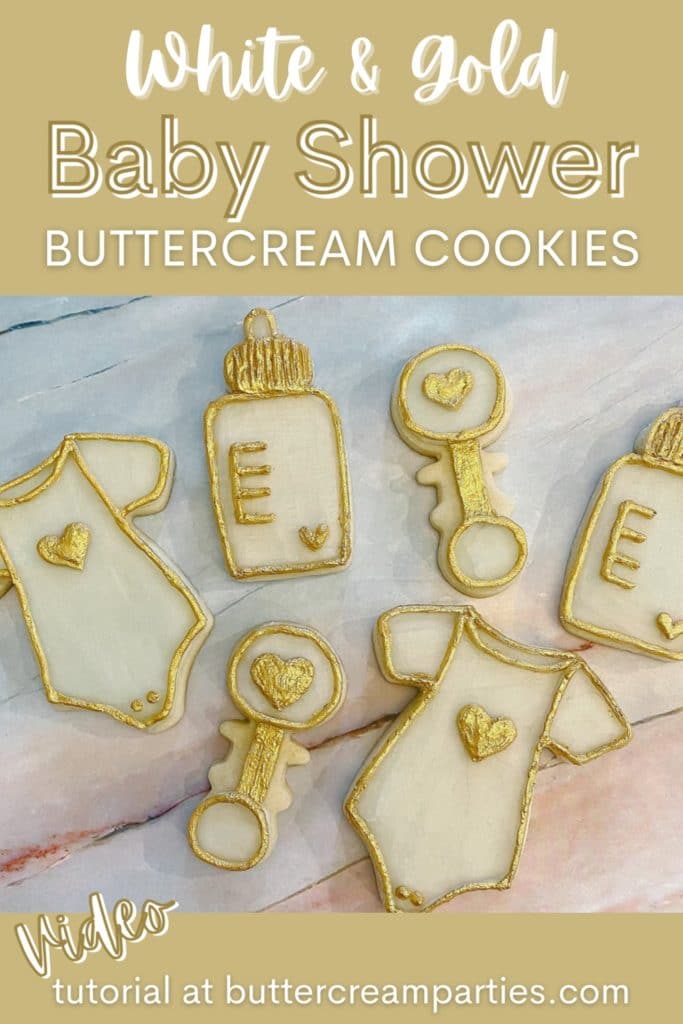
To save the tutorial for these buttercream sugar cookies for later, simply click on any of the social share icons on the page. Alternatively, hover over the image below to pin the image to your Pinterest page! As always, thank you for learning how to decorate sugar cookies with me.
Happy decorating!










I’ve never seen these buttercream techniques before. I’ll definitely try them out. Your cookies are adorable!
Thank you!
What a cool idea !! I really like the idea of neutral color and find your tutorial very well explained. As soon as I get the chance I’ll try to make them :))
I try to be as thorough as possible, so thank you!
These are beautiful cookies and such a fabulous idea for a baby shower!
Thank you! I wish I could take credit for the baby shower theme, it is a great one!
These cookies look adorable and a great idea for a baby shower! Thanks for the clear instructions!
You are welcome!
These so classy! I love the gold and how simpictic and elegant they are.
Thank you so much! I agree that a white & gold baby shower is classy & elegant!
Your cookies are always so cute and I really love that you use buttercream rather than royal icing. These cookies are perfect for a shower!
Thank you, Cindy! I couldn’t imagine switching over to royal icing at this point. I just love working with buttercream.
These are so cute and would be perfect for a baby shower.
Thank you!