Green Grinch Sugar Cookies With Buttercream Frosting
How the Grinch Stole Christmas is a classic book and movie, a must-see every Christmas season. Thus, Grinch sugar cookies are a fun treat to accompany the show.
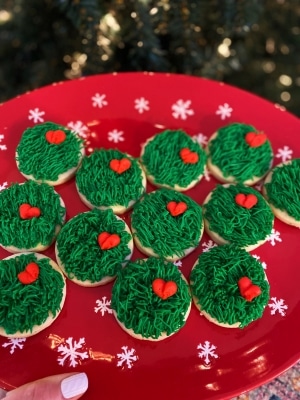
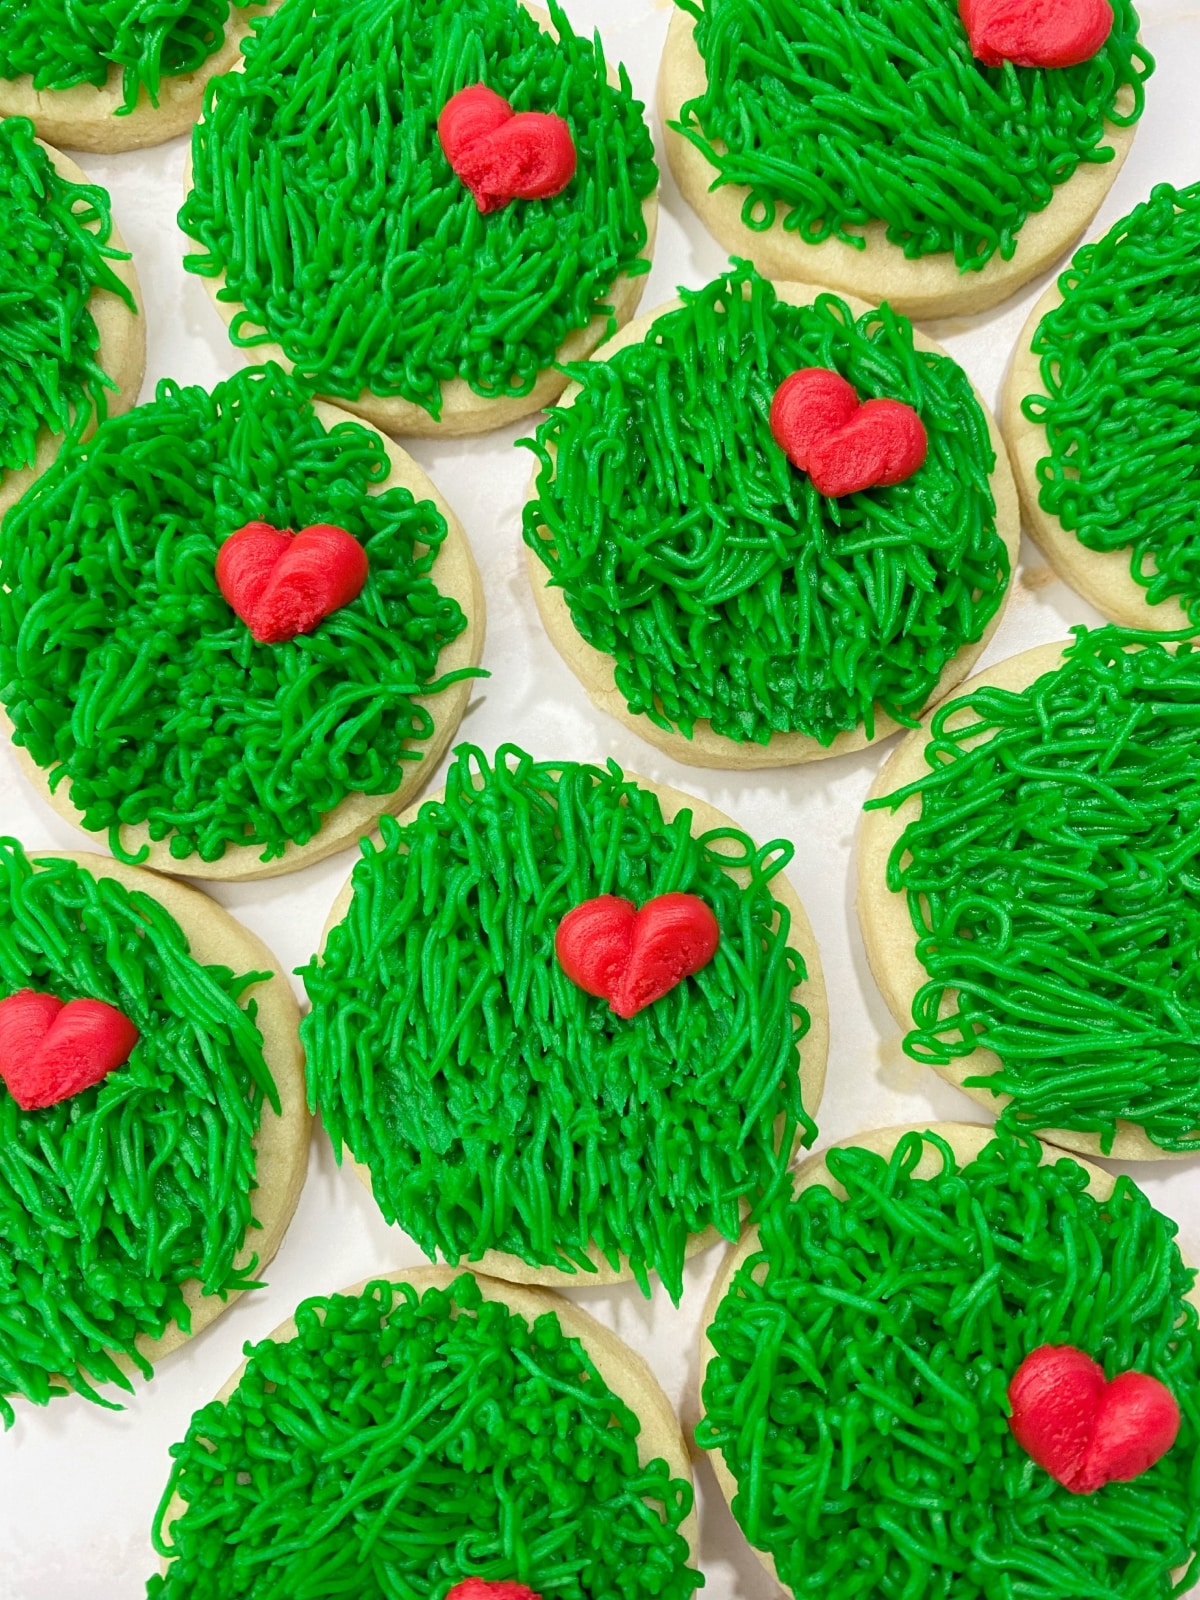
The decorated cookies feature the Grinch’s iconic green hair and his growing red heart. I did look up if the Grinch has hair or if he has fur and the consensus seems to be that he had hair. Makes sense to me so I’m going with hair.
No need to have ever decorated a sugar cookie before, these Grinch cookies are easy to create. Get the older kids involved and make it a day! Dr. Seuss said it best in How the Grinch Stole Christmas:
“Then the Grinch thought of something he hadn’t before! What if Christmas, he thought, doesn’t come from a store. What if Christmas…perhaps…means a little bit more!”
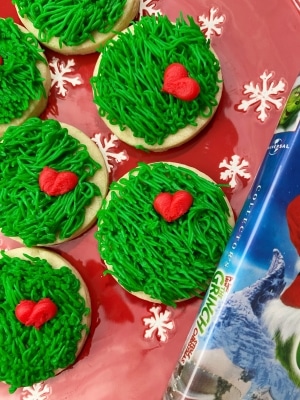
A cozy night in with the family watching the movie and eating Grinch cookies sounds pretty heartwarming, doesn’t it?
Speaking of the movie, are you a fan of Jim Carrey’s version or the classic 1966 version? I like both but if I HAD to pick, I’d go with the classic version.
But back to the task at hand, let’s make these delightful and whimsical Grinch sugar cookies!
*This post may contain affiliate links, which means I may receive a commission, at no extra cost to you, if you make a purchase through a link. Please see my full disclosure for further information.*
Skip to
Part 1: Making the Soft Sugar Cookies
You can make any flavor of cookies you want for your Grinch cookies. I will include my classic vanilla sugar cookie for this tutorial. Check out these flavors if you prefer something else:
- Brownie chocolate cut out sugar cookies
- Pumpkin spice cut out sugar cookies
- Sprinkle sugar cookies (these use Halloween sprinkles but swap in green for the Grinch!)
To make deliciously soft no-chill vanilla cut out sugar cookies, you’ll need:
- flour
- baking powder
- an egg
- vanilla extract
- salted butter
- granulated sugar
Go ahead and preheat the oven to 350 degrees Fahrenheit.
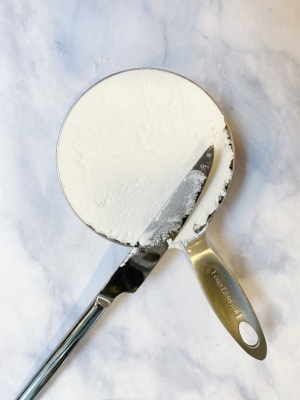
Grab a medium sized mixing bowl and add in 3 cups of flour. Remember, when measuring flour, do the spoon & scrape method.
What’s the spoon & scrape method? Simply use a spoon to spoon flour into your measuring cup. Once you have a mound at the top, take a knife and scrape it over the top of the measuring cup. Obviously don’t scrape the excess into your mixing bowl.
Next, add in two teaspoons of baking powder into the mixing bowl. Make sure to use baking powder and not baking soda. The baking soda will cause the cookies to puff up and spread. Likely still delicious but not as pretty.
Stir the baking powder into the flour and set this bowl aside.
Grab your stand mixer and attach the paddle attachment. When I was first starting on my baking journey (I was in my 20s) I used the whisk. Whoops. I’ll just say we had to throw away that whisk attachment.
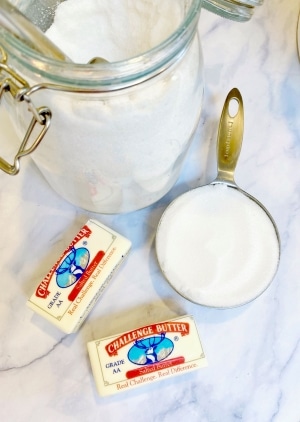
In the stand mixer, add in one cup (or two sticks) of COLD salted butter. By cold, I mean refrigerated and not at room temperature.
You can chop the butter up into cubes before adding it into the stand if you want to speed up the process and reduce the chance of your mixer kicking the butter out onto the floor.
To the butter, cubed or not, add in one cup of granulated white sugar. You don’t need to do the scoop & scrape method for the sugar.
Now, cream the butter and sugar together on medium speed. You will know it’s done when you can’t see any butter lumps. Try not to overmix, as this just adds heat into the butter and increases the chance of spread.
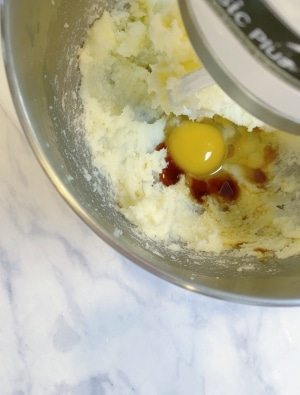
Next up is adding one egg to the mixer. If you have access to duck eggs, I HIGHLY recommend using a duck egg. We have about 20 ducks, so I always use a duck egg.
Baking with duck eggs has a richer taste due to the larger yolk. We all know that the yolk is the yummier part of the egg, too.
If you don’t have a duck egg, use a chicken egg and the buttercream cookies will still be delish.
Before turning on the mixer, go ahead and add in at least one and a half teaspoons of vanilla extract. I’ve been known to add up to a tablespoon.
If you love almond extract in your cookie, go ahead and reduce the vanilla extract amount and add in some almond to make up the difference. I just prefer an all vanilla cookie.
Now, go ahead and mix the egg and extract in the stand mixer until the egg is just combined. Again, we don’t want to introduce too much heat.
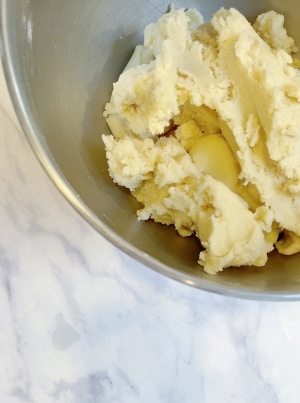
Lastly, spoon in some of the flour & baking powder mixture and mix until it’s not a powdery mess. Continue adding in the dry ingredients until it’s all been added.
The dough will pull away from the sides when it is ready. If it is too sticky, add in a tablespoon of flour. It’s better to go with more than less flour here.
Roll out the cookie dough on a floured surface to 3/8″ thick. I prefer a thicker cookie because buttercream frosting can be overpowering if the cookie is too thin.
I use this Joseph-Joseph rolling pin to ensure my cookies are even and 3/8″ thick. I highly recommend it! It’s one of my favorite kitchen tools.
Use a round cookie cutter to cut out the cookies. Place no more than 6 cookies on a standard sized cookie sheet. I find this no chill sugar cookie dough recipe to work wonders on this cookie sheet and a silicone mat.
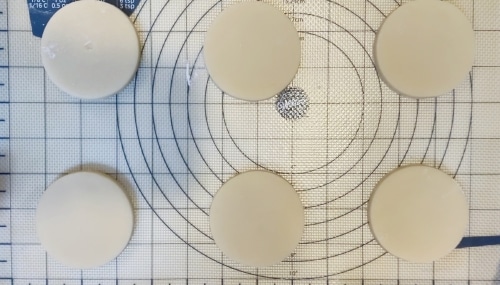
Bake for 7-9 minutes at 350 degrees Fahrenheit, or until the middle of the cookie doesn’t look wet. Sometimes it forms a bit of a bump on the top of the cookie which also means they are done.
I always err on underbaking than overbaking. The cookies will continue to cook a bit as they cool on the baking sheet. The egg & flour should be cooked enough for safe eating, assuming the cookies didn’t look wet in appearance anymore.
Allow the cookies to cool on the sheet for at least 5 minutes, then use a thin spatula to move them to a piece of parchment paper. Roll out the next set of 6 cookies and repeat this process until all the dough is used.
To take these soon-to-be buttercream cookies OUT OF THIS WORLD, put your just-baked-but-cooled cookies into an airtight container and then freeze them while you make the buttercream frosting.
Freezing the cookies for a bit seals in moisture so you have amazingly soft cookies that almost melt in your mouth. Just heavenly!
I learned this trick when making banana bread back in the day and it applies to these sugar cookies as well. Best hack ever.
Part 2: Making the Grinch Buttercream Frosting
This is a delicious crusting buttercream recipe. What does crusting mean? It just means that the frosting will form a bit of a crust on the outside layer of frosting to protect the design. The bite will still be soft and almost melt in your mouth.
Here are the ingredients you will need:
- room temperature unsalted butter
- powdered sugar
- vanilla extract
- milk
- green & red gel food dye – buy at Walmart for the cheapest price, around $2/bottle
It is imperative that your butter is room temperature for the buttercream to come together better. If you are starting with cold butter, you can beat the butter long enough so that it comes to room temperature if necessary. Just make sure to only proceed with the rest of the ingredients once the butter is at room temperature.
Wash & dry the bowl from the stand mixer since you just made the cookies in it. Now, add in the cup of room temperature unsalted butter.
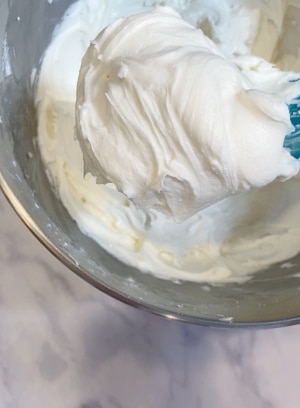
Using the paddle attachment (make sure it’s clean from the cookie dough), cream the butter on medium-high until it is lighter in color. Make sure all of the lumps are gone, too.
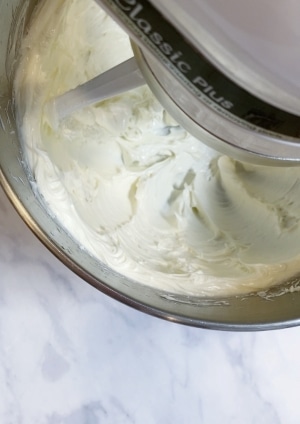
Turn off the stand mixer and add in four cups of powdered confectioner’s sugar. Four cups is a lot, yes. However, I promise the flavors will all balance out. And remember? We made thick sugar cookies.
We use four cups of powdered sugar in order for the frosting to form a slight crust. All that means is that the outer layer of frosting will dry to the touch. This helps keep fingers cleaned when picking up the cookies & it acts as a tasty cement if you want to add sprinkles.
The frosting will get nowhere near as hard as royal icing so don’t worry about losing your softest sugar cookie award.
With the four cups of powdered sugar, add in at least one and a half teaspoons of vanilla extract. Just like the cookies, I tend to measure the vanilla extract from the heart and it may be around a tablespoon sometimes.
Add in one tablespoon of milk.
Cover the stand mixer with a clean towel or a paper towel and mix on low/stir. Once the frosting is coming together, remove the towel. Add in one more tablespoon of milk, still keeping the mixer on low speed. If the frosting is thicker than a creamy peanut butter consistency, add in one more tablespoon of milk.
We don’t want the consistency to be too soft, as the Grinch’s hair won’t lay correctly. (If you get everything bagged and the frosting is too soft, take it out of the bag, stir in more powdered sugar, and put it back into the bag.)
Do not turn the mixer higher than low. If needed, use a rubber spatula to stir the frosting. Overmixing buttercream can cause air bubbles. If you do overmix, here’s a post on how to fix it. I promise it’s not terribly hard to fix, but, as always, prevention is better.
Once your buttercream has been made, scoop out a cup of buttercream. This will be your red frosting. Color the remaining buttercream green for the Grinch’s hair. If coloring the green in the mixing bowl, remember to only mix on low speed.
Both the red and the green frosting will become darker with time. I prefer to make my red frosting 24-48 hours before using in order to get a saturated shade without having to use a ton of red gel dye.
*PLEASE NOTE that when you are placing frozen buttercream onto non-frozen buttercream, you risk the frozen buttercream “bleeding” onto the non-frozen as it defrosts. To help prevent this, do not oversaturate your red frosting as this will be the frozen frosting. This pertains more to people decorating the cookies a day or more before the movie watching.
Part 3: Decorating the Grinch Sugar Cookies with Buttercream Frosting
Okay, let’s start putting all these delicious flavors together for some Grinch cookies! Once you have your cookies baked and buttercream made, it’s time to start piping.
For decorated Grinch sugar cookies, you’ll want:
- two piping bags
- one Wilton #12 piping tip
- one Wilton #233 piping tip
Place the tip #12 into one piping bag and the #233 tip into another piping bag. Then, cut the piping bags so that part of the tip is out.

![]()

![]()
Scoop the red buttercream into the bag with the tip #12 in it. Scoop a cup of green buttercream into the bag with the tip #233 in it.
First, make the red buttercream hearts on a piece of parchment paper. We are making buttercream transfers so that we can easily place the hearts onto our grinch cookies. Trying to pipe on the hair means the green frosting will get on the red piping bag and drag the frosting around.
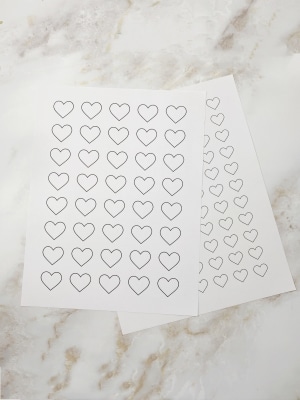
You can get your free buttercream transfer templates here.
To make a buttercream transfer:
- Print the template – grab your free template here
- Place the template onto a cookie tray that will fit into your freezer
- Lay a piece of parchment paper over the template and tape it onto the template
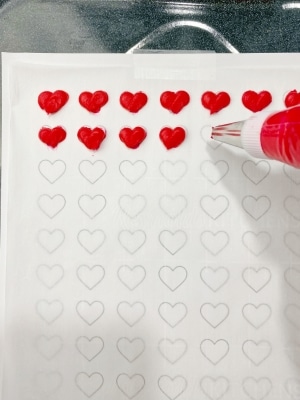
- Pipe the red buttercream over the heart shapes for as many cookies as you baked
- Place the tray into the freezer for at least 10 minutes while you pipe the Grinch’s green hair
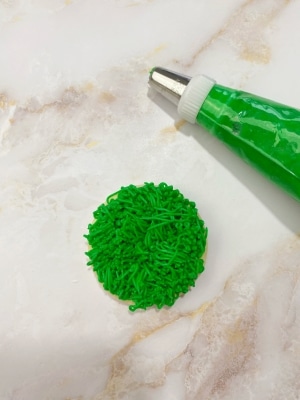
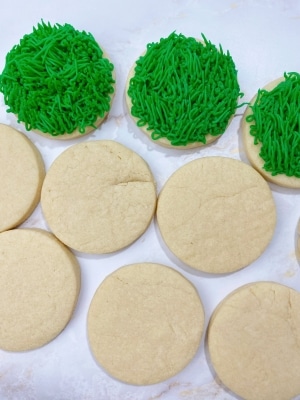
Use the green bag to pipe hair onto the Grinch cookie. You can either pipe in a circular manner, a typewriter style, or a random style. The grinch probably doesn’t comb his chest hair so we can be messy here.
Lastly, peel the buttercream transfers and place them onto the grinch cookies. I found this easiest to just use my fingers but if you are making them for others, don’t forget your gloves.
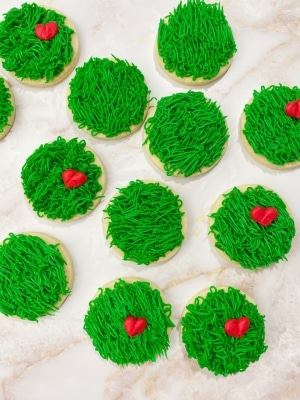
You can keep some Grinch cookies without the hearts or you can give the Grinch a heart in every cookie.
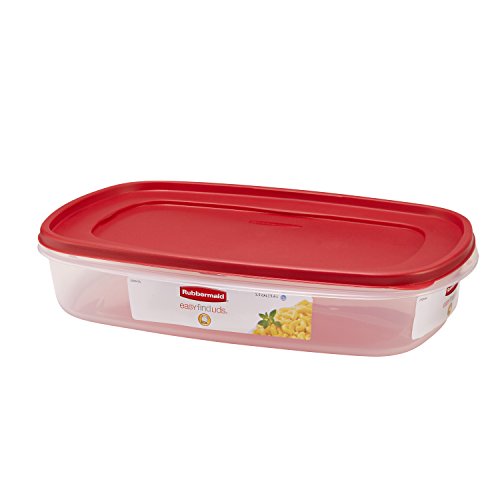
Don’t stack these cookies, as they are fragile. To transport your cookies, these containers work best because they are air tight and large.
Green Grinch Sugar Cookies with Buttercream Frosting
Equipment
- Stand Mixer with Paddle Attachment
- Rubber Spatula
- Medium Sized Mixing Bowl
- Measuring cups and spoons
- Cookie Sheet lined with parchment paper or a silicone mat
- Rolling Pin
- Disposable Piping Bags
- Wilton tip #12 & Wilton tip #233
- Medium Sized Circle Cookie Cutter
- Parchment paper and heart template free template is available for download above
Ingredients
Vanilla Sugar Cookies
- 3 cups all-purpose flour, plus more for rolling 284 grams
- 2 tsp. baking powder
- 1 cup cold salted butter cut into cubes
- 1 cup granulated white sugar
- 1 egg
- 1.5 tsp. vanilla extract at least, I add about a tablespoon
Grinch Buttercream Frosting
- 1 cup unsalted butter room temperature
- 4 cups powdered sugar
- 1.5 tsp. vanilla extract
- 2-4 tbsp. whole milk
- green & red gel food dye
Instructions
- While you will make the cookies first, you will want to set the unsalted butter out so that it comes to room temperature. The unsalted butter will be used when preparing the buttercream.
Vanilla Sugar Cookies
- Preheat the oven to 350 degrees Fahrenheit.
- In a medium sized mixing bowl, add in the flour and baking powder. Stir the ingredients to combine them.
- In the stand mixer, cream the salted butter and sugar together until all of the butter lumps are gone.
- Add in the egg and vanilla extract and mix until just combined.
- Slowly add the flour and baking powder mixture into the wet ingredients until the dough forms a ball. If the ball is very sticky, add another tablespoon of flour.
- Roll the dough onto a floured surface and use the round cookie cutter to cut out the cookies.
- Place six cut out cookies onto a cookie sheet lined with a silicone mat. Bake for 7-10 minutes or until the center of the cookies do not appear wet.
- Allow the cookies to cool for 5 minutes on the baking sheet before transferring them to a piece of parchment paper. Repeat the cookie baking process for all remaining cookies.
Grinch Buttercream Frosting
- Add the room temperature unsalted butter to the stand mixer and mix with the paddle attachment until lighter in color.
- Add the powdered sugar to the mixer, along with the vanilla extract and two tablespoons of milk.
- Place a clean towel over the stand mixer and mix on low speed until the sugar is incorporated. Use a rubber spatula to scrape the sides if needed.
- If the frosting is thicker than a creamy peanut butter consistency, add in 1-2 more tablespoons of milk.
- Pull out one cup of frosting and dye that red. Add the red frosting into a piping bag with the tip #12.
- Dye the rest of the frosting green. Put one cup of green frosting into a piping bag with the tip #233.
Decorating the Grinch Sugar Cookies
- First, create the heart buttercream transfers: Lay the template onto a tray that will fit into the freezer. Place a piece of parchment paper over the template and tape it down. Pipe the hearts onto the parchment paper and place the tray into the freezer then move to decorating the Grinch hair.
- Pipe the Grinch hair with the green frosting. Be as messy as you want here, as the Grinch probably isn't the best at combing his hair.
- Once all of the cookies have their Grinch hair on them, remove the hearts from the freezer. Peel one heart off of the parchment paper and place it onto a Grinch cookie. Repeat for all of the cookies.
Part 4: Frequently Asked Questions
Don’t I need to chill the dough before baking?
This is a no-chill, no-spread sugar cookie recipe. I like to be able to roll out, cut out, and bake my sugar cookies all at once without waiting. Who likes to wait any longer than necessary for cookies, right?
We get away with not chilling the dough by using cold, cubed butter. When baking in batches, allow the cookies to cool on the baking sheet for 5 minutes, then carefully remove the cookies and place them onto a sheet of parchment paper to continue cooling. Cut out the next set of cookies and bake them on the same baking sheet. Repeat the process as many times until the dough is used.
If you cannot use all the dough at once, you may freeze the dough for 3 months or place it in your refrigerator for a week. The dough may spread more, so after rolling and cutting out the cookies, lay the cookies onto the baking sheet and freeze them for 10 minutes. Then, bake the cookies.
Can I package these cookies?
Yes! You can package buttercream sugar cookies. I have a very detailed post on packaging buttercream sugar cookies for your reference.


Save the Tutorial for These Grinch Cookies
Use the image below to pin this Grinch sugar cookie recipe to your Christmas or holiday board on Pinterest. Alternatively, use any of the social share icons on the top of the page to share it to your favorite social media site.