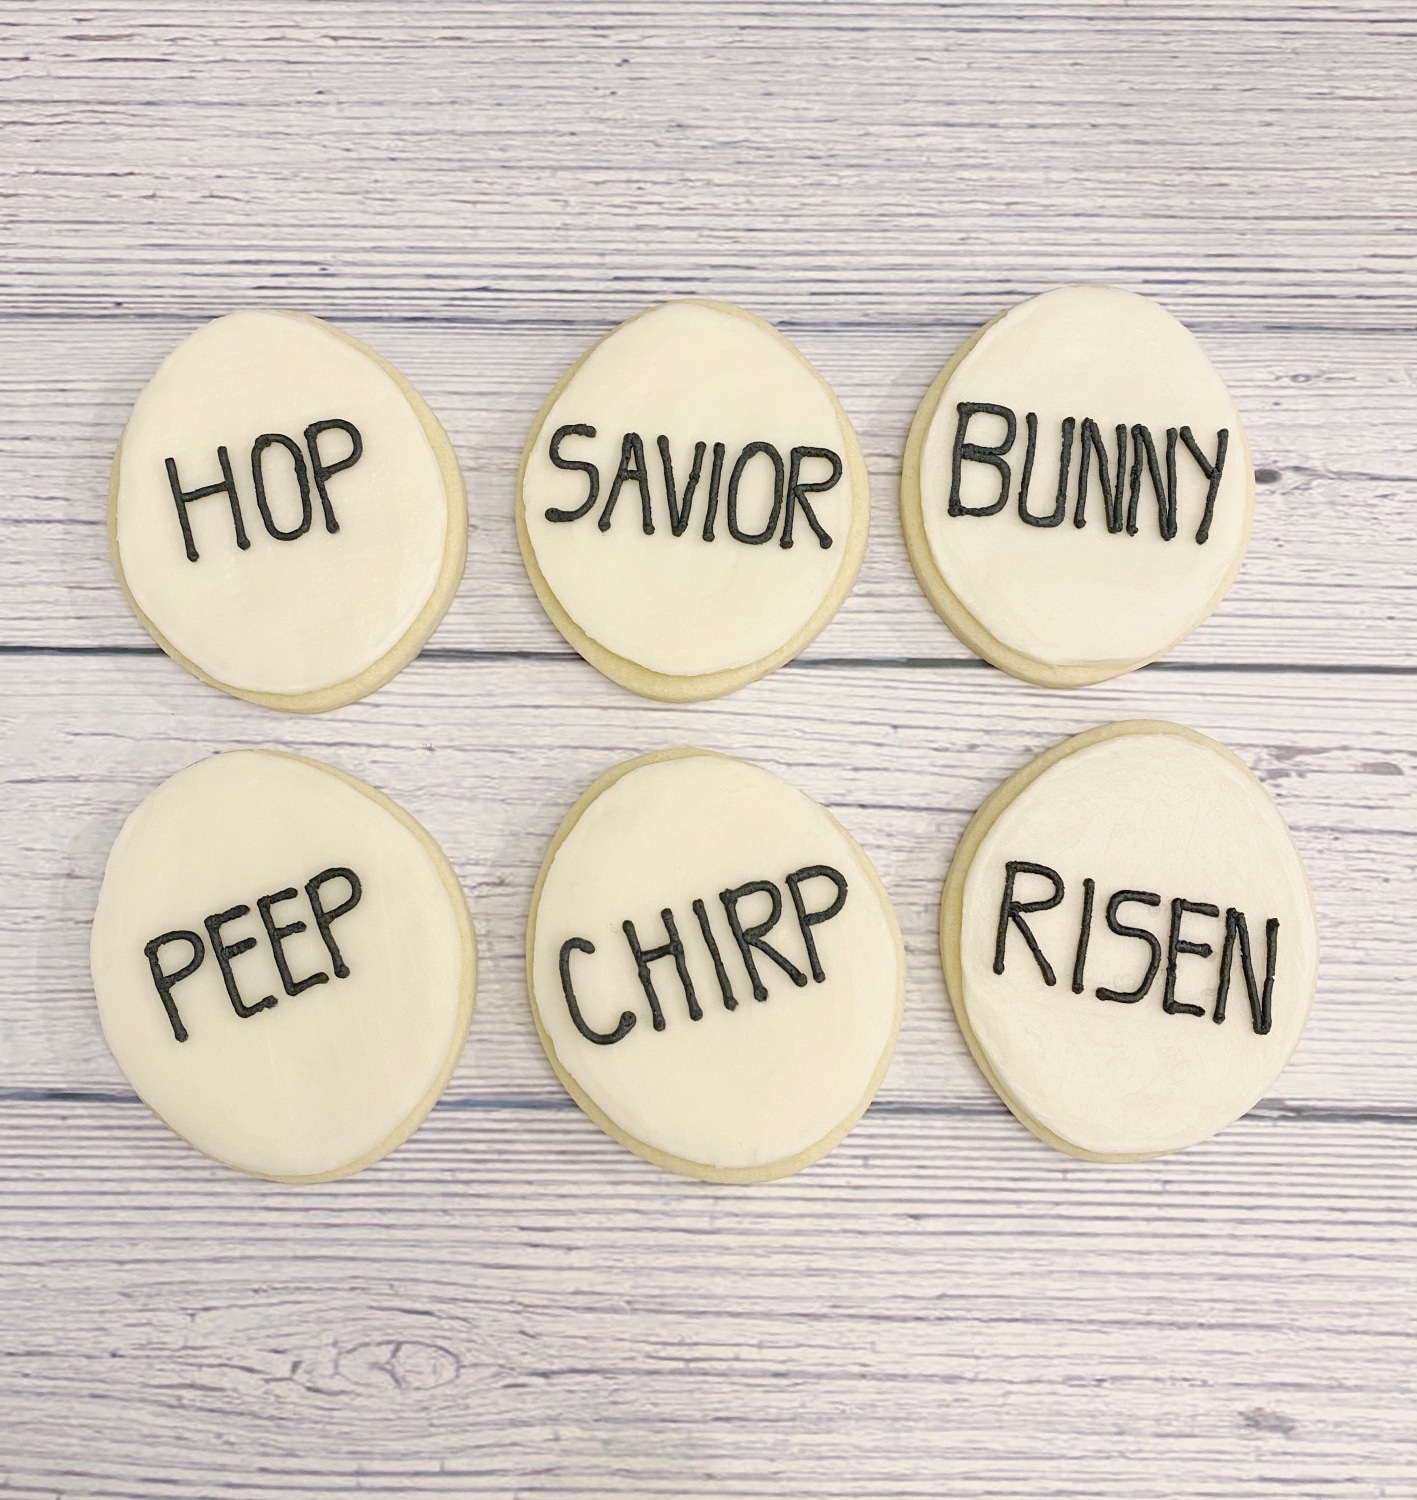
Simple Easter Egg Sugar Cookies for an Easter Celebration
This one is for those of you who love the farmhouse style! I love these Easter egg sugar cookies because they are so simple to decorate. You only need a few tools so they are perfect for someone who doesn’t want to fully commit to decorating sugar cookies as a hobby. The hardest part is writing with buttercream. However, I have some tips for you to feel like a pro.
I have also included some tips for how to make black frosting and how to prevent black frosting from bleeding. Follow along for the full, beginner-friendly tutorial, complete with videos!
*This post may contain affiliate links, which means I may receive a commission, at no extra cost to you, if you make a purchase through a link. Please see my full disclosure for further information.*
Part 1: Gathering Your Supplies For Your Easter Egg Sugar Cookies
To create these simple Easter egg sugar cookies using buttercream frosting, you will want to gather:
- 2 Icing bags
- One Wilton tip #2 and one #5 – I love this set of tips because it contains all the tips I use for my tutorials but you can also go to Michaels and purchase each tip on it’s own
- Egg/oval cookie cutter – I used the oval in the Wilton 101 Cookie Cutters set
- Black gel food dye
- Ingredients for a crusting buttercream, find my crusting buttercream icing recipe here
- Ingredients for sugar cookie dough, find my no spread sugar cookies recipe here
- Butter knife
- Angled flat spatula
I prefer to use the Wilton gel food dye since gel is more vibrant (i.e. more cost effective because you use less) than liquid and doesn’t change the consistency of your frosting. You can get that here: Wilton Gel Coloring 12 Count.
Part 2: Baking the Cookies Plus Tips for How to Make Black Frosting
- Roll, cut out, and bake your sugar cookies according to your cookie dough recipe. You should be able to make at least 12, but likely more, cookies if you used the recipe I linked above with your dough.
- Make your buttercream icing and pull out about a quarter of it into a bowl. This will become your black frosting. Here are my tips and some things I’ve learned for how to make black frosting:
- use gel food dye, not liquid
- you only need to mix enough dye to get to a dark gray shade – leave it out on the counter overnight (covered with plastic wrap) and you should have black frosting in the morning. This is what I do 95% of the time! If it’s not black, add just the tiniest bit of black gel coloring and you will get there!
- if you don’t have time to wait, microwave it! Thank you Jhanine Walker from That’s Cakeable!
- beat black cocoa powder into your frosting before adding black gel color – keep in mind you will now have a chocolate flavor to your cookies
- remember that the color will deepen as it “crusts” i.e. dries on your decorated cookies
- lastly, do not oversaturate if you will be putting the black on top of a light background! If there is too much black dye in the frosting, it will bleed, causing the background frosting to become pink.
- Set up your icing bags as follows: Place the white frosting into an icing bag with the tip #5 and the black frosting into an icing bag with the tip #2. If you aren’t sure how to do this, no worries, just hop over to my Getting Started: Learn How to Decorate Buttercream Cookies page.
Part 3: The Fun Part! Frosting Your Easter Egg Sugar Cookies!
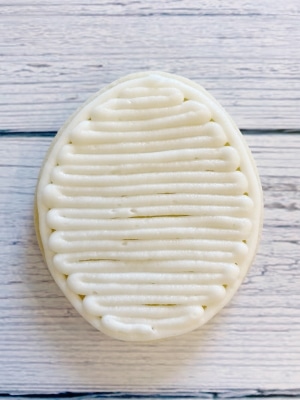
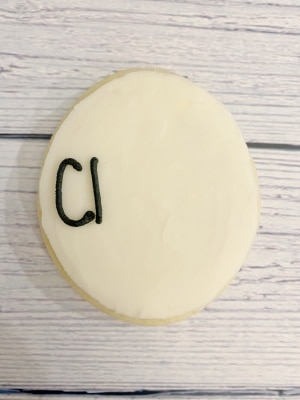
- Our first step is to outline and fill in the shape of the Easter egg. Use the white frosting to do this step. Don’t worry about the fill lines in your egg not being perfect, you will be smoothing the frosting out with your flat spatula in the next step.

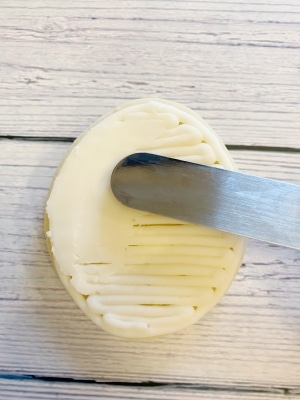
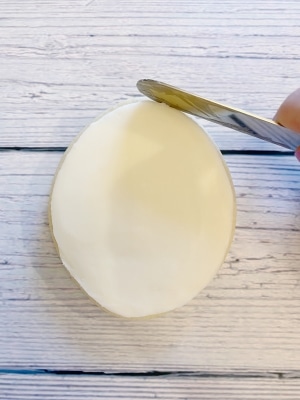
- To smooth out the frosting, use your flat spatula. My favorite way to smooth frosting is to pop the cookies into the freezer prior to using the flat spatula. Wait about 10 minutes, then pull them out and use the flat spatula to smooth them out. Another way I like to smooth buttercream is by using parchment paper. This is great if you don’t have the freezer space. All you do is cut a piece of parchment paper out, lay it over the frosted cookie, and use the warmth of your fingers to press out the lines as much as possible. Then, use the flat spatula to perfect it a bit more.
Using the freezer method transfers less frosting onto the flat spatula & keeps the edges cleaner. - The last step is to write your sayings onto the Easter eggs! Use the black frosting with the tip #2 for this step. For tips on writing with buttercream, see the next section below.

Tips on Writing with Buttercream Frosting!
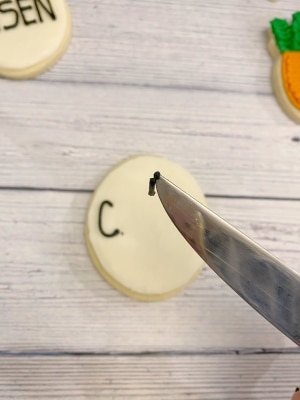
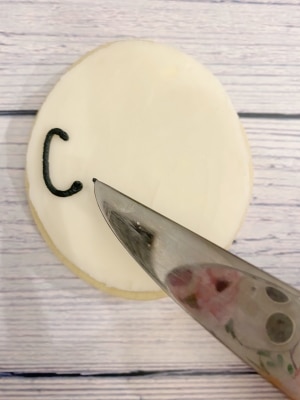
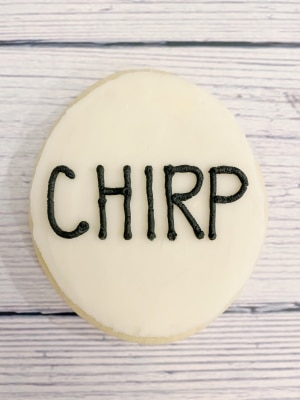
- A pointed knife is your best friend! Use it to pick up frosting mistakes or to gently push frosting to the desired place.
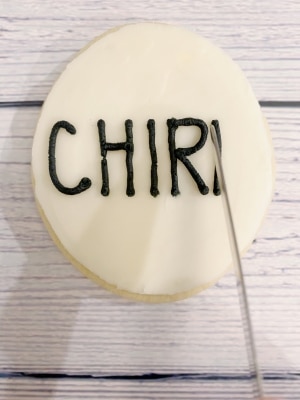
I didn’t like how close the “H” was going to be to the “C.” I easily picked up the start of the “H” with my pointed butter knife. There was a small amount of the “H” left so I picked that up too. You can pick up large and small amounts of frosting easily with this “erasing” method. The beginning of the “P” was a bit wonky so I used the knife to gently roll the “log” of frosting to the right. Beautiful! I also went and squeezed out a tiny dot of frosting onto the “H” because there was a small break in the icing that bothered me. - Go to a font website such as dafont or 1001freefonts to find a font style as inspiration. If you have a printer, print off your desired words using the font preview and then practice writing (with a pen first) in that style of font by tracing it. Then, try writing with a tip #2 in buttercream onto parchment paper. This way, you can scoop up the frosting and place it back into the bag.
- Make your buttercream frosting slightly more runny than usual if you are noticing small bubbles or breaks in your letters. Simply add small amounts of milk or water to your icing.
- Allow your background to crust first. For these Easter egg sugar cookies, that would mean allowing the white frosting to sit out for several hours, or overnight, before writing. This makes it easier to pick up mistakes with your knife.
- Go slow and focus on one letter at a time. Your writing does not need to be perfect (seriously, people are eating these cookies, you aren’t displaying them on your living room wall as a permanent piece of art) so allow yourself some grace and just have fun!
How to Prevent Black Frosting From Bleeding
I have noticed that black buttercream will bleed onto lighter colors, such as a white background, if you aren’t careful. My biggest tip is to not oversaturate the black frosting (or any dark frosting for that matter) with gel. In Part 2 above, I discussed how to make black frosting. To sum it up though, you won’t be adding enough gel to obtain a black color right away. Add only enough gel color to get to a dark gray shade to help prevent bleeding.
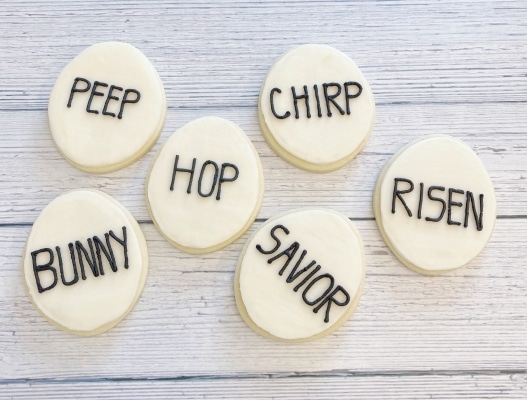
I decided to do a little experiment with these Easter egg sugar cookies. I was that weirdo in school that enjoyed science so I had fun with this! For these cookies, I obtained black frosting by getting the frosting to a dark gray and then letting it sit out. I did not use black cocoa powder.
I decorated six of these Easter egg cookies and then allowed five out of the six to sit on my dining room table for 5 days. I didn’t cover them, and looking back, it would have been better to since I doubt you’d leave cookies sitting out for a week uncovered if you were planning on eating them! I placed the other cookie into the freezer immediately after decorating it (well, after I took some photos of course!) and allowed it to sit in the freezer for 4 days. Then, I let it come back to room temperature for about 24 hours. Below are my findings and tips.
I noticed that the cookies that sat out on my dining room table looked amazing and didn’t have any bleed for all 5 days. Of course, you probably won’t decorate your cookies 5 days prior to an event and have them just sitting out on a table. But, I don’t think it’s out of the question that it sits out for a day or two before the party and then people take some home and eat them a day or two after the party.
The cookie that was frozen for 4 days and then allowed to come to room temperature for a day looked amazing as well! It did not have any bleed when I pulled it out of the freezer and it didn’t bleed in the 24 hours it was allowed to come to room temperature.

I attribute the biggest reason these cookies didn’t bleed is due to not oversaturating the frosting with dye. In my year of decorating cookies, I have had many bleed due to oversaturation. I have noticed some bleeding when I freeze my cookies and allow them to come back to room temperature as well, which is why I wanted to include that in the experiment. I think those previously frozen ones were due to oversaturation, though. Of course, it’s hard to remember if I added too much or if temperature really does play a role.
Are you looking for some delicious traditional Easter recipes?
Of course these Easter egg sugar cookies are necessary for our celebration, but we probably need some more food too. If you were fasting for the Lent season, it’s time to celebrate the resurrection of Jesus Christ with a proper feast! My friend, Mihaela, at theworldisanoyster.com has a great roundup post for some delicious recipes. You can check that out here! I’m confident you won’t be disappointed!
Don’t forget to grab your Easter celebration supplies!
Windy City Novelties has lots of fun stuff for your Easter celebration! You can get your Easter eggs, some fun yard decorations for the Easter egg hunt, some cute bunny napkins & plates, photo props, and tons more. You can even create your own custom banner. Of course, they have party supplies for just about any party or celebration. Check them out by clicking the photo link below! *Not a sponsored post but I may receive a commission, at no extra cost to you, if you make a purchase through this link, as I am an affiliate member.

Save the Tutorial for These Easy Easter Cookies for Later
To save these Easter buttercream iced cookies for later, use any of the social share icons at the top or side of this page. Alternatively, hover over the image below and pin it to your Pinterest account. Make sure you’re following me on Pinterest, too! buttercream parties | decorated sugar cookie tutorials

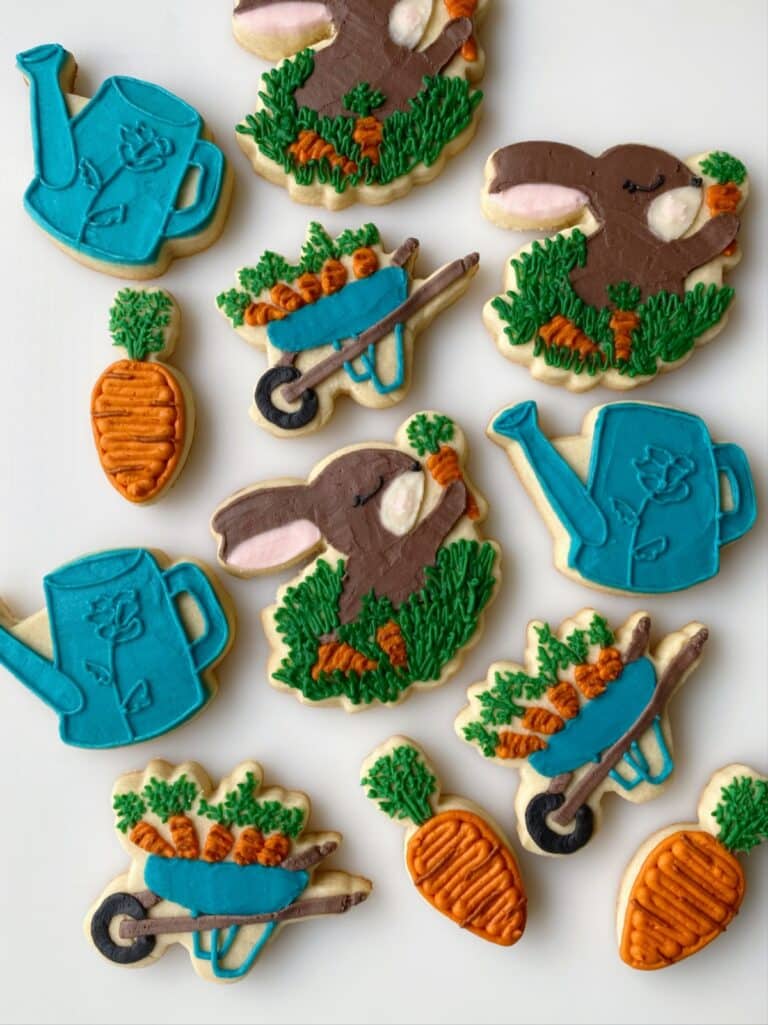
I hope that you all have a wonderful Easter celebration with your family and friends! Don’t forget to check out my other Easter tutorials here: Easter Buttercream Sugar Cookie Tutorials I especially love how these eggs look with the Easter bunnies & carrots tutorial! 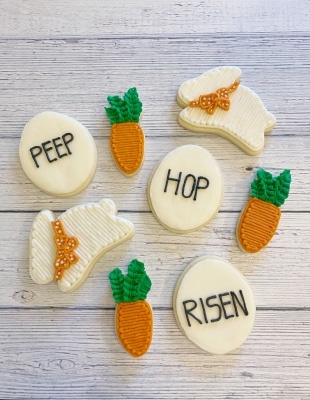
I’d love to know in the comments below how you obtain dark frosting and how you prevent bleed! Have you noticed an issue with bleeding if you freeze your cookies? Let’s help each other learn!
I love a simple cookie! Great tip on frosting to perfection!
Sometimes the more simple they are, the better! You are welcome for the tips!
I have little to no experience decorating cookies! I tried my hand back at Christmas — results were so, so. I’m so glad I came across your site because you do a lovely job explaining the process and the nuances! I can’t wait to try some of your tips on cookies next weekend!
Yay, I’m glad my blog is helpful. Have fun decorating cookies and let me know if you have any questions, I am more than happy to help!
So many great ideas as always. I love the idea of decorating the cookies with words! So fun!
These are adorable!
Excellent tips, especially about the black icing. And I love how simple these are! So cute!
I love cookies! These look amazing.
These cookies look so pretty and yummy! Also, the video was very helpful! Can’t wait to make these!
I know I say this about your cookies a lot, but these are so cute!
These look yummy and so pretty. Sugar cookies are the best too. I’m not a baker what so ever, but these look like something I can give a try.
I love all of your cookie ideas they are so beautiful and delicate. So lovely.
Thank you, Gabriela!