Fun Stained Glass Cookies for Easter – Painting on Buttercream Tutorial
 This year’s Easter celebrations will look a lot different from every other year. There won’t be any large gatherings or potlucks of food. We will be missing friends and family at the table. Church services will be streamed for online viewing from our living rooms. However, that doesn’t mean we can’t create some fun and bake up some cookies at home.
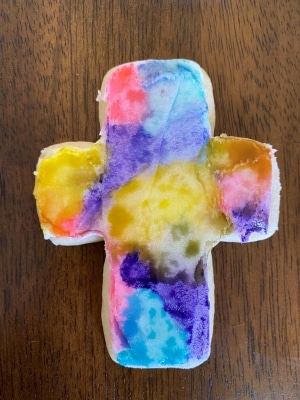
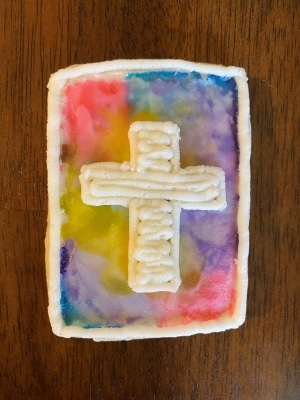
These stained glass cookies are perfect for lifting our spirits this Easter! I love painting on buttercream because it combines two of my hobbies into one – painting and decorating buttercream iced cookies.
Follow along for the full, step-by-step tutorial!
*This post may contain affiliate links, which means I may receive a commission, at no extra cost to you, if you make a purchase through a link. Please see my full disclosure for further information.*
Part 1: Gathering your Supplies for your Stained Glass Cookies
To create these buttercream iced cookies, you will want to gather:
- 1 Icing bag
- One Wilton tip #2 and one Wilton tip #5
- 1 Coupler
- Rectangle cookie cutter
- Cross cookie cutter
- Easter egg (or oval) cookie cutter – Both the cross & egg cutter I used were from this essential set: Wilton 101 Cookie Cutter Set
- White (undyed) buttercream frosting, here’s my crusting buttercream recipe
- Gel food colors – I used pink, lemon yellow, teal, and violet in the Wilton Gel Set
- Small paint brush – I always use the smallest in this Wilton Cake Decorating Tools – 5 Pc Brush Set & I love it!
- 4 Small dishes or lids to mix your watercolor paints – I used leftover baby food lids
- A splash of vodka
- Angled flat spatula and a pointed knife
- Your favorite sugar cookie dough recipe – if you don’t have a favorite, here’s mine
You may be asking, “What are couplers?” Couplers allow you to change your tips on your icing bags. Check out my page, Getting Started: Learn How to Decorate Buttercream Cookies, to learn how to do this. Essentially, you will attach a coupler to each icing bag. When you need to attach a tip, just make sure to rinse out the previous color from the tip with hot water. Purchasing a set of couplers is pretty affordable on Amazon: 4 Count Wilton Coupler Set.
Part 2: Baking the Cookies, Setting up Your Icing Bags, & Preparing for Painting on Buttercream
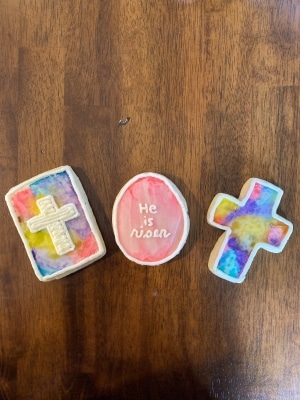
- Roll, cut out, and bake your sugar cookies according to your cookie dough recipe. I like to make at least four of each of these designs to have a dozen cookies.
- Make your buttercream icing while the cookies are baking and cooling.
- Set up your icing bag as follows: Place a coupler into the icing bag and then add in your white frosting. If you don’t know how to do this, just hop over to my Getting Started: Learn How to Decorate Buttercream Cookies page.
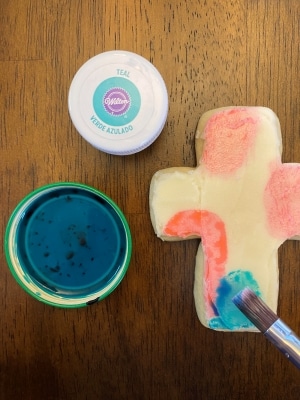
- Mix your paints for your stained glass cookies: Pour a tiny bit of vodka into your small containers. I didn’t measure but I used the lids of baby food jars to mix my paints if that gives you an idea. Now, add in a small amount of gel food coloring. I used the tip of a butter knife to scoop some up and then added that in. You can test out your saturation by putting a bit of frosting onto a plate and then painting some color onto it. Play around with the levels of gel coloring and vodka until you get a nice color payout that still has a watercolor paint consistency.
Part 3: The Fun Part! Decorating Your Stained Glass Cookies and Painting on Buttercream!
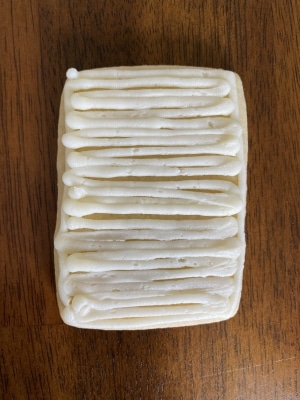
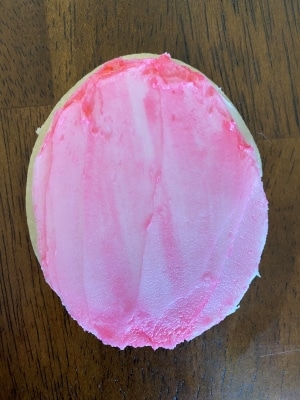
- Your first step will be to outline and fill in the backgrounds for all of your cookies. Attach tip #5 to the white bag of frosting to do this step.

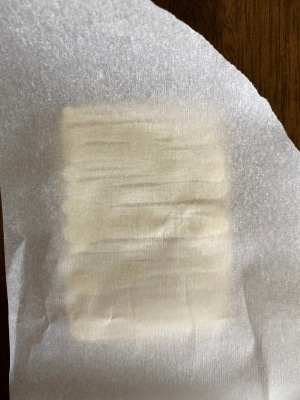
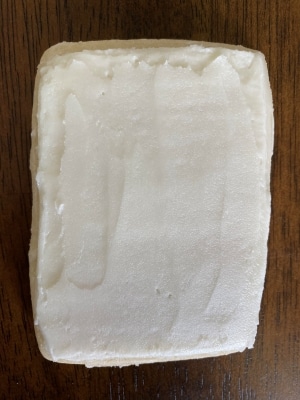
- Next, you will be smoothing out the frosting on all of the cookies to create a flat surface for painting on buttercream. I have two easy ways to smooth buttercream frosting: If you have access to a freezer, arrange your cookies on a flat surface in the freezer (you can simply put them on a cookie sheet) and leave them in there for about 10 minutes. If your freezer is too full for this, you can also use parchment paper. Cut a piece of parchment paper out that it slightly larger than the cookies, lay it over the top of the frosting, and use your fingers to smooth out the lines and press the frosting into the cookie. Once you’ve used either of those two options, use a flat spatula to smooth out the lines.
Using the parchment paper method The final smoothing with a flat spatula - Now is the extra fun part, painting on buttercream frosting! My best tip here is to use one color at a time and paint onto all of your cookies. Then, rinse the brush and go in with the next color. Of course, if you have more than one brush, you can paint just one cookie at a time.
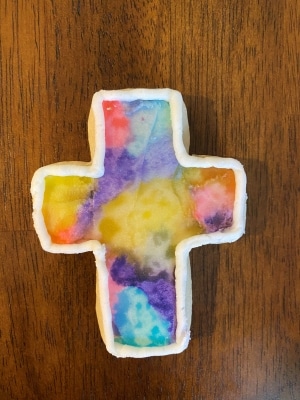
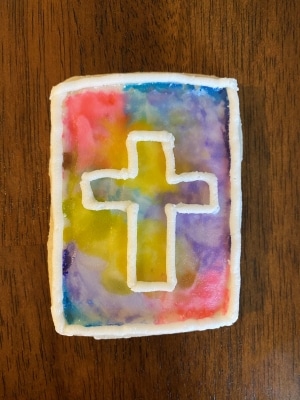
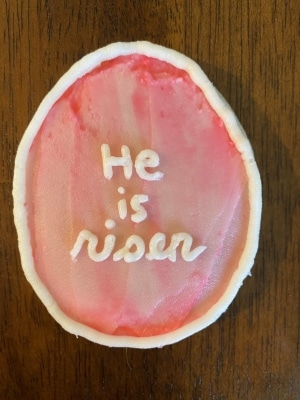
- Our last step is to switch out the tip #5 on the white frosting for a tip #2. Use the tip #2 to outline the edges of your cookies. Make sure that the “paint” is dry before doing this step, or you might have some bleeding. I also chose to write “He is risen” on the egg cookie with the tip #2. If writing with buttercream scares you, you don’t need to write anything on the eggs. Maybe just paint them like the other stained glass cookies! You can also practice writing with buttercream on parchment paper and then scoop up the frosting into the bag and write on the cookie when you are ready.
And that’s it! I wish all of you a Happy & Healthy Easter! As always, thank you for taking the time to read my blog and I hope that you are inspired to learn how to decorate buttercream cookies yourself!
Don’t forget to grab your party supplies!
Windy City Novelties has lots of fun stuff for your Easter party! You can get some fun lawn decorations for the Easter egg hunt, photo booth props, the cutest bunny plates & napkins, and of course, Easter eggs. You can even create your own custom banner to personalize your party. Of course, they have party supplies for just about any party. Check them out by clicking the photo link below! *Not a sponsored post but I may receive a commission, at no extra cost to you, if you make a purchase through this link, as I am an affiliate partner.
 Save the Tutorial for These Easter Stained Glass Cookies for Later!
To save these Easter stained glass cookies for later, use any of the social share icons at the top or side of this page. Alternatively, hover over the image below and pin it to your Pinterest account. Make sure you’re following me on Pinterest if you aren’t already! buttercream parties | decorated sugar cookie tutorials 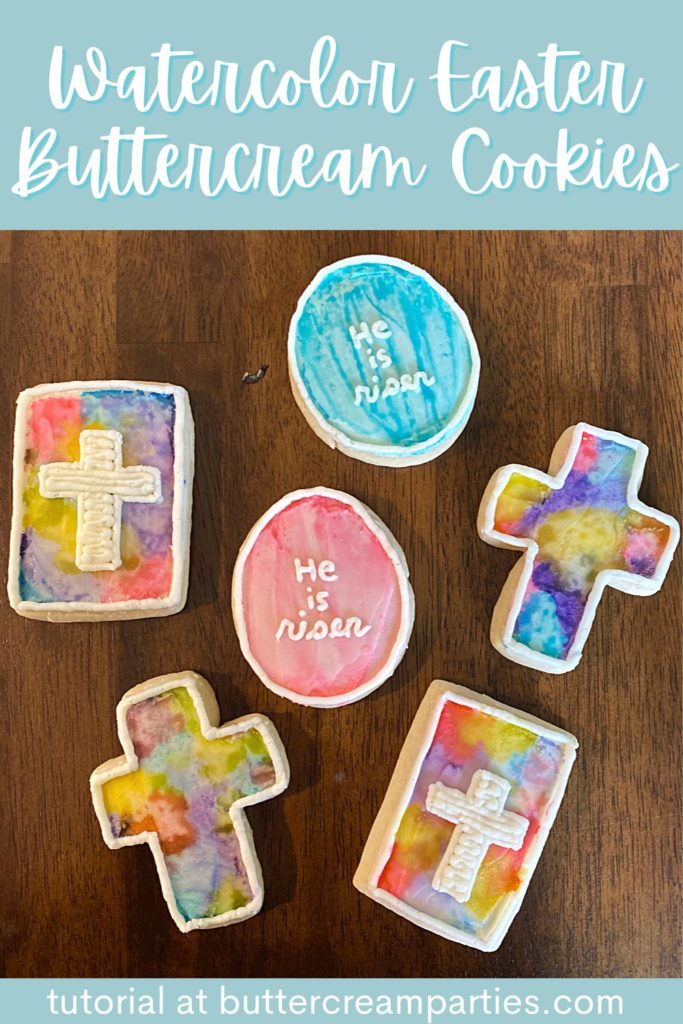
so cute and colorful! I just got a new recipe for buttercream cookies would love to try these 🙂
There are so many good sugar cookie recipes out there! Have fun decorating!
These are beautiful cookies. I love the technique of painting on watered down gel food coloring!
It was so fun! You know I love painting on cookies!
These look so amazing I am already hungry for them
Thank you! I hope you have a chance to eat some sugar cookies for Easter this year!