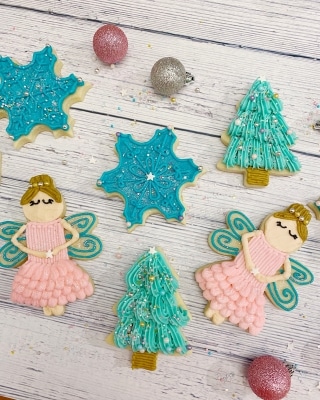
Cute Sugar Plum Fairy Buttercream Cookies
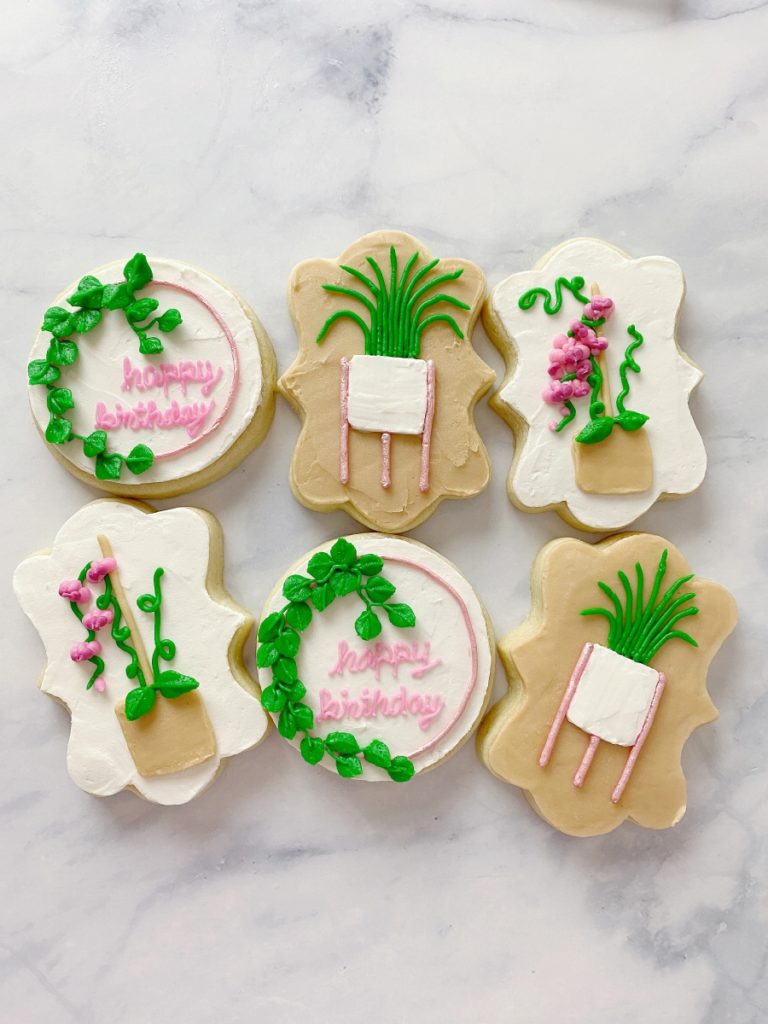
I am IN LOVE with these cute sugar plum fairy buttercream cookies! I think it’s mostly because the colors are so beautiful. I love to see pastels pulled off correctly during the Christmas season.
This set of sugar plum fairy buttercream cookies would be great for a kid’s birthday party as well! Or maybe even as a baby shower for a little girl on the way!
This tutorial is beginner-friendly, so don’t be worried about all of the steps! I will have a video tutorial plus step-by-step photo series for each of these sugar plum fairy buttercream cookies.
Follow along for the detailed tutorial!
But wait! Before you check out the tutorial, I would love if you checked out my friend’s blog post featuring 12 Christmas desserts from around the world! With it being 2020 and all, it seems the perfect time to try out some new traditions.
If you’re up for it, then this post has 12 great desserts to try out. Check it out here: Twelve Must-Try Christmas Treats From Around The World. She also has great content year-round on her blog, so make sure to subscribe!
*This post may contain affiliate links, which means I may receive a commission, at no extra cost to you, if you make a purchase through a link. Please see my full disclosure for further information.*
Skip to
Part 1: Gathering Your Supplies For These Cute Sugar Plum Fairy Buttercream Cookies
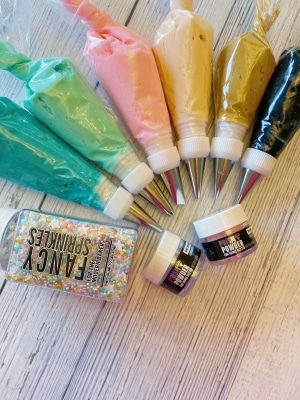
To create these sugar plum fairy buttercream cookies, you will want to gather:
- 6 Icing bags
- 3 Couplers
- One Wilton tip in each of these numbers: 1, 2, 3, 5, 102 (103 & 104 work as well), and 21 (18 works, too)
- Sugar plum fairy cookie cutter – Get the exact one I used here: Ann Clark Sugar Plum Fairy
- Snowflake cookie cutter – I used the larger one in this set of two: Ann Clark Snowflake Cookie Cutters
- Christmas tree cookie cutter – You guessed it, another Ann Clark recommendation! I used this exact one: Ann Clark Christmas Tree Cookie Cutter
- Fancy Sprinkles Prism Powder in Aquamarine Blue & Rose Quartz Pink as well as Fancy Sprinkles blend in Sugar Plum Fairy – you can find the prism powders here: Fancy Sprinkles Prism Powders The sprinkle blend was a seasonal item but you can browse the Fancy Sprinkles site or Amazon for dupes.
- Black, pink, teal, mint, desired skin tone, and brown buttercream frosting *recipe linked below
- Flat spatula – this 9″ one by Wilton is the perfect size for cookies: Wilton 9″ Angled Flat Spatula
- Clean & fluffy small paint brush or makeup brush – I used my “highlighter” brush for applying highlight to my face
- Ingredients for a crusting buttercream, find my crusting buttercream icing recipe here
- Ingredients for sugar cookie dough, find my no spread sugar cookies recipe here
I prefer to use the Wilton gel food dye since gel is more vibrant (i.e. more cost effective because you use less) than liquid and doesn’t change the consistency of your frosting. You can get that here: Wilton Gel Coloring 12 Count.
You may be asking, “What are couplers?” Couplers allow you to change your tips on your icing bags. Check out my page, Getting Started: Learn How to Decorate Buttercream Cookies, to learn how to do this. Essentially, you will attach a coupler to each icing bag. When you need to attach a tip, just make sure to rinse out the previous color from the tip with hot water. Purchasing a set of couplers is pretty affordable on Amazon: 4 Count Wilton Coupler Set.
Part 2: Baking the Cookies and Setting up Your Icing Bags
- Roll, cut out, and bake your sugar cookies according to your cookie dough recipe. You should be able to make at least 4 of each sugar cookie if you used the recipe I linked above with your dough.
- Make your buttercream icing and separate it into six bowls. Mix your teal, mint, pink, black, desired skin tone, and brown frostings into their own small containers. You will be using MUCH LESS black and brown frosting, so adjust your amounts as necessary. As I mentioned above, I prefer the Wilton brand of gel color. When creating pastel colors, remember that a little goes a long way AND the color will darken as it crusts. To create a mint color, I mixed Wilton Teal with Wilton Kelly Green. To create a skin tone color, mix yellow, brown, black, and/or pink until you get your desired tone.
- Set up your icing bags as follows: Place the mint frosting into a bag with the star tip in it (either your #21 or 18 sized tip.) Place the black frosting into a bag with the tip #1 in it. Place the brown frosting into a bag with the tip #2 in it. Place each of the remaining colors of frosting into their own icing bags, each with a coupler in it. If you aren’t sure how to do this, no worries, just hop over to my Getting Started: Learn How to Decorate Buttercream Cookies page. You do not need to add the tips to the couplers yet. *Note, in the photo below, I have attached couplers to the mint, black, and brown frosting bags. I only do this because I make a lot of tutorials for this blog and reuse icing. You don’t need to put couplers onto these bags.
Part 3: The Fun Part! Frosting Your Sugar Plum Fairy Buttercream Cookies!
*Special Note – make sure to complete each step on all of your sugar plum fairy buttercream cookies before moving onto the next step. This saves time and energy since some of the colors will be sharing the same tip and you will need to rinse/dry the tip between color changes.
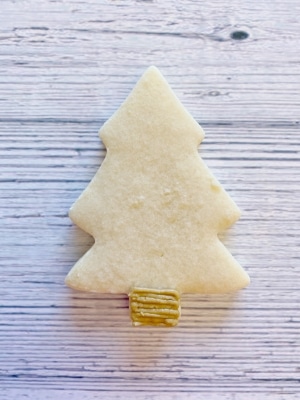
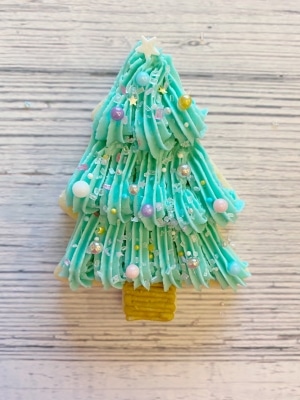
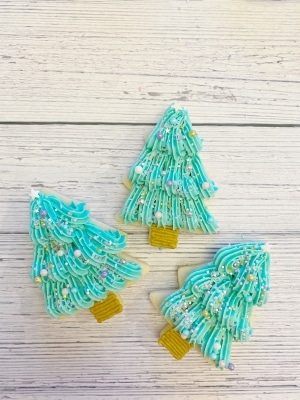
Sugar Plum Fairy Buttercream Cookies – Christmas Tree
- Your first step will be to use the brown frosting to create the stump of the Christmas tree.

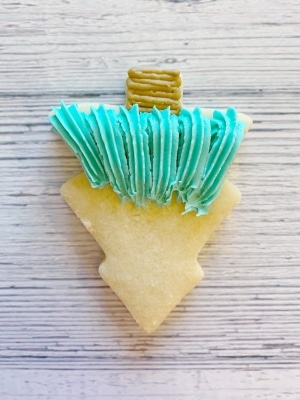
- Next, rotate the cookie 180 degrees. Create a row of tree branches with the mint frosting. To do this, start with the tip completely perpendicular to the cookie and squeeze while pulling up and toward you.
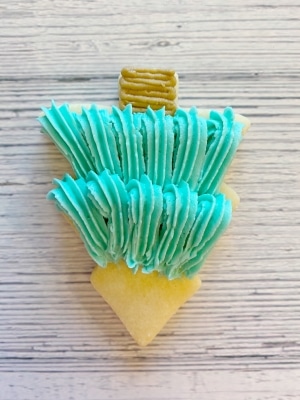
- Repeat this process for two more rows.
- Using your Fancy Sprinkles Sugar Plum Fairy blend, place sprinkles all over the Christmas tree for ornaments. I decided to place a star at the top of the tree.

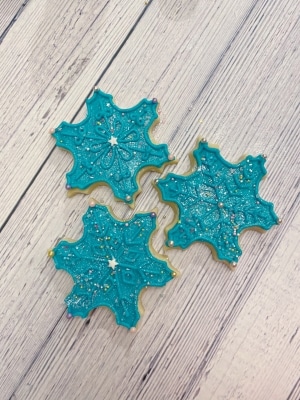
Sugar Plum Fairy Buttercream Cookies – Snowflake
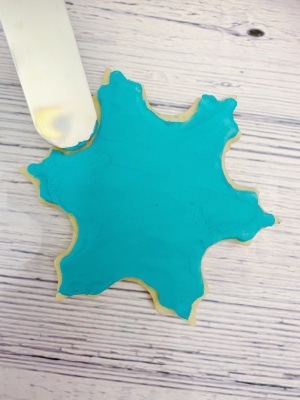
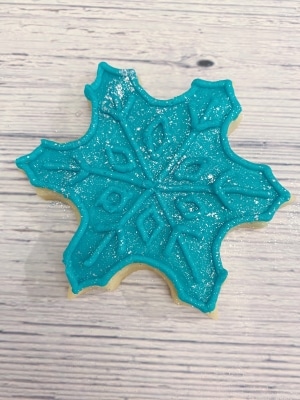
- Attach the tip #5 to the teal frosting. Outline and fill in the shape of your snowflake cookie.
- Use the flat spatula to smooth out the icing. Since this can be difficult, use the edges of the spatula to clean up the edges of your snowflake as well. And remember, a great tip is to place your frosted cookie into the freezer for 5-10 minutes before smoothing it out. This helps keep the frosting in place but allows you to smooth out the top.
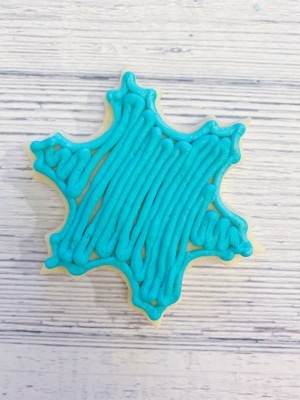
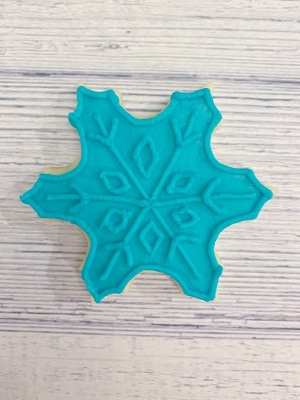
- Remove the tip #5 from the teal icing and attach tip #3 to the teal icing. Outline the edges of the snowflake again and then fill in your snowflake details. Being creative with the design is half the fun!
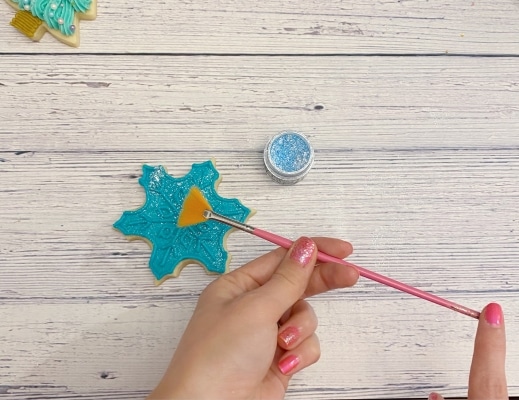
- For this step, grab your Fancy Sprinkles Prism Powder in Aquamarine Blue and your fluffy brush. Place the brush into the sparkly powder and then tap the end of the brush with your finger to get a dusting of sparkles onto your cookie. Repeat as many times as you want until you get your desired level of sparkle!

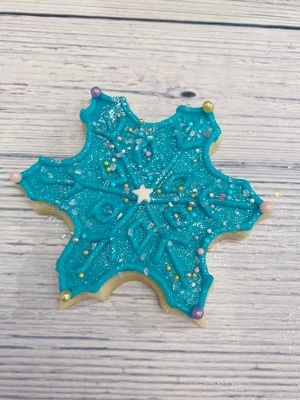
- All that is left now is to use the Fancy Sprinkles blend in Sugar Plum Fairy to add some extra fun to the snowflakes!
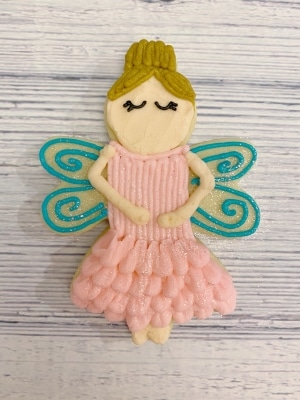
Sugar Plum Fairy Buttercream Cookies – The Sugar Plum Fairy Herself!
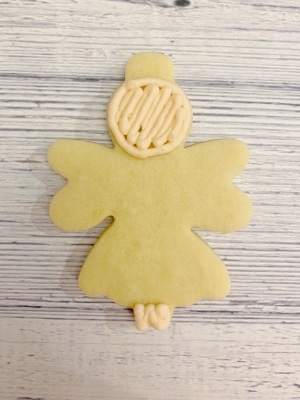
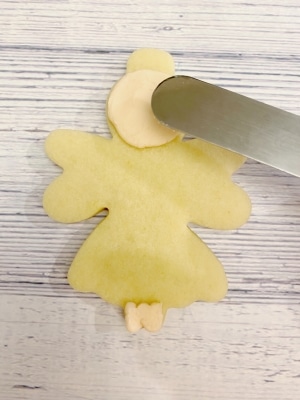
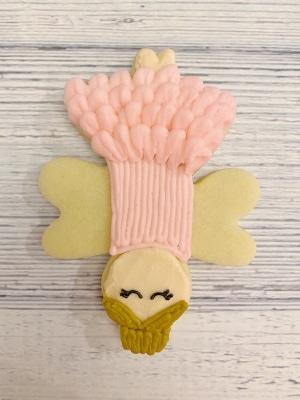
- The first step will be to draw the feet and face of the sugar plum fairy. Take your skin tone frosting and attach tip #5 to it. Make sure that it has been rinsed and dried from when you used it for the snowflakes. Use the flat spatula to smooth the feet and face.
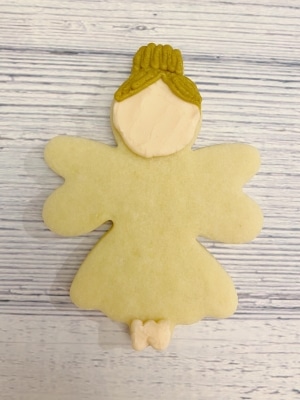
- Next, use the brown frosting to outline and fill in the fairy’s bun/hairline.
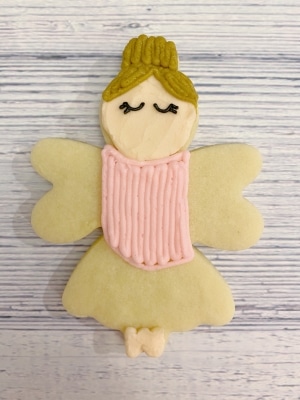
- Use the black frosting to draw two half circles for the eyes. I decided to give her some lashes, too! Use the pink frosting with tip #5 attached to outline and fill in the top part of the sugar plum fairy’s dress. Make sure that the tip has been rinsed and dried from when you used it for the snowflake cookies.
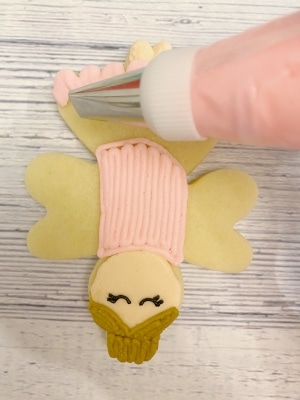
- Remove the tip #5 from the pink frosting and replace it with the tip #103. Rotate the cookie 180 degrees and pipe out ruffles along the bottom of the dress for the first layer. To do this, hold the tip so that the fat part is away from you and the skinny part is toward you. Squeeze out frosting as you pipe up & down, moving toward the right.
- Create three more layers of ruffles. If you used a larger petal tip, like a tip #104, instead, you may only be able to fit three rows.
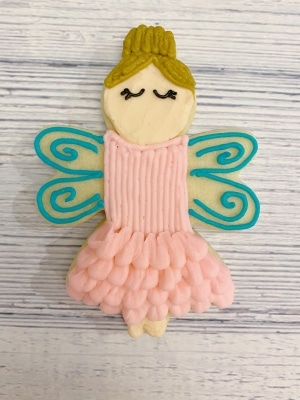
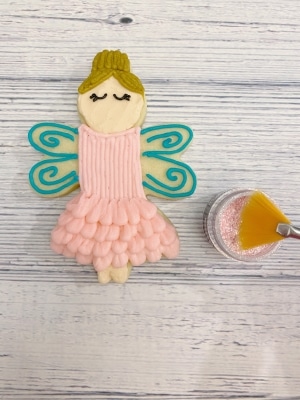
- Attach the tip #3 to the teal frosting. Outline the wings and then add in a swirl pattern to the center of the wings.
- Using the Rose Quartz Pink shade of Prism Powder, dust the fairy’s wings and dress. Use the same technique that you used for the snowflakes.
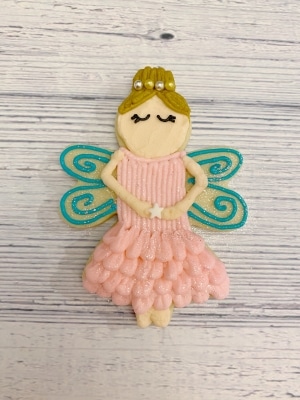
- Attach the tip #5 to the skin tone frosting. Make sure that you rinsed and dried the tip first from when you used it with the pink frosting. Pipe out two lines to represent the sugar plum fairy’s arms.
- Lastly, use various sprinkles of the Fancy Sprinkles blend to adorn your sugar plum fairy buttercream cookies! I decided to place a star in her hands and some silver & gold nonpareils around her bun.
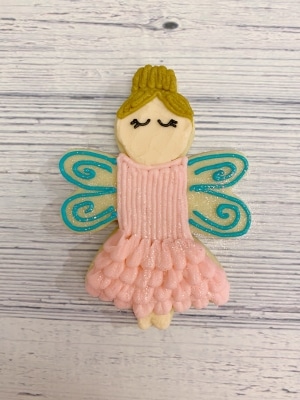
Aren’t these sugar plum fairy buttercream cookies just the cutest! Here’s some more photos because I am obsessed! 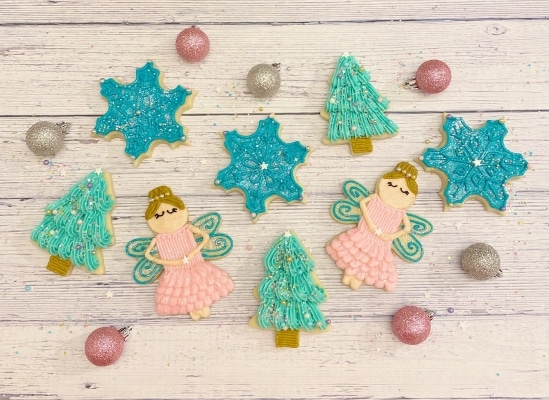
Make sure to share these to your favorite social media site so you don’t lose the tutorial! Just use the social share icons on the side or top of the page. Alternatively, use the image below to pin it to your Pinterest account! 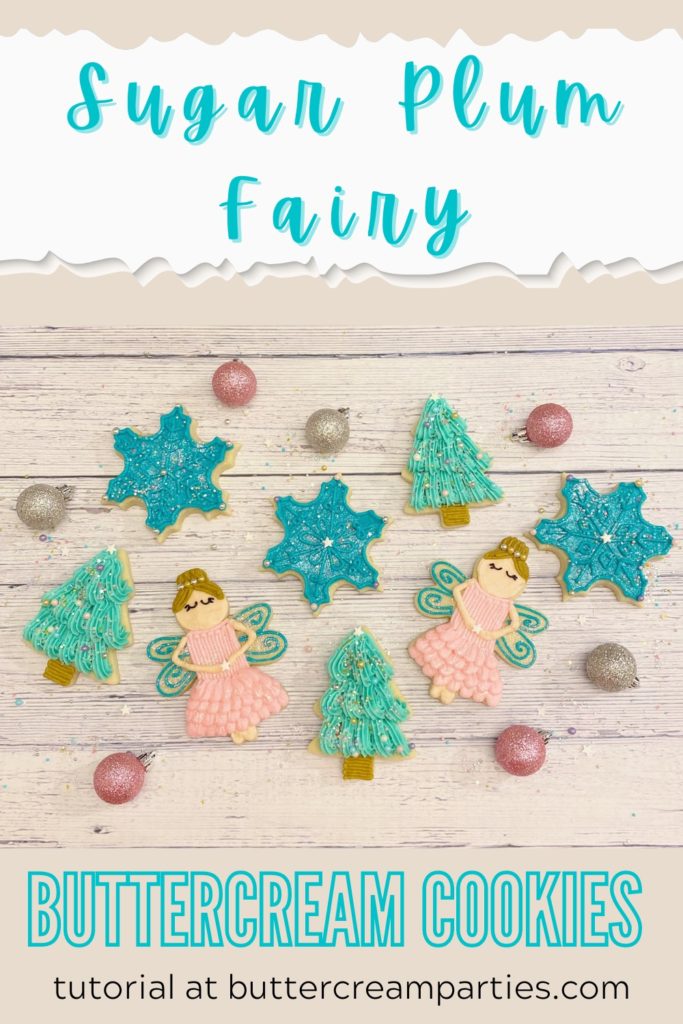

These cookies are absolutely GORGEOUS!
Thank you so much!
Wow, I’m so impressed with the creativity and design of these cookies! They are so beautiful and festive.
Thank you! I had a lot of fun with them!
These are too cute! Thanks for the video. Now I feel as if I could make these cookies. I pinned this post to try this later.
Yay, I’m glad it helped! I love watching videos so I can see the “full picture” and techniques used but referencing the photo series for when it comes down to actually recreating the cookies.
I love your videos! My hands are so shaky, I doubt I won’t create a big mess!:))
Thank you so much! I also have very shaky hands! I just fix lines along the way with the tip of the frosting bag or a pointed knife. It’s possible for us 🙂
Wow, you are so talented! These a mini works of art! I’d love to see i I can figure out a keto version!
Thank you!! While I haven’t tested any keto versions out myself, you can definitely find keto cookies and keto frosting. I bet it would work!
Your cookies are always so beautiful. I wish I had as steady of a hand as you haha 🙂
Thank you! I really like how this set turned out!