How to Decorate Wedding Dress Cookies with Buttercream
9 - 9Shares
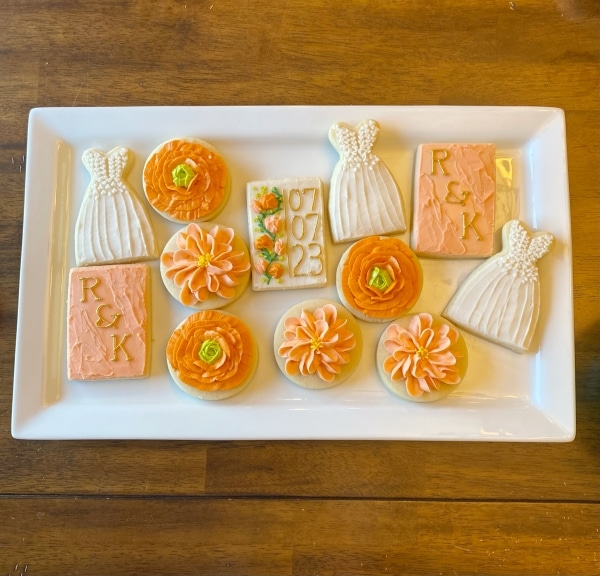
My brother-in-law got married a couple of weeks ago so I made some wedding cookies as a gift. While I made a few different designs, the most detailed were the wedding dress cookies.
The bridge and groom got married in Hawaii and the bride had the most beautiful dress for the occasion. The wedding dress cookies, therefore, have a sheer top with an overlay and a flowy silhouette.
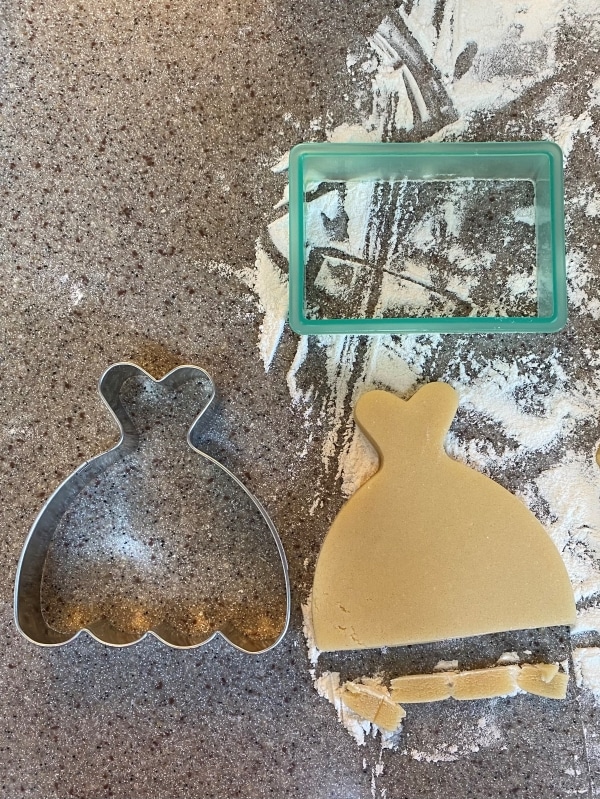
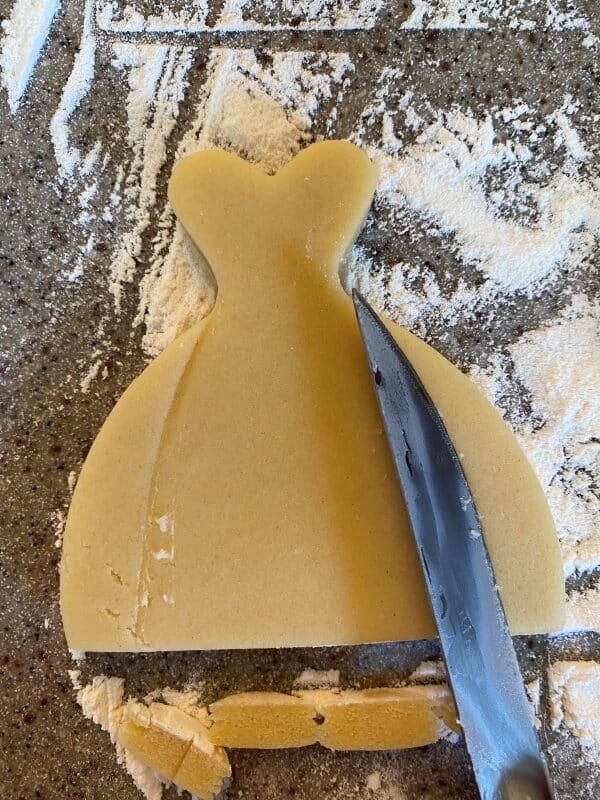
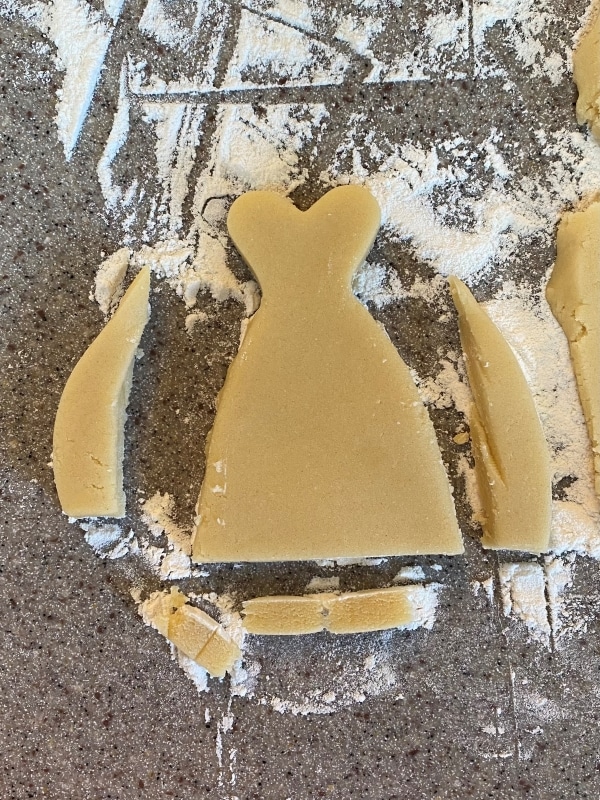
I encourage you to decorate your wedding dress cookies to mimic the bride’s dress you are making. Just use the techniques taught here and adjust. You will even see how I altered the cookie cutter shape to make these ones.
I also have a tutorial for a ruffle dress if you are making wedding dress cookies that have a ruffle skirt.
To make these wedding dress cookies, you will only need one icing bag, one piping tip, and a palette knife as special tools. I love when simple tools lead to an intricate design.
Follow along for the step-by-step photo series and video tutorials plus recipes for these wedding dress cookies.
*This post may contain affiliate links, which means I may receive a commission, at no extra cost to you, if you make a purchase through a link. Please see my full disclosure for further information.*
Skip to
Part 1: Gathering the Supplies for the Wedding Dress Cookies
To decorate these wedding cookies, you will want to gather:
- 1 Icing bag
- One Wilton #2 tip
- Palette knife
- Wedding dress cookie cutter
- Ingredients for a crusting buttercream & sugar cookie dough – found below in recipe card
Part 2: Baking the Cookies and Setting up the Icing Bag
- Roll, cut out, and bake your cookies according to the recipe. I altered my cookie cutter as the bride had more of an A-line dress than ballgown. I cut off the bottom of the dress to make a straight line and also used the curve of a knife to slim down the dress.
- Make your buttercream icing according to the recipe card below.
- Set up your icing bag by placing the Wilton tip #2 in the bag, cutting it to size, and then filling the buttercream into the bag until the max fill line, or about a cup. Overfilling the bag will make it more difficult to pipe.
Part 3: Decorating the Wedding Dress Cookies
I have included both a video tutorial and a step-by-step photo series tutorial for these cookies. I recommend watching the video first to get an overall feel for the steps and then watching the photo series when it comes time to decorate.
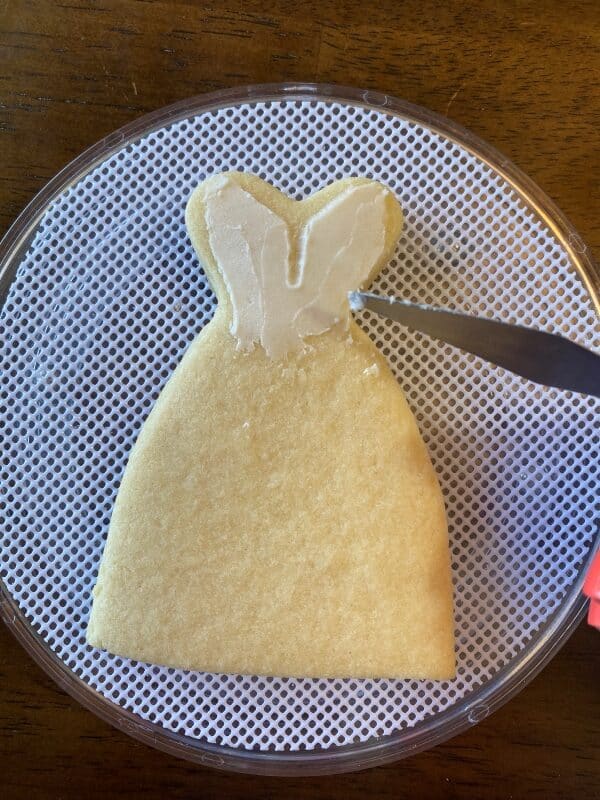
- Place a small amount of frosting on the top part of the dress.
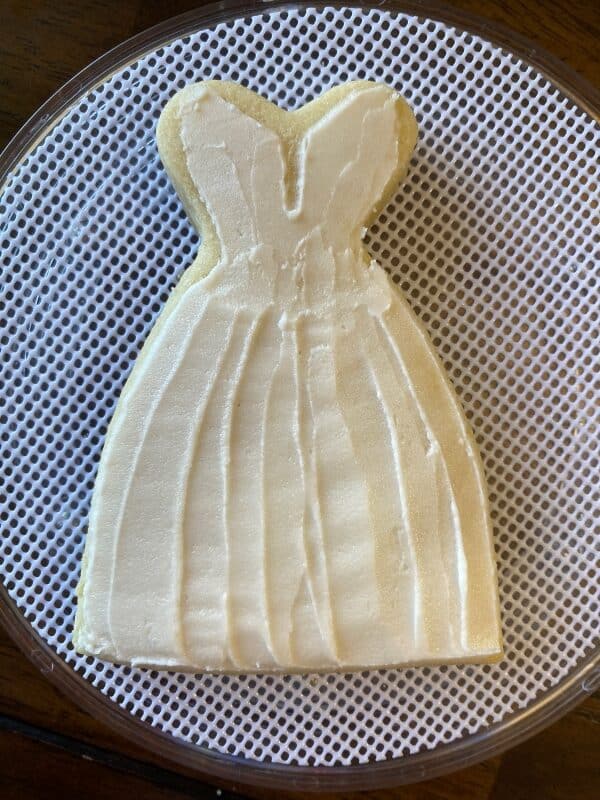
- Use your palette knife to smooth this part of the dress, creating a thin “sheer” appearance. You will also want to shape the dress to mimic the dress style the bride is wearing. In my case, I created a “V” cut top.
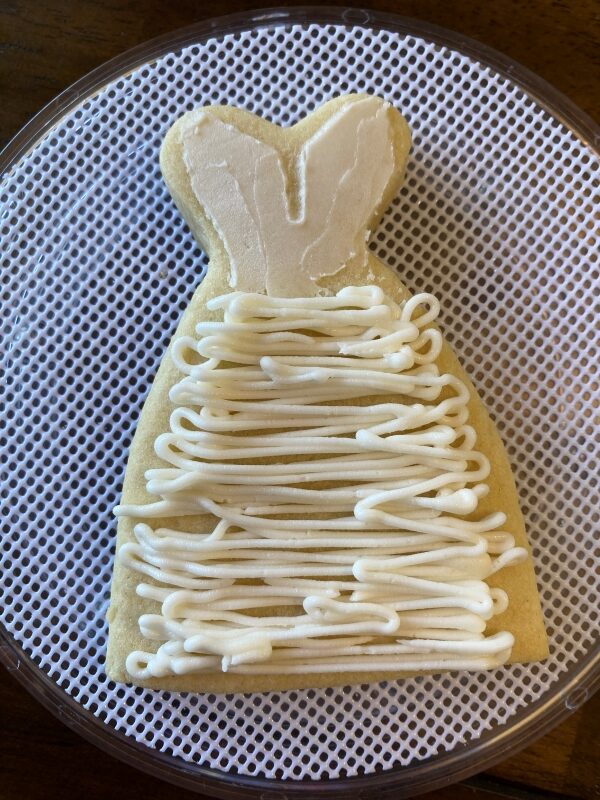
- Squeeze out a lot of frosting onto the skirt part of the dress. I did several rough layers of frosting since the Wilton tip #2 is a small tip.
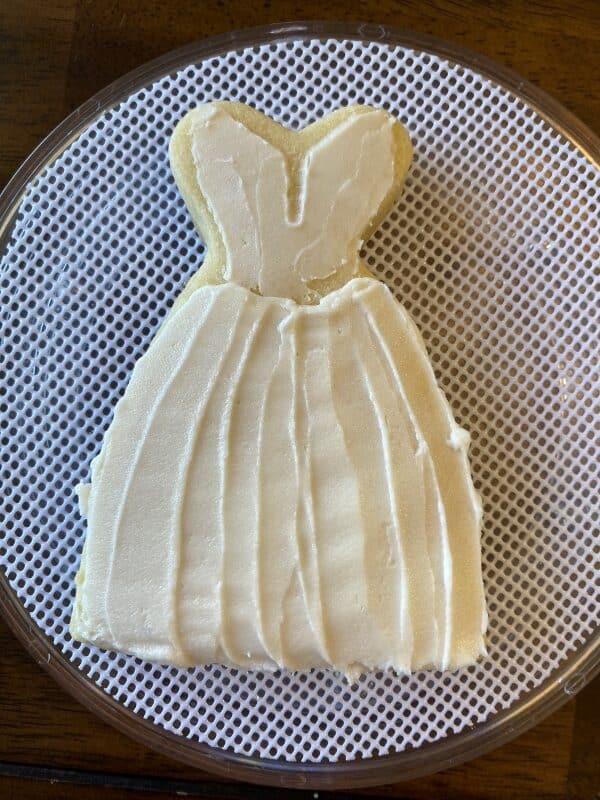
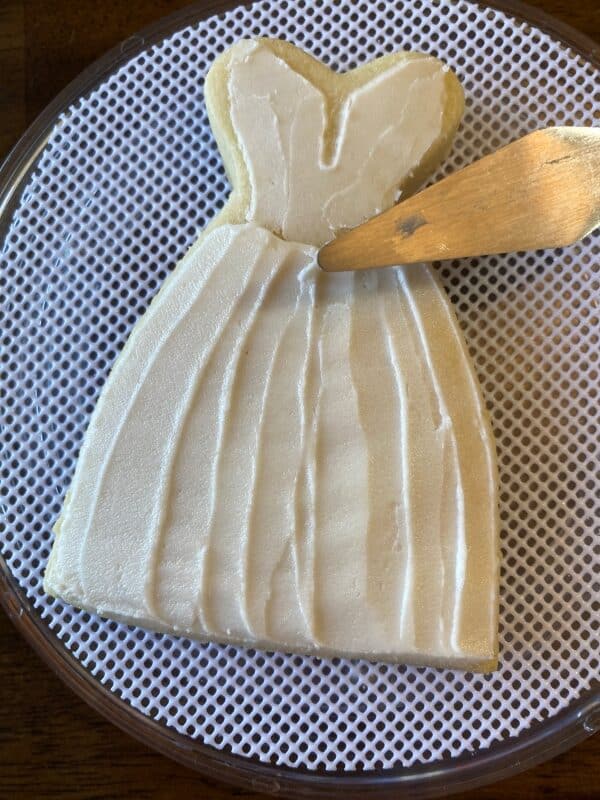
- Use the palette knife to smooth the frosting evenly over the skirt. Then, create pleats by pressing into the frosting with the tip of the palette knife and draw a vertical line down from the top of the skirt to the bottom. I held the palette knife perpendicular to the dress in order to do this, but your dress style may be different.
The first step, smoothing the frosting out, can be completed roughly, as the folds of the dress will be drawn in next. Using the palette knife perpendicularly to spread the frosting from top to bottom will create the folds of the fabric. - Use the palette knife to connect the skirt thickness to the sheer top thickness. I just spread some of the skirt frosting up into the top until it was a gradual decline in thickness. This doesn’t need to be perfect since there will be an overlay.
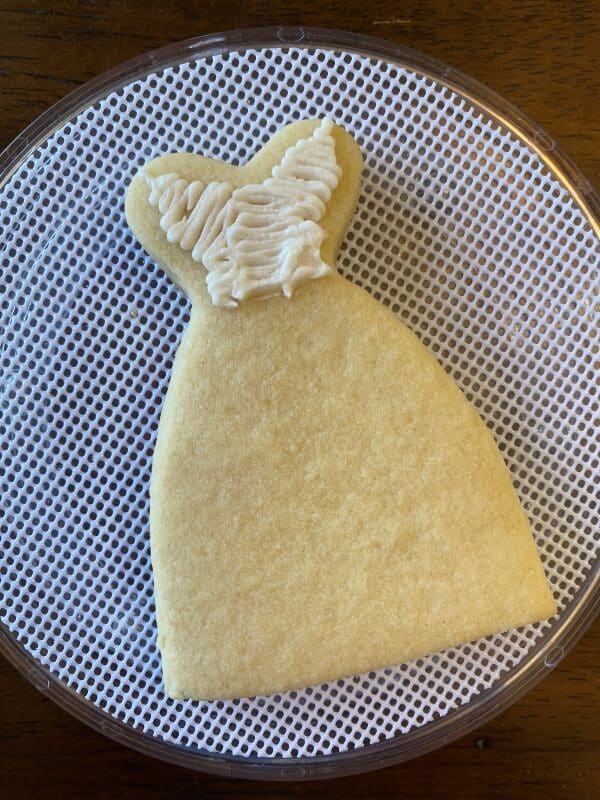
- Pipe the overlay by creating small details with the tip #2. This wedding dress had a floral/leaf overlay so I kept it simple by piping small hearts as the leaves and small teardrops to fill in other spaces.
I just love how these wedding dress cookies turned out. I, of course, made some other designs for the wedding cookies.
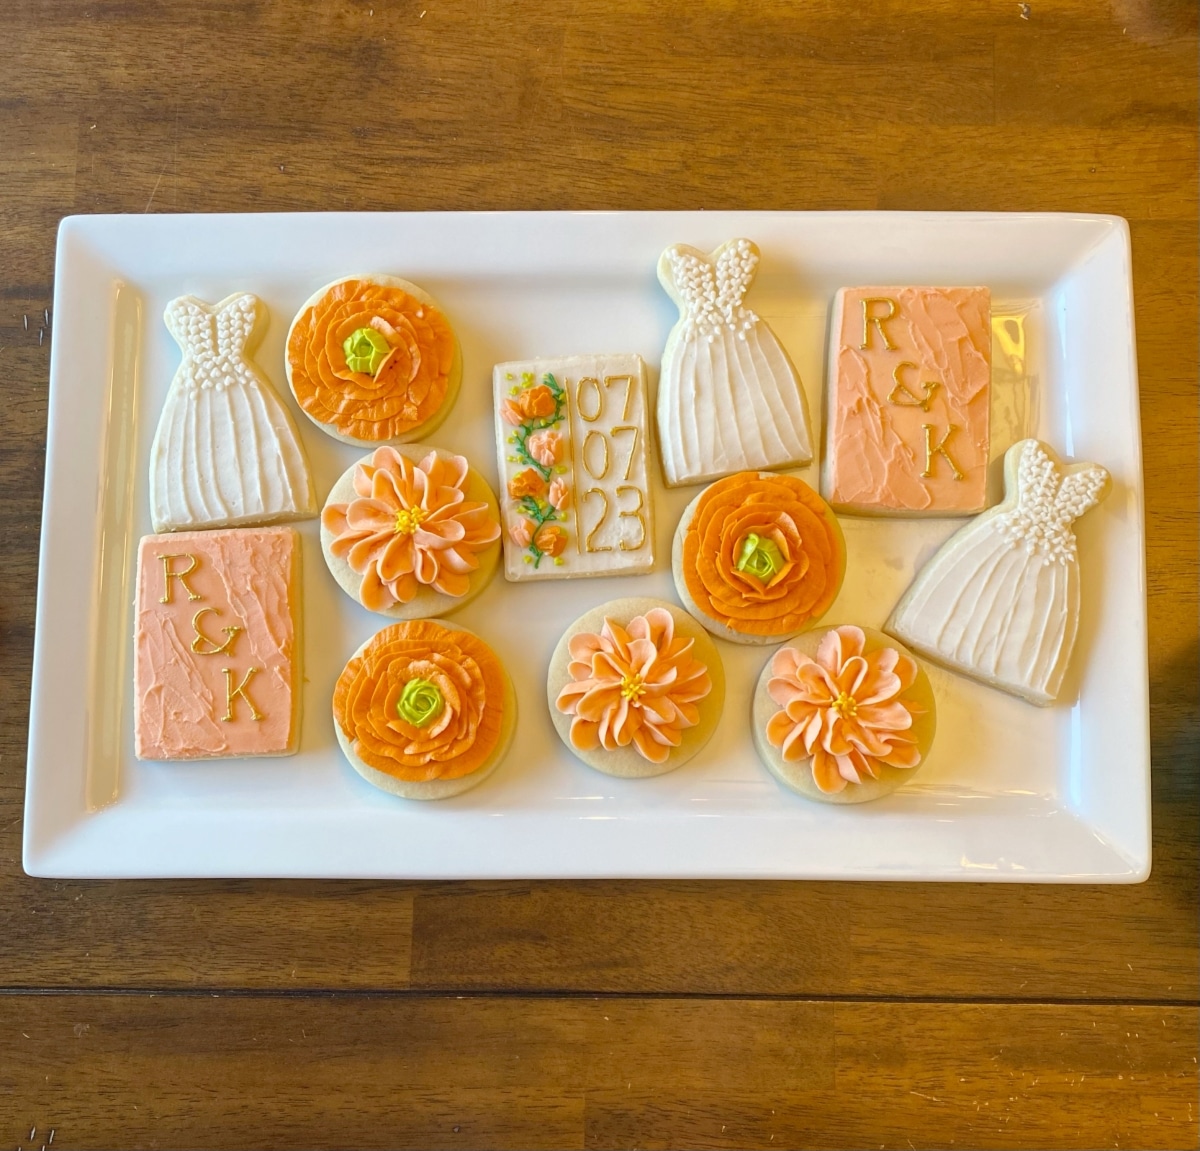
Wedding Dress Cookies with Buttercream Frosting
Equipment
- Stand Mixer with Paddle Attachment
- Rubber Spatula
- Measuring cups and spoons
- Medium Sized Mixing Bowl
- Lined aluminum cookie sheet parchment paper or silicone baking sheet
- Rolling Pin
- Wedding dress cookie cutter
- Icing bag
- Wilton tip #2
- Palette Knife
Ingredients
Buttercream Frosting
- ½ cup room temperature unsalted butter 4 ounces
- ½ cup room temperature salted butter 4 ounces
- 4 cups powdered sugar
- 1 tbsp. vanilla extract
- 1-3 tbsp. whole milk
Sugar Cookies
- 1 cup cold salted butter cubed
- 1 cup granulated sugar
- 3 cups all purpose flour measured with the scoop & level method
- 2 tsp. baking powder
- 1 egg
- 1.5 tsp. vanilla extract
Instructions
- Remove all of the butter from the refrigerator. You will make the sugar cookies first but the butter for the frosting needs to come to room temperature before mixing.
Sugar Cookies
- Preheat the oven to 350℉ and prepare an aluminum cookie sheet by placing either parchment paper or a silicone baking mat on it.
- In a medium sized mixing bowl, combine the flour and baking powder and mix together. Set this aside.
- Cube a cup of salted butter and then, in a stand mixer with the paddle attachment, combine the cubed butter with the granulated sugar. Mix until creamed together well.
- To the stand mixer, add in the egg and vanilla extract and mix until combined.
- Slowly add in the dry ingredients in the mixing bowl to the stand mixer.
- Roll the dough out to 3/8" thick and use the cookie cutters to cut out the cookies. Place the cookies onto the prepared baking sheet and bake for 9-11 minutes or until the tops of the cookies no longer look wet. When baking the cookies, only bake 6-8 cookies at a time to leave proper space between each cookie to cook without spreading. Overcrowding the cookie sheet will cause spread.
Buttercream Frosting
- In a stand mixer with the paddle attachment, add the room temperature salted and unsalted butter and mix on high until light and fluffy.
- Mix in the powdered sugar little by little. Add in the vanilla extract and milk about halfway through adding the sugar to help the frosting come together. Start with one tablespoon of milk and work up to three if needed, depending on the consistency you want. I like to aim for a peanut butter consistency or thinner.
- Place the buttercream into an icing bag with the Wilton tip #2 in the bag.
Decorating the Wedding Dress Cookies
- Place a small amount of frosting on the top part of the dress.
- Use your palette knife to smooth this part of the dress, creating a thin "sheer" appearance. You will also want to shape the dress to mimic the dress style the bride is wearing. In my case, I created a "V" cut top.
- Squeeze out a lot of frosting onto the skirt part of the dress. I did several rough layers of frosting since the Wilton tip #2 is a small tip.
- Use the palette knife to smooth the frosting evenly over the skirt. Then, create folds by pressing into the frosting with the tip of the palette knife and draw a vertical line down from the top of the skirt to the bottom. I held the palette knife perpendicular to the dress in order to do this, but your dress style may be different.
- Use the palette knife to connect the skirt thickness to the sheer top thickness. I just spread some of the skirt frosting up into the top until it was a gradual decline in thickness. This doesn't need to be perfect since there will be an overlay.
- Pipe the overlay by creating small details with the tip #2. This wedding dress had a floral/leaf overlay so I kept it simple by piping small hearts as the leaves and small teardrops to fill in other spaces.
Notes
Make sure to follow me on YouTube for more cookie tutorials as well! Happy decorating!
Save the Tutorial for These Wedding Dress Cookies
Use the image below to pin this tutorial for wedding dress sugar cookies to your wedding board on Pinterest. Alternatively, use any of the social share icons on the top of the page to share it to your favorite social media site.


