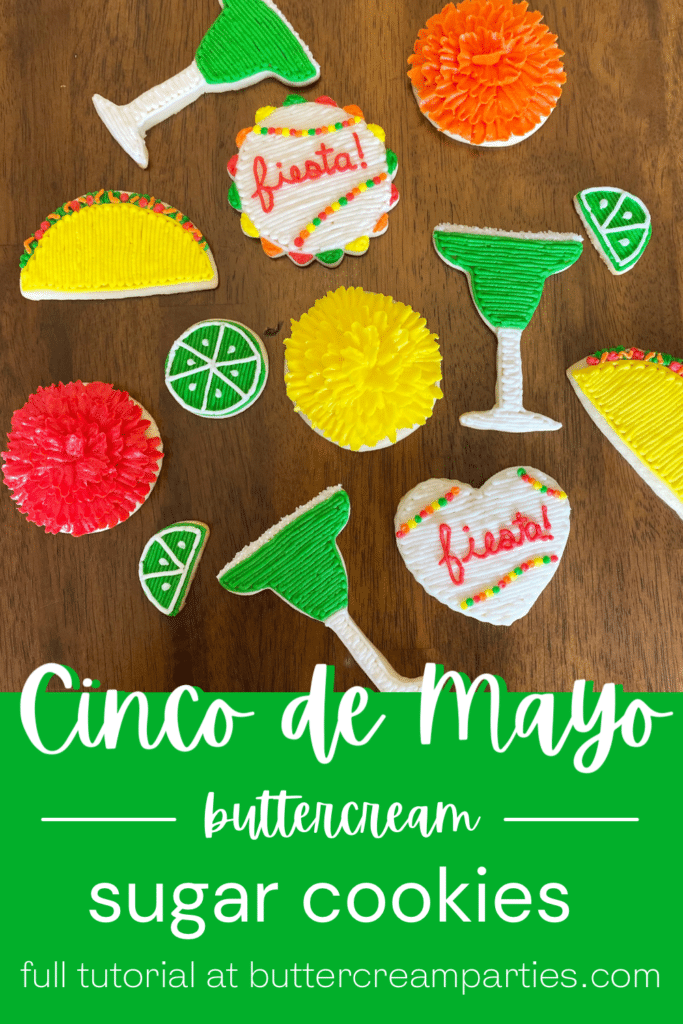
How to Decorate Cinco de Mayo Cookies
Cinco de Mayo is one of my favorite holidays, mostly because my favorite type of cuisine is Mexican food. I don’t have any preference on it either, I will eat real, authentic Mexican food, Americanized Mexican food, and Taco Bell. Every Cinco de Mayo, I cook my family a large meal so we have leftovers the next day.
This year, I think I will try my hand at homemade refried beans. I made horchata one year and my husband, who had never tried it before, loved it. So, I may be making that again this year. Sometimes I think I have more time to get things done, like cook large meals, during the stay-at-home response to COVID-19. But, most of the time, I remember I have a baby and am still working from home. So, we will see what I can manage to put on the table this year. Either way, these fun & cute Cinco de Mayo cookies will be for dessert!
Follow along for the step-by-step photo series tutorial.
*This post may contain affiliate links, which means I may receive a commission, at no extra cost to you, if you make a purchase through a link. Please see my full disclosure for further information.*
Skip to
Part 1: Gathering your Supplies for your Decorated Cinco de Mayo Cookies
To recreate these Cinco de Mayo sugar cookies yourself, you will need:
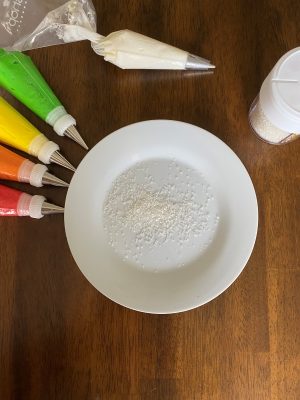
- 5 Icing bags
- 4 Wilton #3 tips, 1 Wilton #2 tip, and 3 Wilton #104 tips – these are cheapest at your local craft store if you purchase each set individually, about $1.50 each in my area
- 4 Couplers
- Circle cookie cutters – one smaller size for the limes and one larger size for the tacos & paper flowers, I used the circles in this set
- Margarita cookie cutter
- Fancy circle and/or heart cookie cutter
- Wilton gel coloring to obtain yellow, lime green, orange, red, and white buttercream frosting, here’s my crusting buttercream recipe
- Sanding sugar
- Plate and knife
- Your favorite sugar cookie dough recipe – if you don’t have a favorite, here’s mine
 You may be asking, “What are couplers?” Couplers allow you to change your tips on your icing bags. Check out my page, Getting Started: Learn How to Decorate Buttercream Cookies, to learn how to do this. Essentially, you will attach a coupler to each icing bag. When you need to attach a tip, just make sure to rinse out the previous color from the tip with hot water. Purchasing a set of couplers is pretty affordable on Amazon: 4 Count Wilton Coupler Set.
Part 2: Baking the Cookies and Setting up Your Icing Bags
- Roll out your sugar cookie dough and cut out your cookies. In order to create your lime slices and tacos, you will be cutting both small and large circles in half with your knife. Keep some circles as is for your whole limes and paper flowers. Bake your cookies and allow them to cool.
- While they are cooling, whip up your frosting. To create a lime green frosting, mix the Wilton Kelly Green with the Wilton Lemon Yellow.
- To set up your icing bags, you will place your white frosting into a bag with a tip #3 in it. The other four bags will all need couplers attached to them. For instructions on how to do this, check out my Getting Started: Learn How to Decorate Buttercream Cookies page. The red frosting will be set up with a tip #2 attached to the coupler first. The orange, yellow, and green frostings will each be in their own bags with couplers and tip #3 attached to them first.
- Pour some sanding sugar onto a plate that will be large enough to lay the margarita cookies flat.
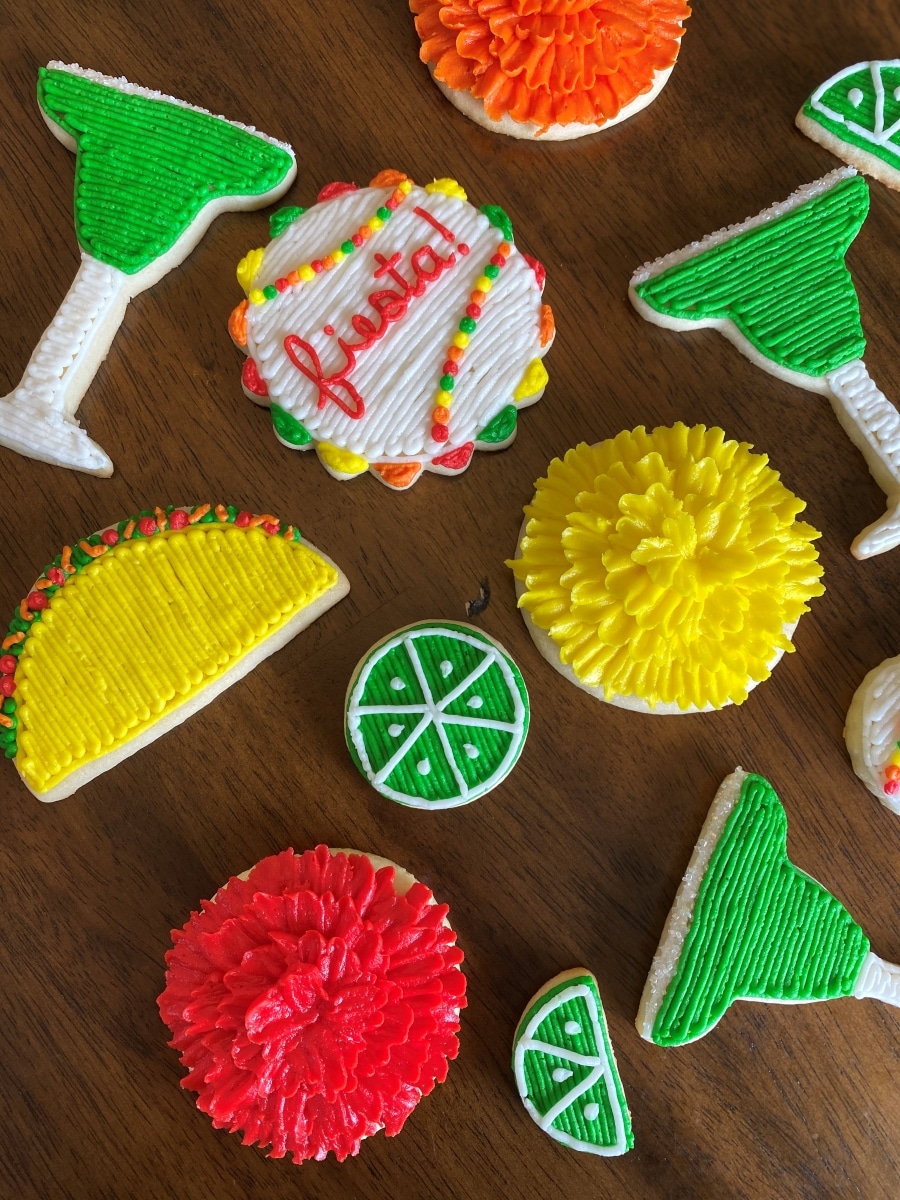
 Part 3: How to Decorate the Sugar Cookies for Your Cinco de Mayo Party
 Part 3: How to Decorate the Sugar Cookies for Your Cinco de Mayo Party
How to Create the Margarita Decorated Cookies
Let’s start with the decorated margarita cookies first. Take your bag of white frosting and draw a straight line across the top of your margarita glass.  Dip the line of frosting into your sanding sugar, being careful not to break your cookie in the process, which I have to confess I did on one cookie. Whoops. This will represent the salted rim, of course.
  Next, take your white frosting and outline and fill in the stem of the glass.
 Then, take your lime green frosting and outline & fill your glass.

How to Create the Lime Decorated Cookies
Every margarita needs a nice lime garnish. To make your lime slice cookies, simply outline and fill your small half circle cookies with your lime green frosting.  Take your white frosting and outline the lime again, this time leaving some green along the outer edges. Basically, you are drawing a smaller version of your lime.
  Draw an upside down “V” shape to create your lime sections.
  Then, place three small dots, one inside each section of lime, to represent the seeds.
  To make the seeds more “seed” shaped, take your knife and pull some of the dots of frosting toward what would be the center of the lime.
  For the whole limes, follow the same technique for the slices.

How to Decorate the Taco Sugar Cookies
Moving onto the taco sugar cookies, you will want to use all of your large half circle cookies. It was easier for me to envision the half circle as a taco if I had the curved edge up and the flat edge down. Take your yellow frosting and outline & fill in the cookie. Make sure to outline lower along the top, curved edge, to leave room for the yummy toppings.  Take your green frosting, still with tip #3 attached, and draw in the lettuce. To do this, use the same back and forth motion you would use to fill in a cookie.
  Take your red frosting, with tip #2 attached, and place some dots and/or squares along the lettuce to represent the tomatoes.
  Lastly, take your orange frosting, with tip #3 attached, and draw in some lines to represent the cheese.
How to Create the Fiesta Cinco de Mayo Decorated Cookies
Now for the Cinco de Mayo decoration cookies. To create your fiesta! cookies, simply outline and fill in your “fancy” shapes. Whether that was fun circles or hearts or something else. I will first show you how I created the fun circle one. You will want to take your white frosting and outline/fill in a circle shape.  Then, take your green (tip #3), red (tip #2), and yellow (tip #3) frostings and alternate filling in the decorative edges. It doesn’t matter that the tip sizes are different, since you will just be filling in small spaces. Take your red frosting and write “fiesta!” across the cookie. You could totally do the upside down exclamation point in front of the word as well. I forgot, oh well.
  Create little streamers in the design by placing small dots a curved pattern wherever you feel needs some space filled. Pro tip – this is a great technique if your writing was off-center.
 Here are how the hearts turned out, using the same technique minus the decorate edge. Have fun with whatever designs you want to do!
How to Decorate the Mexican Flower Cookies
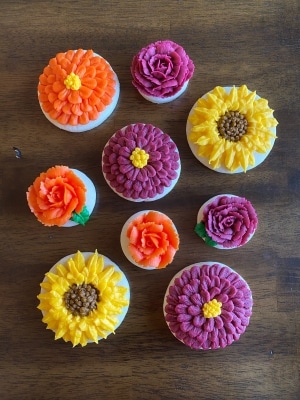
Okay, now for those fun Mexican paper flowers. These ones look intimidating, I know, but trust me, it is easier than you think. You can always practice on a piece of parchment paper first if you’re feeling nervous. Just scoop up the frosting from the parchment paper and put it back into your icing bag once you feel more confident. Change your red, orange, and yellow frosting bags to have tip #104 attached. Your first step will be to create the outside layer of the flower. Essentially, you will be working from the outside-in and the bottom-top. Hold your icing bag so that the tip has the fat end toward you and the skinny end away from you.  Squeeze out your frosting in small up & down motions along the edge of the cookie. It may be easier for you to do it in small chunks at a time.
  Notice how the skinny end creates a more delicate edge? This is what will make your paper flower look more realistic. Continue in the pattern all the way around the edge of the cookie. It helps to rotate the cookie as you go, rather than try to physically move yourself around the cookie.
  For the next layer, you will hold your tip a bit closer to you this time and do the exact same thing. In other words, you want about half of your first layer to be visible under this next layer.
  Create your third layer in the same fashion.
  As you continue making these layers, you will be rotating your tip to be more vertical, rather than horizontal. I.E. the fat side will be more toward the bottom of the table and the skinny side up toward you. This is to create that round look of the paper flowers.
  Once you get the “top” of the flower, you will hold your tip completely vertical, with the fat side of the tip down and the skinny side up. Create a small curved line as your finishing layer.
  Here is what it should look like from the side:
  Use your yellow and red frostings to create paper flowers in those colors as well. And then, that’s it! You are ready for Cinco de Mayo! If you created these cookies, tag me on Instagram at buttercreamparties so I can see! It’s always so fun to see these designs loved by other buttercream cookie decorators in the community.
Save The Tutorial for These Cinco De Mayo Decorated Cookies for Later
To save the tutorial for these buttercream sugar cookies for later, simply click on any of the social share icons on the top or side of this page. Alternatively, hover over the image below to pin the image to your Pinterest page!