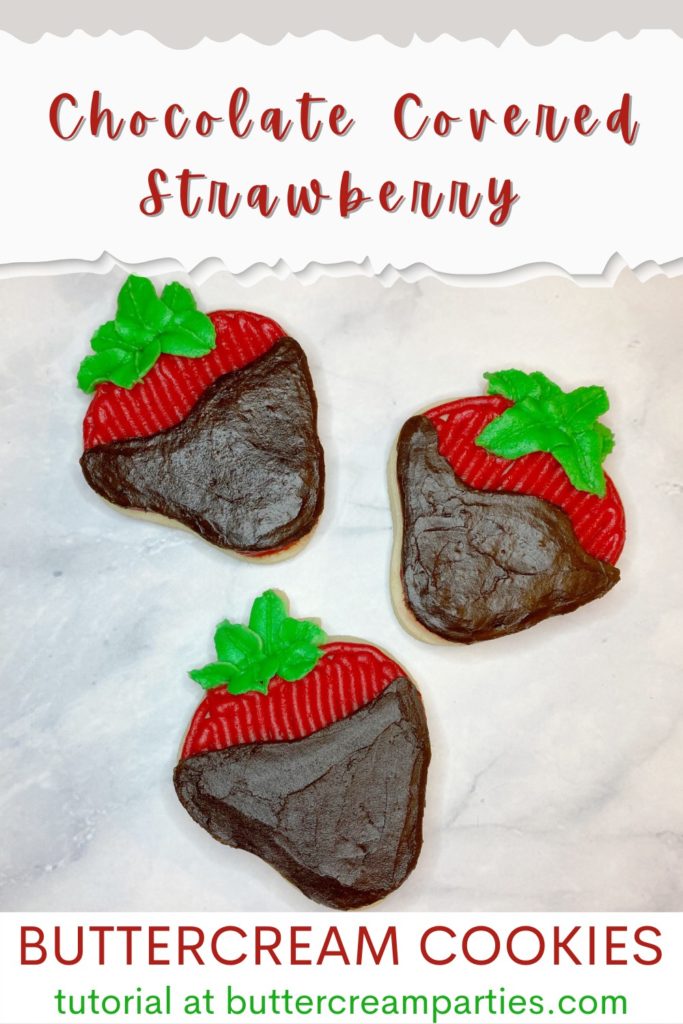
Fun Chocolate Covered Strawberry Decorated Cookies in 4 Steps
Can we all agree that chocolate covered strawberries are delicious? I thought it would be so fun to create some chocolate covered strawberry decorated cookies to go right along side them! What a perfect Valentine’s Day treat. Or whip these up for date night throughout the year.
These sugar cookies are made with buttercream frosting, making them easy to decorate for that special celebration. Plus, I also have a neat trick for how to smooth buttercream frosting.
Follow along for the full step-by-step photo series tutorial as well as a video tutorial!
Skip to
Part 1: Gathering the Supplies for Chocolate Covered Strawberry Decorated Cookies
To create these chocolate covered strawberry decorated cookies you will want to gather:- 3 Icing bags
- Wilton tip #s 3, 5, and 66
- Strawberry shaped cookie cutter – Get the exact one I used here: 9 Piece Fruit Stand Cookie Cutter Set
- Brown, red, and green gel food dye
- Angled flat spatula and a pointed knife
- Ingredients for a crusting buttercream, find my crusting buttercream icing recipe here
- Ingredients for sugar cookie dough, find my no spread sugar cookies recipe here
Part 2: Baking the Cookies and Setting up Your Icing Bags
- Roll, cut out, and bake your strawberry shaped sugar cookies according to your cookie dough recipe. You will be able to bake a lot of these cookies so feel free to create other designs too! I have some other great suggestions for Valentine’s Day cookies here: Valentine’s Day Tutorials
- While your cookies are cooling, make your buttercream frosting. Separate the frosting into 3 different bowls and add in the gel food dye to obtain your brown, red, and green frosting. You only need a small amount of green frosting compared to the brown and red, so adjust accordingly. Remember when creating red frosting, get your shade about 3/4 of the way to where you want it. Then, let it sit out with plastic wrap over it for a few hours (if you have the time) and the red will deepen in color!
- Set up your icing bags as follows: Place the green frosting into an icing bag with the tip #66 in it. Place the red frosting into a bag with the tip #3 in it and the brown frosting into a bag with the tip #5 in it. If you aren’t sure how to do this, no worries, just hop over to my Getting Started: Learn How to Decorate Buttercream Cookies page.
Part 3: The 4 Steps for Decorating Your Chocolate Covered Strawberry Sugar Cookies
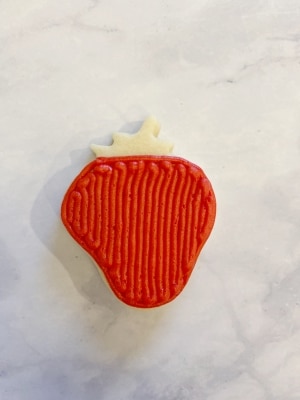
- Your first step will be to outline and fill in the strawberry shape, not including the leaves. Use your red frosting for this step.

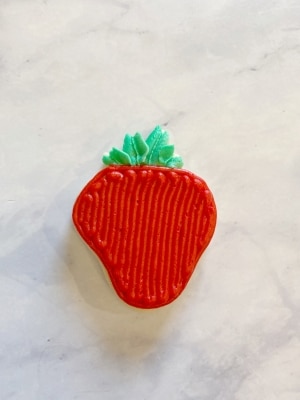
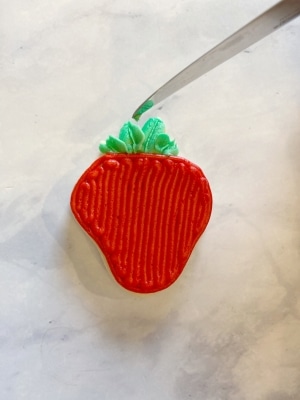
- Next, use the green frosting to pipe out leaves for the strawberry. You will want to align the tip so that the flat/wider part is facing up toward you. Check out the video tutorial for further clarification. You will notice that the leaves don’t want to form a nice tip. Use the pointed knife to move the frosting to create a nice point to each leaf. Don’t forget to create a couple of leaves over the strawberry as well.
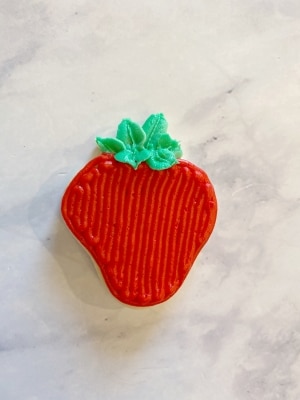
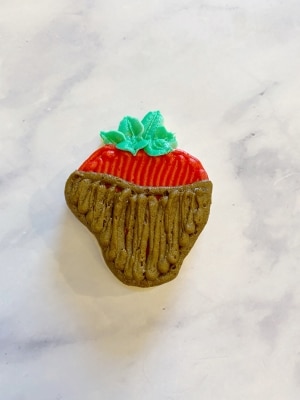
- Now, take the brown frosting and outline/fill in the chocolate for the chocolate covered part of these chocolate covered strawberry decorated cookies. You can be a bit sloppy with the line work since you will be smoothing out the buttercream frosting in the next step.
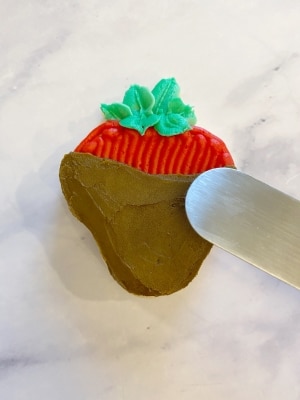
- Once you’ve completed step three for all of your cookies, place your decorated cookies into the freezer for about 10 minutes. This allows the frosting to set in place, making it easier to smooth buttercream frosting. Once the cookies have frozen a bit, take a few out at a time and smooth out the brown frosting.
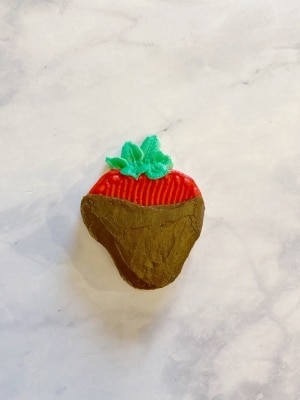
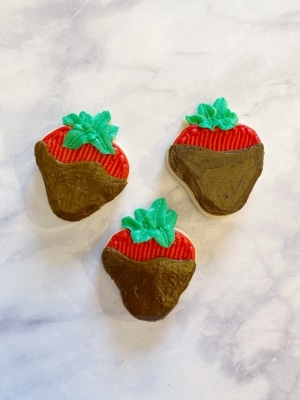
You now have created fun chocolate covered strawberry decorated cookies in 4 easy steps! Yum! As I mentioned before, I would definitely recommend serving these with actual chocolate covered strawberries for the perfect Valentine’s dessert tray. You can’t have too many sweets when you’re celebrating love!
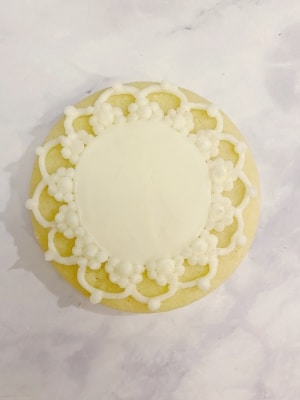
You could even take these lovely chocolate covered strawberry decorated cookies a step further. Pipe on some fun designs with a tip #2 and white frosting. Or maybe paint the chocolate part gold for gold dipped strawberries! Add a bit of a surprise by adding cocoa powder to the brown frosting… lots of fun ideas!
To save the tutorial for these chocolate covered strawberry decorated cookies for later, click on any of the social share icons on this page. You can also hover over the image below and pin it to your Pinterest account. Don’t forget to check out my other Valentine’s Day Tutorials for more fun ideas!
Have a great Valentine’s Day with your loved ones! I’d love to know in the comments below what your Valentine’s Day plans are this year!


Great recipe! I was looking for something I can bake on Valentine’s day for my girlfriend.
I bet she will love these!
These are lovely! I can’t wait to make them with my little ones!
That sounds so fun!
Definitely want to try these out
I hope you get a chance to make these! Have a Happy Valentine’s Day!
such lovely cookies 🙂 one day I will try buttercream cookies and make these gorgeous edible cookies
Yay, buttercream decorated cookies are so much fun!
What a great tutorial!
Thank you so much!
These cookies are adorable! Looks like a super fun idea to do with the kiddos too!
Yes, kids and adults both love to decorate (and eat) sugar cookies!
These are so cute! I am a bit afraid though that mine would turn out like a pinterest fail.
Well we all start somewhere! Even if it’s a Pinterest fail, they should still taste good!
These are so fun and cute!
Thank you!