How to Pipe Easy Buttercream Doily Cookies
Doilies are beautiful. Have you ever taken the time to look at all the detail that went into designing the lace? I just love them, especially this time of the year.
I have seen numerous royal icing lace cookies, but as beautiful as they look, they seem too hard to create! I have shaky hands and not that much patience. I decided to create these beautiful and easy buttercream doily cookies instead.
Follow along for how to pipe EASY buttercream doily cookies, with lots of room for accidental errors and creativity!
Skip to
Part 1: Gathering your Supplies for your Easy Buttercream Doily Cookies
To create these beautiful and easy buttercream doily cookies, perfect for Valentine’s Day, you will want to gather:- 1 Icing bag
- 1 Coupler
- Wilton tip #5 and #2
- Medium circle cookie cutter – I used the medium sized circle in this Wilton 101 Cookie Cutter Set
- Angled flat spatula and a pointed knife
- Ingredients for a crusting buttercream, find my crusting buttercream icing recipe here
- Ingredients for sugar cookie dough, find my no spread sugar cookies recipe here
Part 2: Baking the Cookies and Setting up Your Icing Bag for Easy Buttercream Doily Cookies
- Roll, cut out, and bake your circle sugar cookies according to your cookie dough recipe. You will be able to bake a lot of these cookies so feel free to create other designs too! I have some great suggestions for Valentine’s Day cookies here: Valentine’s Day Tutorials
- While your cookies are cooling, make your buttercream frosting. If you want to create colorful lace, simply add in your Wilton gel dye coloring at this step. I wanted to stick with the classic white/ivory lace for these easy buttercream doily cookies.
- Set up your icing bag as follows: Place the coupler into an icing bag. Attach tip #5 to the coupler. If you aren’t sure how to do this, no worries, just hop over to my Getting Started: Learn How to Decorate Buttercream Cookies page.
Part 3: The Fun Part! Decorating Your Easy Buttercream Doily Cookies
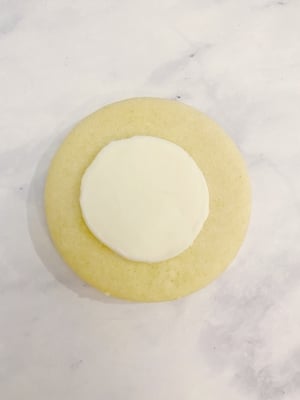
- Your first step will be to outline a circle in the center of your cookie and fill it in. If you struggle with drawing perfect circles (who doesn’t??) then use your flat spatula or pointed knife to push or cut away any frosting you need to get a rounder shape. It doesn’t need to be perfect, though. Your lace details will come in handy for hiding imperfections!

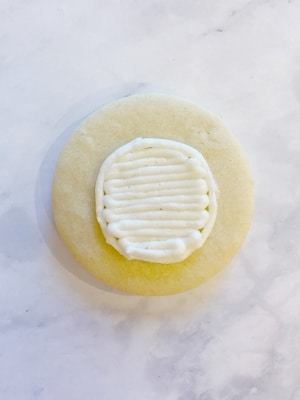
- Complete step one for all of your cookies and then place them into the freezer for ten minutes or so. While your cookies are in the freezer, switch your icing bag from a tip #5 to a tip #2. Once your cookies have sat in the freezer, take them out and smooth the tops over all of them with your angled flat spatula. I recommend doing this step on all of your cookies before moving onto your lace details. This way, the frosting stays nice and frozen, making it easier to smooth without loosing it’s shape. Of course, if things go wonky again, just use the knife/flat spatula to clean up the lines. If they aren’t frozen enough and the frosting is too easy to spread, place them back in the freezer for another 5 minutes.
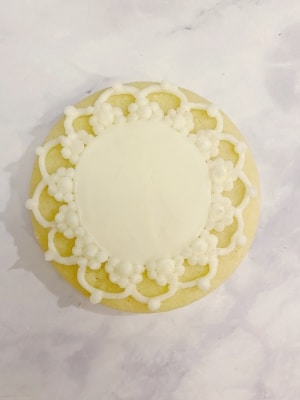
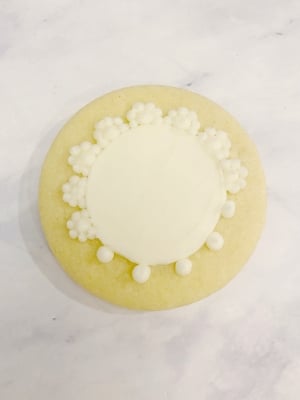
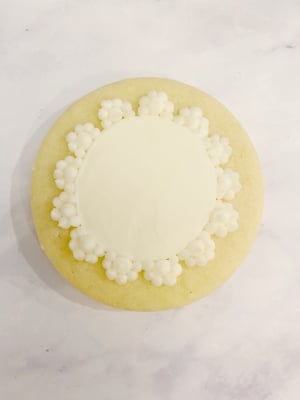
- Now, using the tip #2, draw in your lace pattern. I went simple here but you can do as detailed as you are comfortable with – or push your creative boundaries! You have plenty of cookies here to design. You can make them all the same pattern for ease (like I did) or switch it up. Remember, if you aren’t happy with the lace, just erase what you don’t like. Using undyed frosting really helps here because it won’t stain the sugar cookie. To create the same pattern as me, follow these steps:
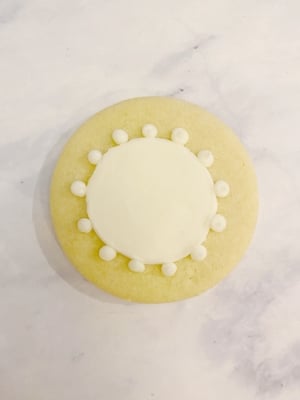
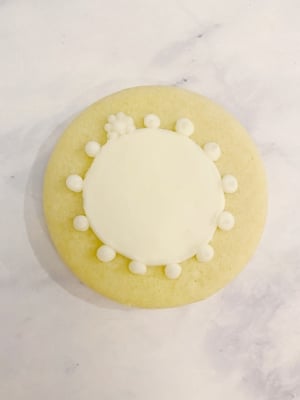
- Squeeze out large dots (for a size 2 tip, that is) around the edge of the circle.
- Squeeze out 5-6 small dots around those larger dots you just created.
- Connect the middle dots together.
- Add one last dot in the middle of those connection lines.
- Squeeze out large dots (for a size 2 tip, that is) around the edge of the circle.
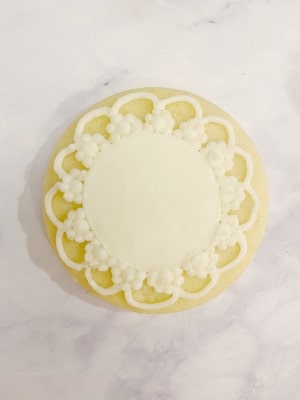
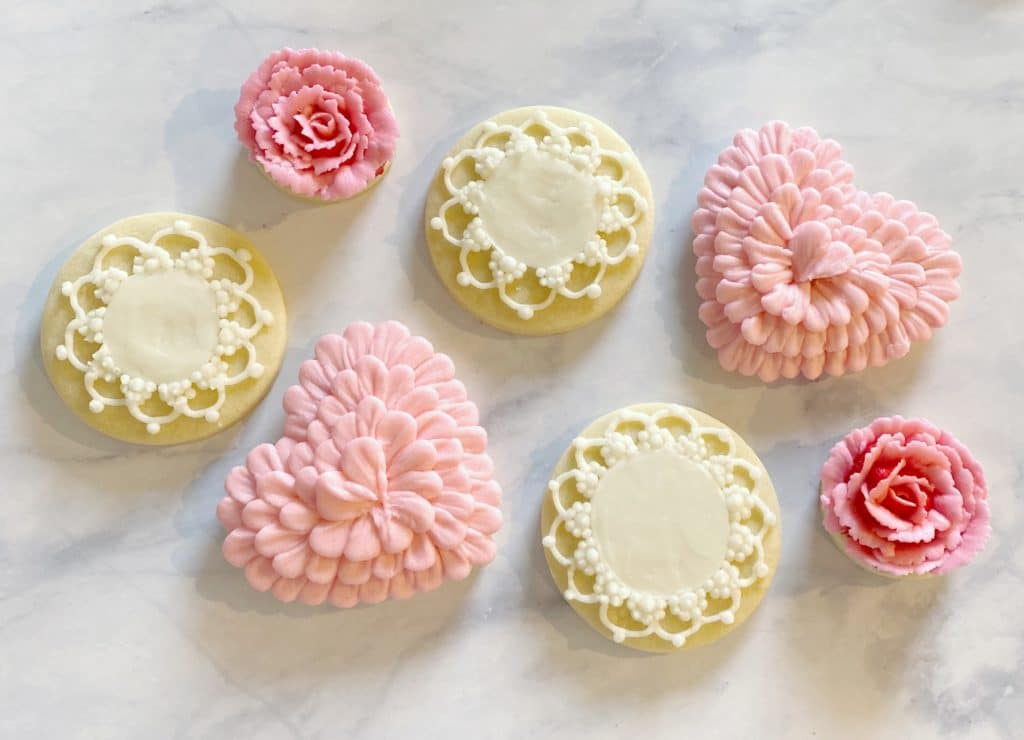
Aren’t these beautiful! They look so good plated all together as well. If you were concerned about any possible mistakes, they will be hidden upon platting. These easy buttercream doily cookies are the perfect gift of love for Valentine’s Day! Don’t forget to check out my other Valentine’s Day Tutorials for more fun ideas! 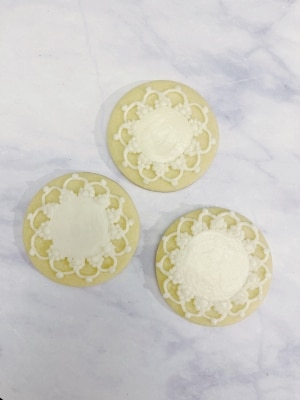
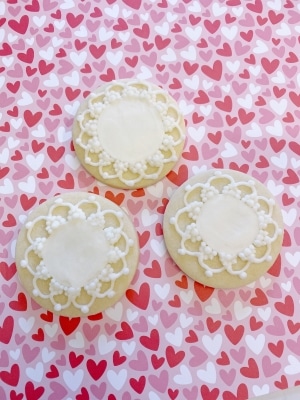
I love how they look against simple scrapbook paper, too! This is a cheap and easy way to present cookies to your party guests as well. Just line a box with your choice of scrapbook paper and place your cookies out on the paper right before your guests arrive! So cute!
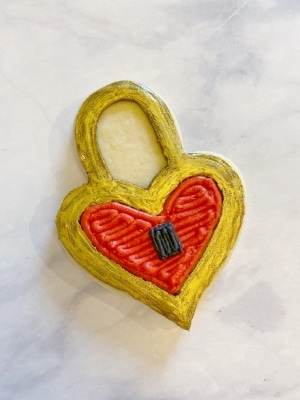
Make sure to check out the other tutorials for my Valentine’s Day buttercream sugar cookies as well! I especially love how these doily cookies look with the two tone roses and the ruffle heart cookies, tutorials available for both of course!
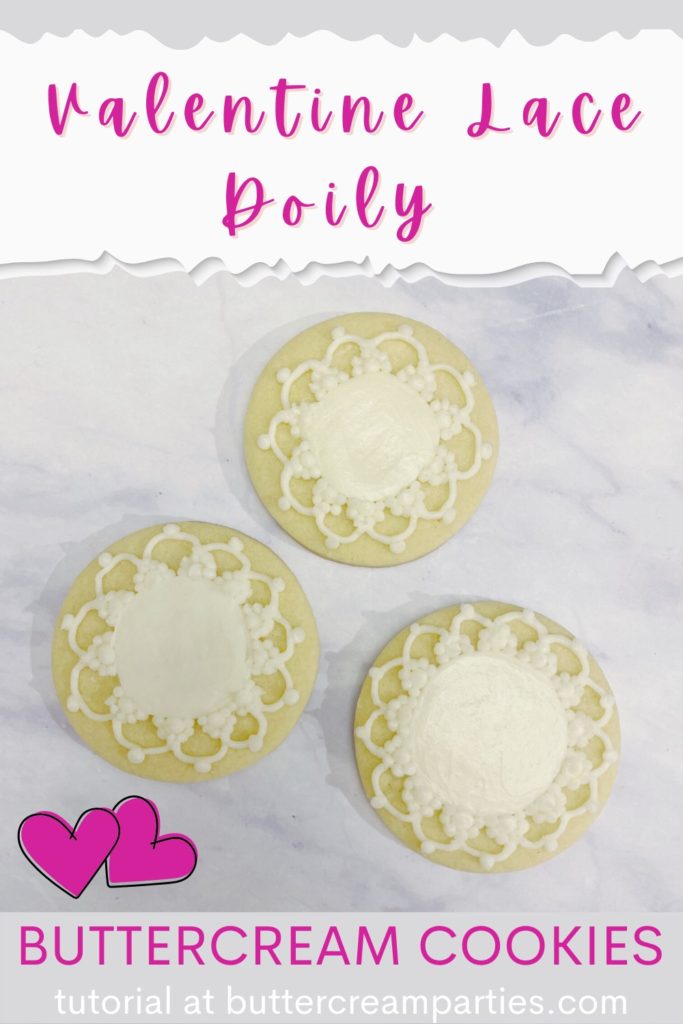
To save these EASY buttercream doily cookies for later, use any of the social share icons on the top/side/bottom of this page to save it to your favorite social media site. Alternatively, hover over the image below to pin this tutorial to your Pinterest page!


You make this look so easy! I love how you broke the steps down…I’ll be trying this weekend.
It really is easy but they look so intricate, at least for buttercream. I hope the tutorial is helpful for you!
These are so beautiful – almost too good to eat
Thank you! Yes, almost! Fortunately they are pretty easy to decorate so if you eat a few, just decorate some more really quick!
What a lovely gift these doily buttercream cookies would be for someone who appreciates the decoration and the taste. So much fun!
I agree that these cookies would be great gifts! Thank you!
These are adorable! I love buttercream on top of cookies (or sandwiched in between two), but I never thought to intricately decorate cookies with it. Who knew it could be so easy! All the pictures and steps you add make this how-to guide really helpful and enjoyable. I appreciate your thoroughness!
Yes, decorating cookies with buttercream opens up a whole new world! And you are welcome for the guide!
What beautiful delicate looking cookies. I think these would be lovely at Easter. Def going to give them a try. Your instructions and photos make it look relatively easy!
What a great idea to make these for Easter as well!
What a great tutorial. I need to practice my piping skills.
Thank you! As always, there is a learning curve when starting a new hobby. But at least with piping, you get to eat your attempts, successful or not! Let me know if you have any questions – I am so happy to help you learn!