
Fool Proof How to Use a Projector For Cookie Decorating – Akaso Projector
Utilizing a projector for cookie decorating can take your decorating to the next level.
You can use it as an aid to your writing skills, trace silhouettes, and create more uniform cookies within a set.
In this post I will be sharing:
- what projector I use and recommend
- how to set up the projector
- what additional software you may need
- and overall general tips for using a projector for cookie decorating
Let’s get started!
*This post may contain affiliate links, which means I may receive a commission, at no extra cost to you, if you make a purchase through a link. Please see my full disclosure for further information.*
Are you decorating for Christmas, by chance?
Make sure to check out my online Christmas cookie decorating class, Merry Cookies! It’s completely beginner friendly and has about two hours of in-depth instructional video so you nail your Christmas cookies this year!

Skip to
My Projector for Cookie Decorating
The projector I use to decorate sugar cookies is the Akaso WT50 Mini Pocket Pico Projector.

This is a great little projector. It has incredible focus for decorating on cookies and cakes. Of course, you can also watch large projection movies as well.
It has a USB, HDMI, 3.5mm AUX, and Micro SD port making it easy to connect to your device.

Speaking of your device, it is compatible with many typical inputs including iOS, Android, and even your PlayStation or Xbox.
It also connects via WiFi and Bluetooth and has a built in battery which reduces the amount of wires you need to position around your cookies.
How to Set Up the Projector for Cookie Decorating
Physical Set Up

While there are many ways to physically set up the Akaso projector, I will share how I set it up quick and easy.
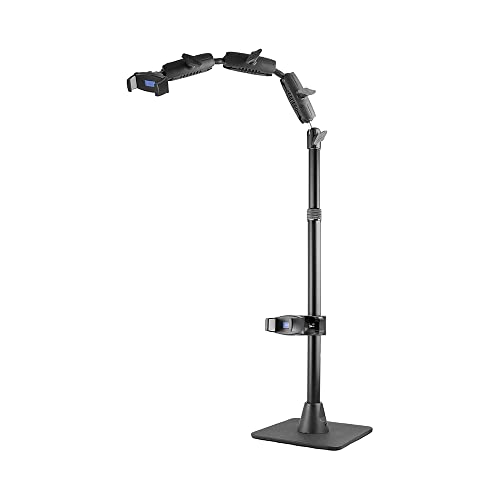
First, utilizing a projector stand will be important. Since cookies are on a work surface straight below you, rather than hanging on a wall, for example, you need the projector above the cookie.
I use an Arkon mount that is specifically designed for overhead mounting. Getting a stand designed for overhead mounting is important so that the projector itself doesn’t topple over, being too heavy for a standard mount.
Since I film my cookie decorating tutorials from my iPhone, I use my iPad to store the image and connect to the projector.
You can also use your phone, iPhone or Android, if you don’t have an iPad.
To connect the phone or tablet to the projector, use your phone/tablet USB charging cord. The USB side will go into the projector.
Alternatively, you can use a thumb drive with the stored image and connect it to the projector that way.
When you turn on the projector (this one takes a minute to boot up) the touchpad screen will have several ways to connect. Make sure to click on the correct setting and your image should appear.
Software and Apps to Use
Now you may be wondering where you will get your image to project. The most important thing you need to be aware of is copyright infringement.
Finding Fonts
Let’s say you just need help with writing on cookies, a fairly common weakness among us cookiers.
If you go to a font generator, such as dafont.com, you need to make sure the font is for commercial use if you sell your cookies. Some designers will allow you to download the font free for commercial use.
If the font is not free for commercial use and you sell your cookies, you must either purchase the font with a commercial license or find a different font.
If you only make cookies as a hobby, you do not need to purchase the commercial license.
Another option for fonts is to utilize the app, Canva. You can download Canva to your phone or tablet or simply go to canva.com.
The free version of Canva has fonts available for commercial use for free. If you have a professional Canva account, you need to make sure the font you choose is also available on the free Canva plan. You can filter out the professional fonts to make this easier.
Canva is my preferred tool and I love to put my image onto Canva (whether I got it from Canva or Etsy) as it is an easy photo editor to work with once the projector is set up.

Another great option for fonts is to use the app Procreate. Procreate is great if you have great calligraphy or handwriting skills on tablets that just doesn’t translate to piping.
You can create your own font and then you don’t need to worry about copyright infringement.
Where to Get Images
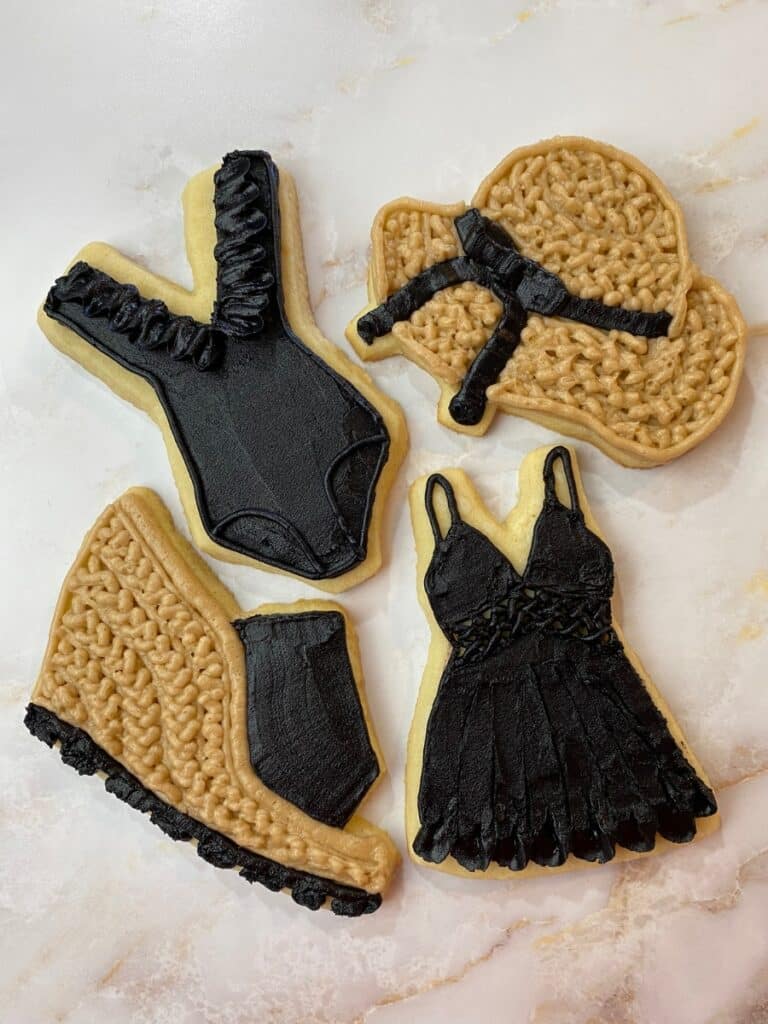
Similar to finding fonts, you can find free stock images on Canva using a free account. It is best to stick to silhouette and black and white images, as too many details will be hard to see on the cookie.
Another great option for finding images, especially trending images, is Etsy. There are many Etsy sellers who sell SVG and PNG files.
Here are some things to keep in mind with Etsy:
- Do make sure to read their copyright rules before purchasing and using on cookies that will be sold.
- Do make sure to actually purchase the image and not screenshot it.

Just like creating your own fonts, you can draw your own designs on an app like Procreate. Again, this is great for those who can draw well, but not necessary pipe well. and are interested in keeping consistency in the cookies.
Lastly, check out stock photos online. There are quite a few stock images you can purchase online. This route is your most expensive route, so check the other three options first.
Do not get images from Google search. These are copyrighted images.
Tips for Piping Using a Projector for Cookie Decorating
Piping can feel just a bit different when you are tracing an image versus freehand. For one thing, you need to hold your piping bag so that your hand isn’t in the projected image.
You also need to keep your head out of the way of the projector.
For a better traced image, it is good to use a small piping tip, such as the PME 1.5 tip.

Additionally, keep your buttercream at a softer consistency. You want the buttercream to flow easily through the piping tip so that it creates a smooth line.
Trouble Shooting the Projector for Cookie Decorating
If your Akaso mini projector is giving you issues, of course, make sure to check the manual.
Here are some issues I have ran into when I started using it:
The Projector Isn’t Projecting an Image
While this sounds silly, when I first got my projector, I couldn’t get the projection light to come on. I read the manual several times.
The issue was that I did not have the lens open. To save myself from embarrassment just a little bit, there was not one spot in the manual that showed how to open the lens or suggest that it even needed to be opened.
I realize it’s common sense. But just incase you, too, feel like you’re losing your mind, here is your reminder to open your lens.

You also need to make sure that the projector is both turned on and the projector light is set to on. For the Akaso mini projector, this is two separate buttons.

The Image is Oriented Wrong
If you don’t want to mess with your projector settings, change the image. Often this is the quickest fix for me.
Rotate your image on your input device (such as your phone or tablet) so that it is the correct way on the cookie.
The Image is Too Hard to See
Stock images and purchased images are typically a you get what you get type of scenario. If the image isn’t showing up well, try using a black and white filter on the image and/or invert the image colors.
Alternatively, it may be that the image is fine but the room is too bright. Turn off the lights and cover the windows if necessary.
The Image Keeps Moving
If your image is slowly moving, make sure the projector is securely attached to the stand. I have found that with this projector and stand, if it does move, it is very minimal.
It is so minimal that I am able to complete an entire cookie design before it moves. I tend to notice the movement only when I am doing more cookies and have realized I’m placing my cookie in a slightly different spot that where I had placed the very first cookie.
Again, it is very minimal as the Arkon cookie projector stand is very sturdy.
Save the Tutorial for How to Use a Projector for Cookie Decorating
If you are planning on using a projector for cookie decorating, make sure to save this image to your cookie decorating board on Pinterest. Alternately, use any of the social sharing buttons at the top of the post to share to your favorite site.


Hi! I’ve had the hardest time with this projector and cookie/ cake decorating and can’t seem to find an answer so thought you might know. It projects fine onto a wall but when I go to project down onto the table, it is distorted (lines at an angle). I’m sure it’s something that can be fixed so wanted to see if you’ve had this happen. Thank you, Jen
Hi Jen,
I don’t think I’ve had this issue before, if I am understanding correctly. I’m assuming you’ve checked to make sure it is perfectly level with the cookie both horizontally and vertically. If my projector is slightly tilted the words are as well so I just play with it for a while. Outside of that, I unfortunately don’t know how to help. I would contact Akaso support!