Cute Decorated Cookies for Rubber Ducky Baby Shower Themes
46 - 46Shares
My husband is obsessed with ducks. He always puts DuckTales and The Mighty Ducks on TV “for our son.” But I know the truth.
Oh yeah, he also has 16 pet ducks. And they have a huge coop that might as well be a duck hotel. They free-range a lot, though.
That being said, I knew I needed to create some duck cookies. I’ve seen lots of cute rubber ducky baby shower themes popping up so all of it just came together. I also decided to throw in a tutorial for jean cookies with these cute baby overall cookies! As I always say, you can create detailed sugar cookies with buttercream. You don’t need finicky royal icing!
These rubber ducky cookies are so cute, I might be starting to become obsessed with ducks too! Follow along for the full step-by-step photo series tutorial, plus a video, to create these cookies!
I also am a firm believer that the girls get all of the cute baby shower themes. These rubber ducks are perfect for boy baby showers! Of course, they would be cute for a little girl, too.
*This post may contain affiliate links, which means I may receive a commission, at no extra cost to you, if you make a purchase through a link. Please see my full disclosure for further information.*
Skip to
Part 1: Gathering your Supplies for the Rubber Ducky Cookies
To create these cookies for your rubber ducky baby shower theme, you will want to gather:
- 6 Icing bags
- 5 Couplers
- One Wilton tip #2, one Wilton tip #4, and one Wilton tip #10 – buy these individually at a craft store or purchase this kit that I use all the time if you become addicted to decorating cookies like me
- Rubber ducky cookie cutter – I used the duck in this set
- Baby overall cookie cutter – I used the one in this set
- Buttercream frosting in black, white, yellow, orange, light & dark blue*
- 9″ flat spatula
- Your favorite sugar cookie dough recipe – if you don’t have a favorite, I recommend Katrina’s Best Sugar Cookie Recipe
 *Your buttercream frosting should, ideally, be a frosting that “crusts.” This means that the frosting will form an outer crust to protect it while traveling. Check out my recipe for crusting buttercream if you don’t already have a favorite. I prefer to use the Wilton gel food dye since gel is more vibrant (i.e. more cost effective because you use less) than liquid and doesn’t change the consistency of your frosting. You can get that here: Wilton Gel Coloring 12 Count.
You may be asking, “What are couplers?” Couplers allow you to change your tips on your icing bags. Check out my page, Getting Started: Learn How to Decorate Buttercream Cookies, to learn how to do this. Essentially, you will attach a coupler to each icing bag. When you need to attach a tip, just make sure to rinse out the previous color from the tip with hot water. Purchasing a set of couplers is pretty affordable on Amazon: 4 Count Wilton Coupler Set.
Part 2: Baking the Cookies and Setting up Your Icing Bags
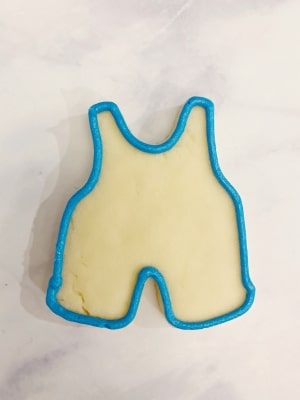
- Roll, cut out, and bake your sugar cookies according to your cookie dough recipe.
- Make your buttercream icing and separate it into six bowls. You won’t need much black or orange frosting at all so adjust those bowls to have less frosting. Mix up your black, orange, yellow, white, light blue, and dark blue frosting shades. The dark blue will be used only on the denim cookies so pick your favorite denim shade! Or, match your baby shower theme colors! Remember that the color will still deepen as it sets.
- Set up your icing bags as follows: Place each of your frosting colors except the white into their own icing bags set up with couplers. Place the white frosting into a bag set up with the tip #10 in it. If you don’t know how to do this, just hop over to my Getting Started: Learn How to Decorate Buttercream Cookies page. You don’t need to attach any tips to the bags yet.
Part 3: How to Decorate Sugar Cookies for Rubber Ducky Baby Shower Themes
Check out the video tutorial for all three of these designs first. Then, go ahead and check out the step-by-step photo series tutorials for each cookie.
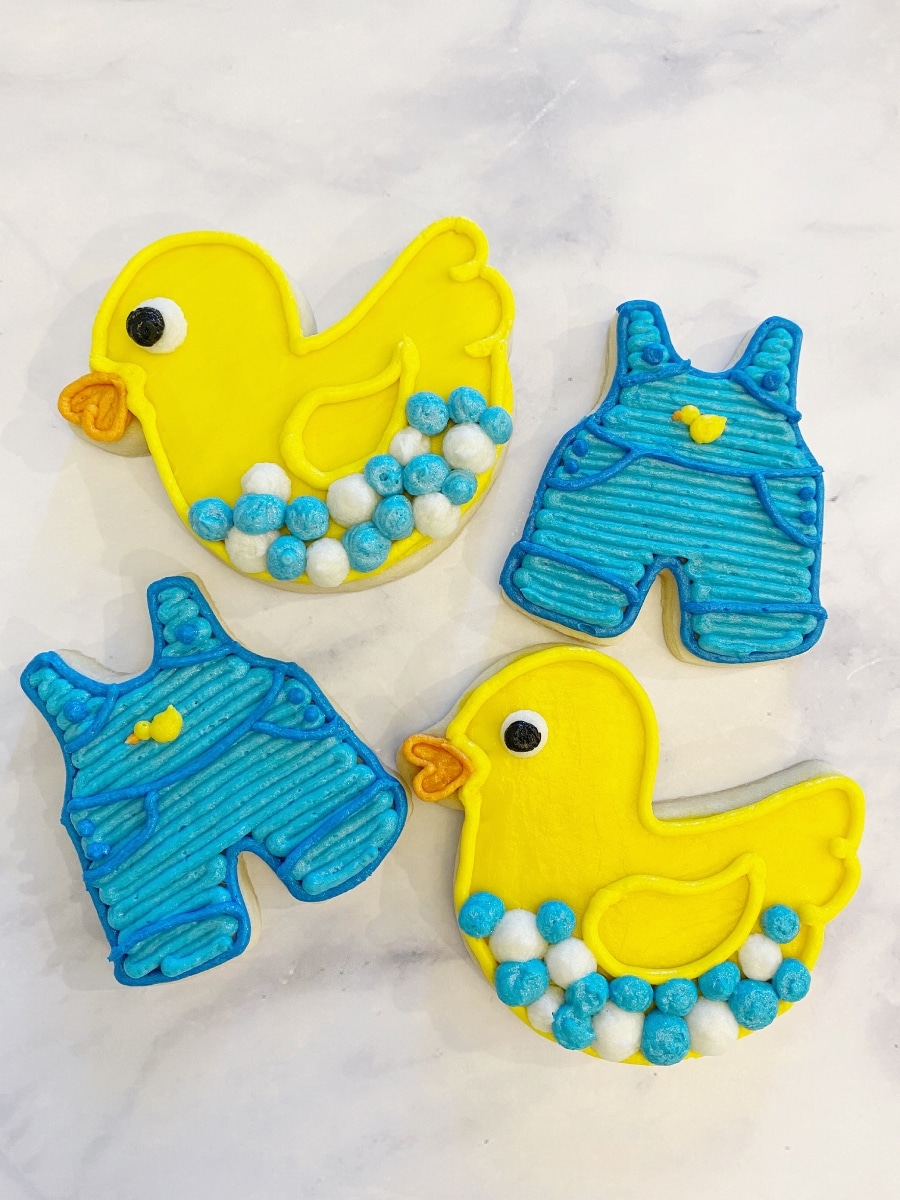
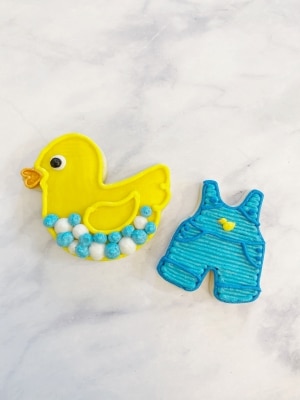
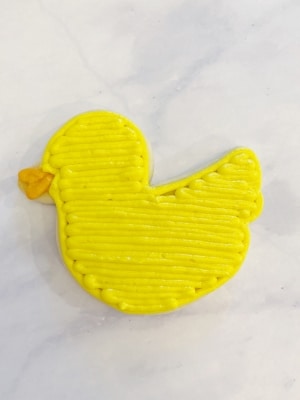
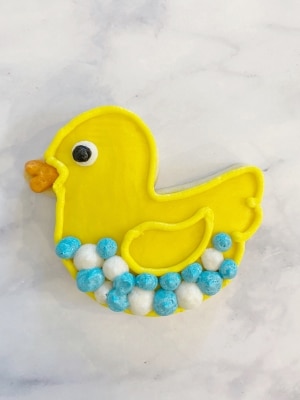
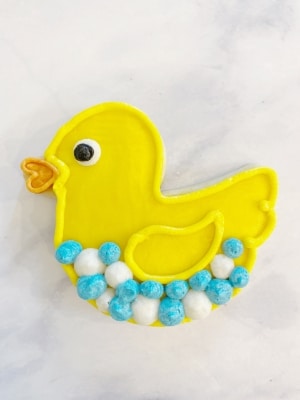
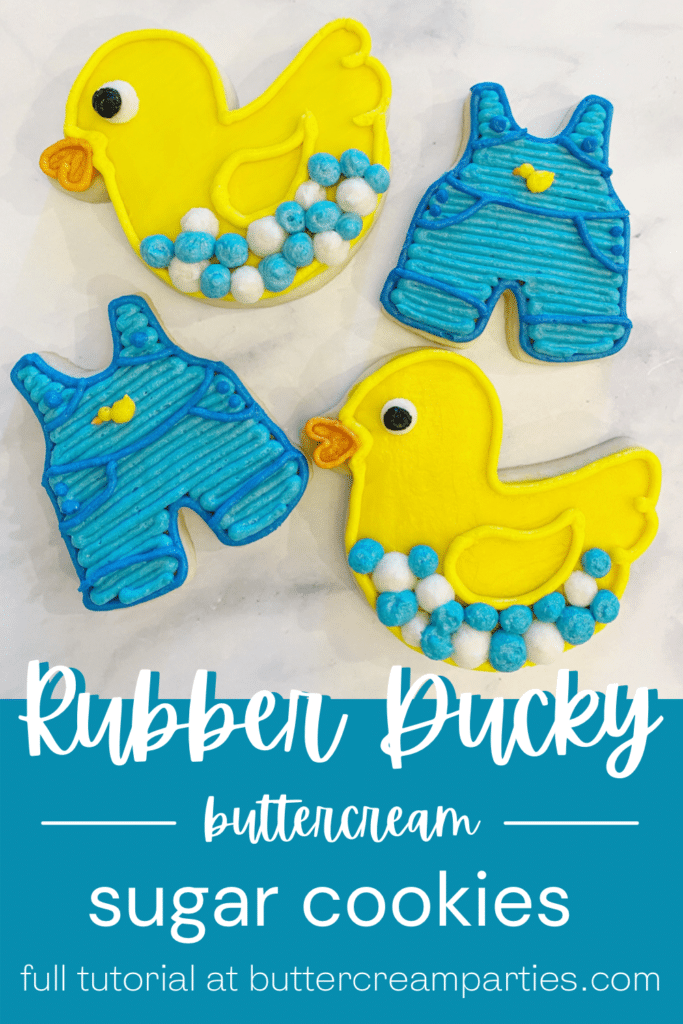
How to Decorate the Rubber Duck Cookies
- Using the orange frosting set up with a tip #4, draw a sideways heart for the beak. Once you’ve done that for all of your rubber ducky cookies, remove/rinse/dry the tip #4 from the orange frosting and attach it to the yellow. Outline and fill in the duck’s body.

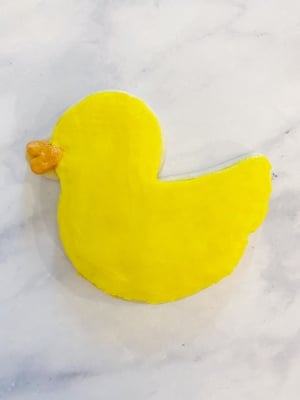
- Use the angled flat spatula to smooth out the duck’s body. The easiest way to do this is to place the frosted cookies into the freezer for at least 10 minutes, then use the spatula. This helps to keep the frosting where you want it. For more smoothing tips, check out my post here: How to Smooth Buttercream for Cookies.
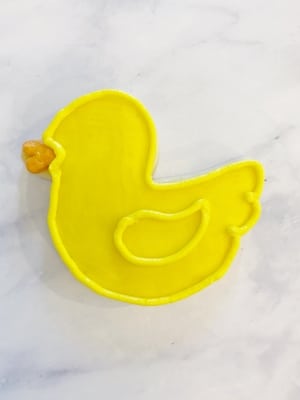
- Next, outline the duck’s body again and around the beak. Then, outline a wing.
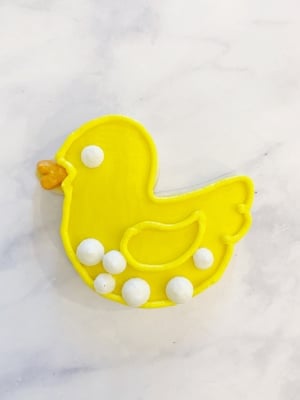
- The next step is to use the white frosting to squeeze out bubbles and a dot for the eye.
- Attach the Wilton tip #2 to the black frosting and add a dot of that for the pupil. If you want a bigger pupil, just squeeze out more frosting to create a larger dot, still with the tip #2. Remove/rinse/dry the tip #4 from the yellow frosting and attach it to the light blue frosting. Use the light blue frosting to squeeze out various sizes of blue bubbles.
- Once you’ve completed steps 1-5 on all of the rubber duck cookies, remove/rinse/dry the tip #2 from the black frosting and attach it to the orange. Outline the duck’s beak.
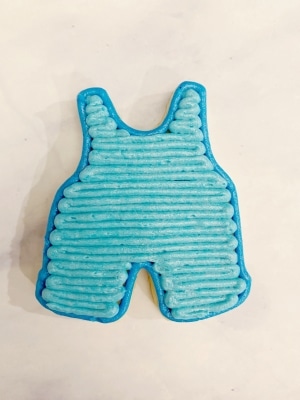
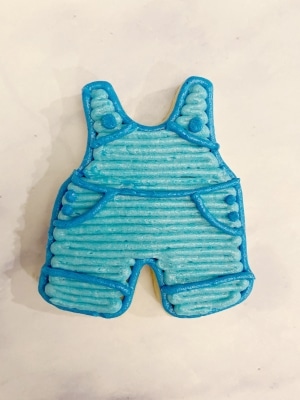
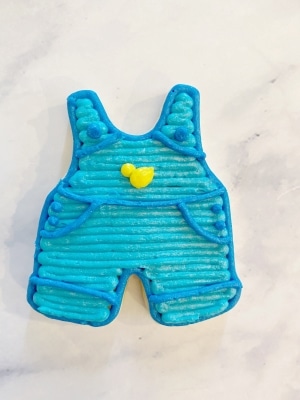
How to Decorate the Baby Overall Cookies/Jean Cookies
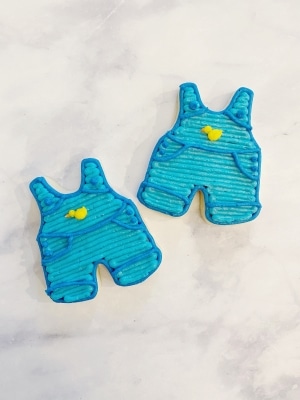
- The first step for these denim cookies is to outline the edges of the overall with dark blue frosting. Use the Wilton tip #2 for this step.
- Next, use the light blue frosting with tip #4 attached to fill in the jean cookies.
- This step can seem overwhelming with all of the lines and details, but it’s not too bad. Just focus on one area at a time to complete these ones. Use the dark blue frosting with tip #2 still attached for the details.
- Once you are happy with the denim details on the baby overall cookies, use the yellow frosting with tip #4 attached to create two small dots. One dot will be the duck’s head and the other will be slightly larger to represent the body. Use the end of the icing bag tip to pull out some frosting to create a tip for the duck’s tail. You can also use a toothpick if you prefer.
- Lastly, use the orange frosting to create a small beak. Remove/rinse/dry the tip #2 from the dark blue frosting and attach it to the orange for this step. Use either the icing bag tip or a toothpick to pull the icing out to a point for the beak.
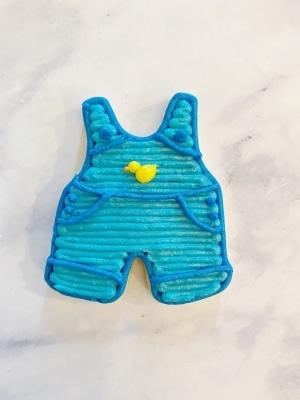
Isn’t this rubber ducky cookie set just the cutest? I love the mix of smooth and linework in the buttercream for this one. It really provides a nice texture.
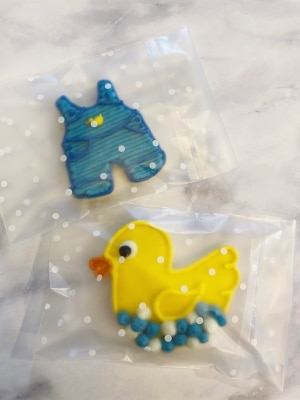
These cookies make the cutest baby shower favors. All you need to do is seal them up in 4″ x 6″ self-sealing bags like this and set them out on table near the door! For tips on how to best package buttercream cookies, check out my post here, How to Package Buttercream Sugar Cookies.
Save the Tutorial for How to Decorate Rubber Duck Cookies
If you have a baby shower to plan coming up, make sure to save this cookie decorating tutorial for later! Use the image below to pin it to your Pinterest account. Alternatively, use the social share icons at the top of the page. Thanks for sharing!
Find me at Event Planning Blog Directory